If you need to plug a hole in your glassfibre boat, fear not – repairs are easy to make. Jake Kavanagh shows how it’s done and offers some useful tips
One of the beauties of glassfibre boats is that they are so easy to fix. Even a hole the size of a domestic fridge can be invisibly repaired, and the hull will be just as strong as it was before (or even stronger). Nor do these repairs involve rocket science – just some manual dexterity and the ability to think in three dimensions.
Repairs become more difficult when the damaged area is largely inaccessible, or on an awkward corner. And unfortunately, unless you intend to paint over the repair, colour matching the gel coat is a real challenge, and a job best left for the professionals.
But for our purposes we’re going to look at filling and fairing two gashes – one simple, one awkward – so they sand back smooth.
RESINS
There are two main types of resin available for repairs: epoxy and polyester.
All the repairs mentioned here can be done using either one, but as we were attending the advanced repair course run by Wessex Resins, the UK distributor of the West System Epoxy, we worked entirely with their products.
Polyester
Nearly all GRP production boats are made from polyester resin, which is about a quarter of the price of epoxy. Supplied as ‘pre-accelerated’, it usually has a one-year shelf life, and to start the curing process you simply mix in a small amount of catalyst. The downside is that polyester resin shrinks as it cures by as much as 4%, which can put strain on a repair, and it will repair only a quarter of the area compared to the equivalent amount of epoxy. Its adhesive qualities, especially to wood, are not exactly brilliant and it has a pungent aroma. That said, it is easy to use, cheap and effective.
Epoxy
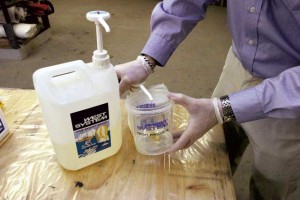 Epoxy, on the other hand, is probably more suited to repairs, which need to be light, strong, and involve bonding to other materials. It has minimal shrinkage, and is a powerful adhesive. The resin has to be mixed in precise amounts with the hardener, and mistakes can weaken the mixture. The downside is the price, and the fact that it is quite sensitive to temperature when curing. The process almost stops below 5°C, but hardens in minutes if it’s too hot (unless tropical hardeners are used). It is incredibly tough, with virtually no smell, and is remarkably versatile.
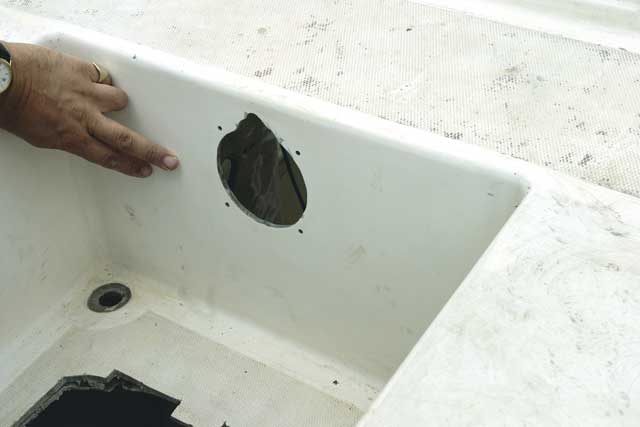
Holes in the gel coat don’t always have to be accidental. You may have moved a bilge pump or bulkhead mounted compass, for example, and simply want to fill the hole that’s left.
REINFORCEMENT
The strength of a repair comes from the reinforcing cloth behind it, and there are three main types:
Chopped strand mat (CSM)
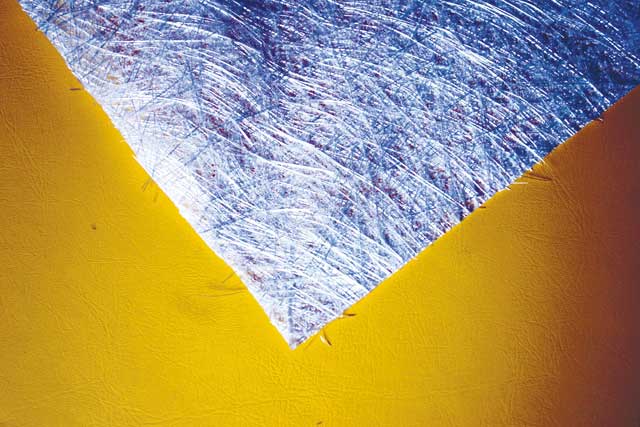
Chopped strand mat (CSM) is perfect for use with polyester resin – but not epoxy
Made up of two layers of 50mm chopped strands of glass held together in a styrene binder, CSM is designed to spread loads in all directions, and once the polyester resin soaks in, the binder is dissolved by the styrene. This means it can’t be used with epoxy, which is styrene-free. The binder remains intact, which builds a weakness into the structure.
Woven roving
These are long strands of glass woven into a cloth that makes it strong and able to hinge without breaking up. It is ideal for use with all resins.
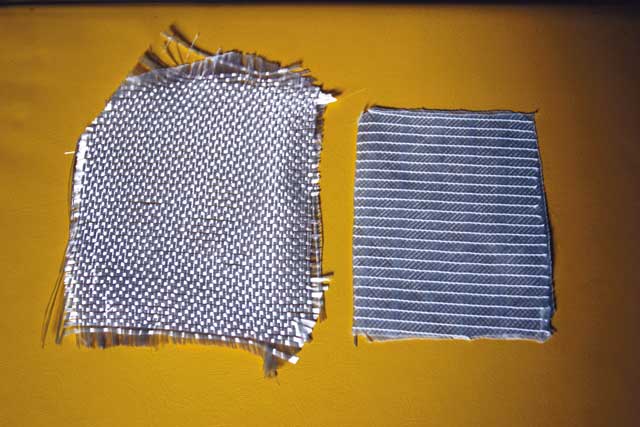
Woven roving (left) is a versatile cloth, but stitched cloth (right) is stronger…
Stitched (engineered) cloth
Probably the best (and most expensive) material to work with, as it is particularly strong, and can be manipulated into very tight shapes.
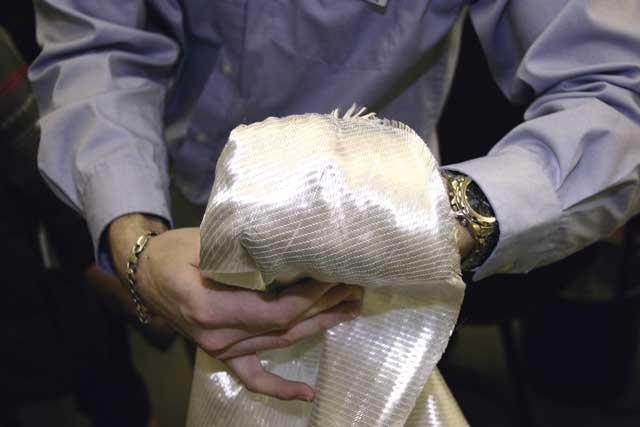
… and can also be manipulated into tight shapes with no loss of cohesion
Gaining Access
A successful repair will depend on the degree of access to the hull. Broadly speaking, there are repairs that you can get to from both sides of the hull, and those you can only tackle from the outside. Where access is limited, you need to take extra care to get a good bond. For our practical course, Wessex Resins had vandalised a section of a GRP dinghy for us (see p101). But we begin (right) by filling a simple hole accessible from inside and outside the boat using the technique learned at the course.
Step-by-step
Repairing accessible damage
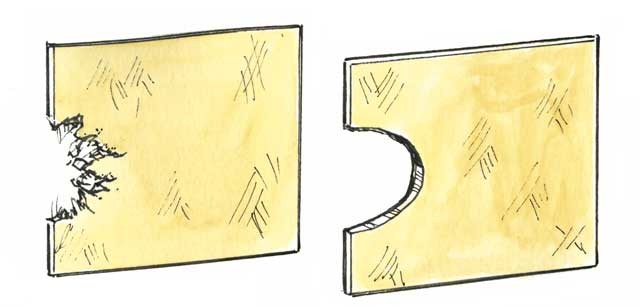
1: If the hole has been smashed in, it can be cut around with a fine-toothed jigsaw blade. If it is a pre-cut hole, you may still need to trim it up with a Dremel to remove any cracked or flaked gel coat.
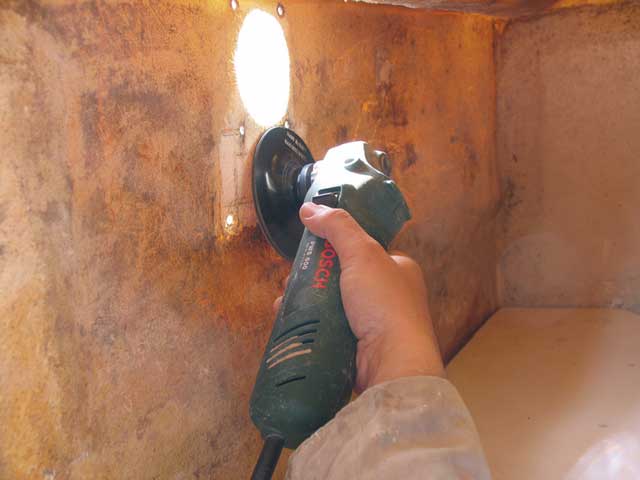
2: Grind out a shallow depression behind the hole to a ratio of about 12:1. An angle grinder with a coarse (40-grit) disc will make short work of this.
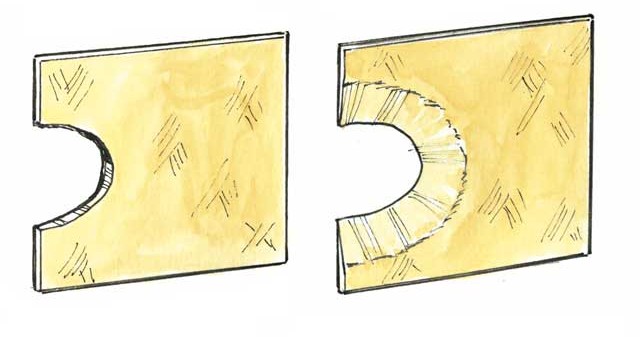
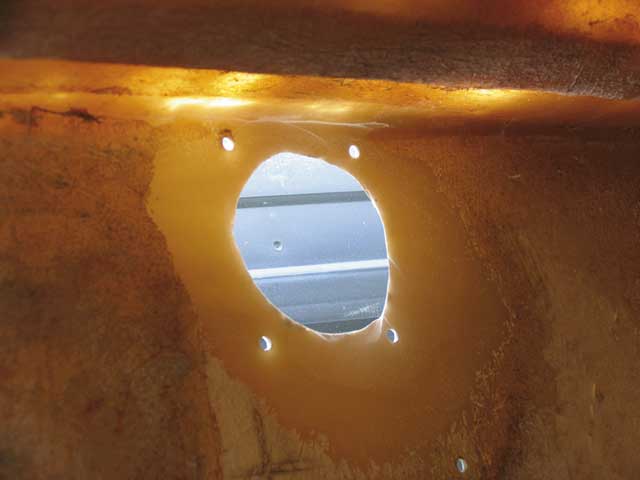
3: If room is limited, as at the top here, make the depression as shallow as you can.
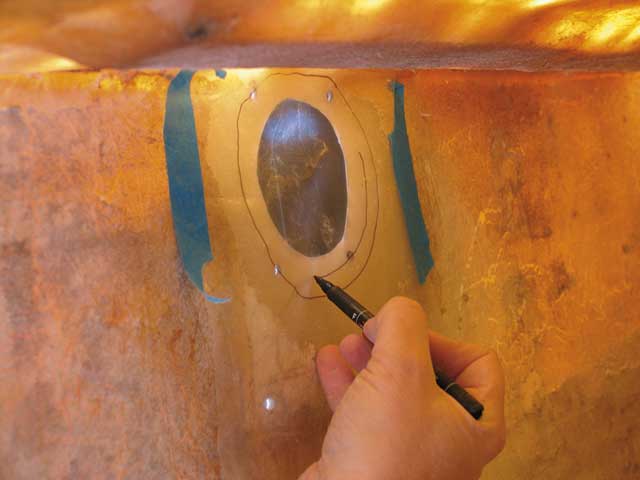
4: Stick a piece of thick polythene over the hole on the inside, and draw a series of decreasing circles on the depression, up to the edge of the hole itself. These will be cutting guides for the fabric circles. The number of circles will depend on the thickness of the structure. The thicker it is, the more you will need. Mark the orientation of the polythene, so you know which way up it goes.
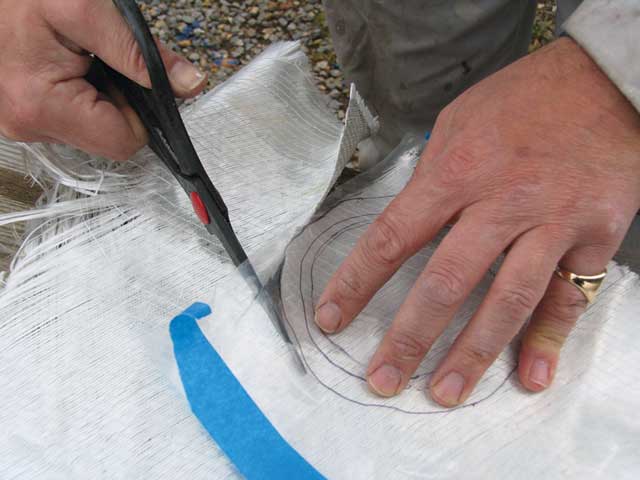
5: Remove the polythene, and use it as a cutting guide for the stitched or woven fabric. Here is a good chance to use up any offcuts or scraps (but don’t use CSM).
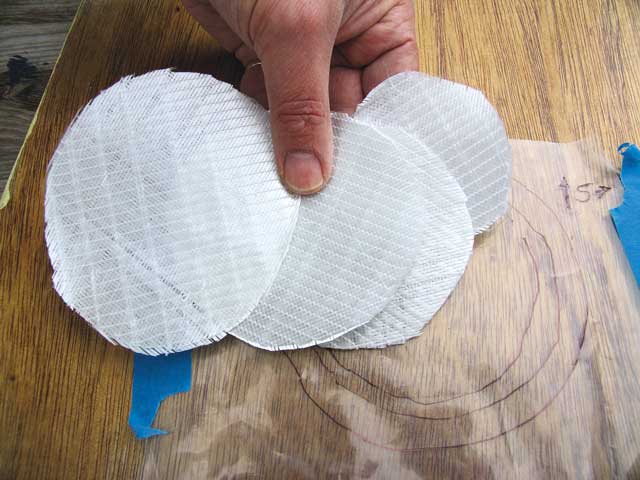
6: You will now have around four or five circles of fabric ready for laminating.
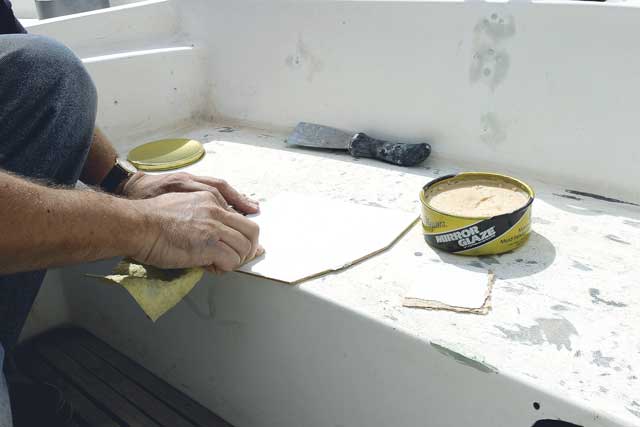
7: Lay up the repair against a blanking plate, which can be any slippery surface cut not much bigger than the size of the hole. We’re using a piece of white-coated hardboard. Three layers of release wax is rubbed onto the inside surface, avoiding lumps and smears.
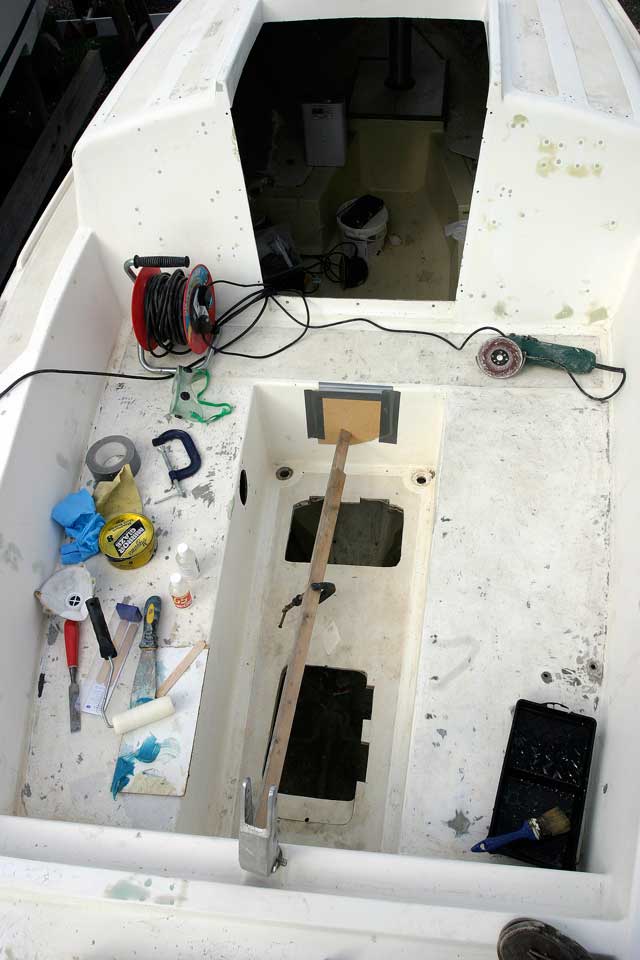
8: Push the blanking plate up against the hole and secure it. In this case we used duct-tape, and held it firmly in place with a compression post.
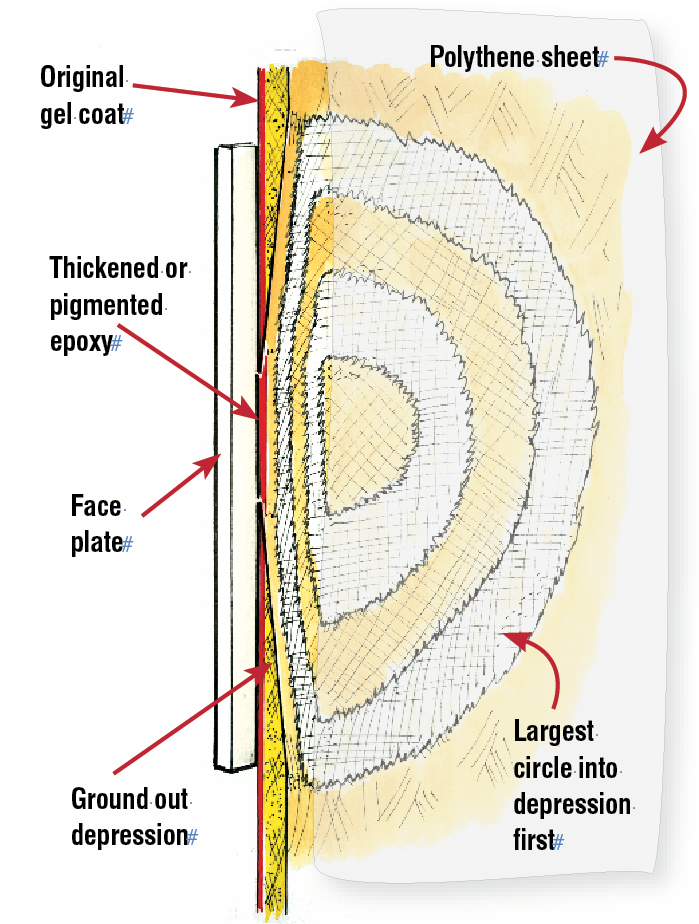
9: The principle of the repair : Fabric circles will be filling the depression to make it absolutely flush on both the inside and outside of the hull. Contrary to what you would expect, the largest circle will be the first into the hole, to make maximum contact with the lip of the depression. It will sit on a layer of thickened epoxy.
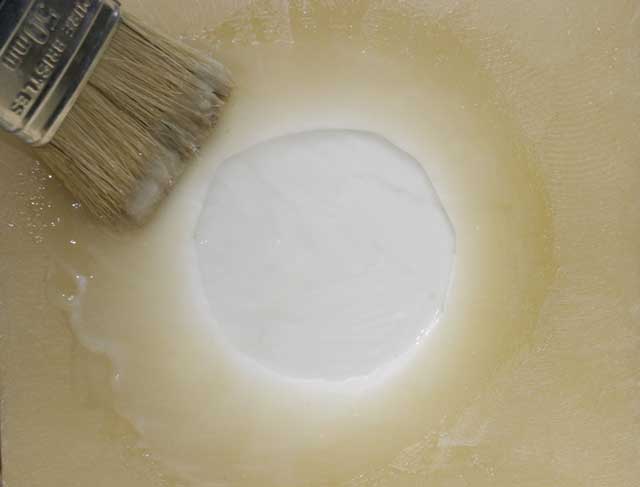
10: Mix up some thickened or pigmented epoxy (ordinary epoxy with some silica powder added) and paint it liberally onto the inside of the hole, so it covers all the depression and the faceplate. Brush carefully in order to avoid any air bubbles.
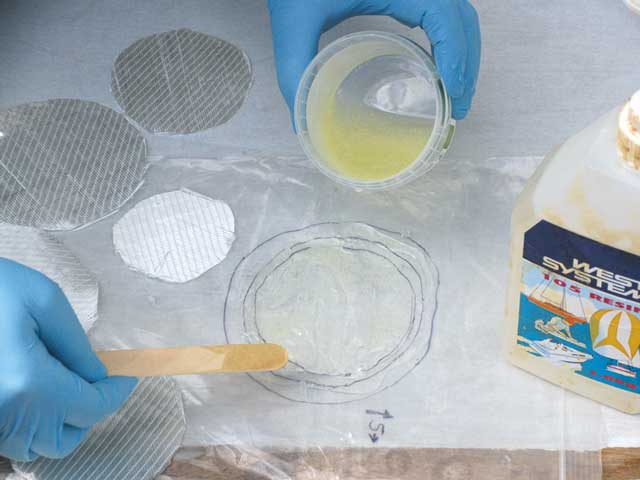
11: Now place the polythene guide on the work table, and lay a fresh polythene sheet over the top so the guide marks show through. Mix up some epoxy, and smear it on to the polythene.
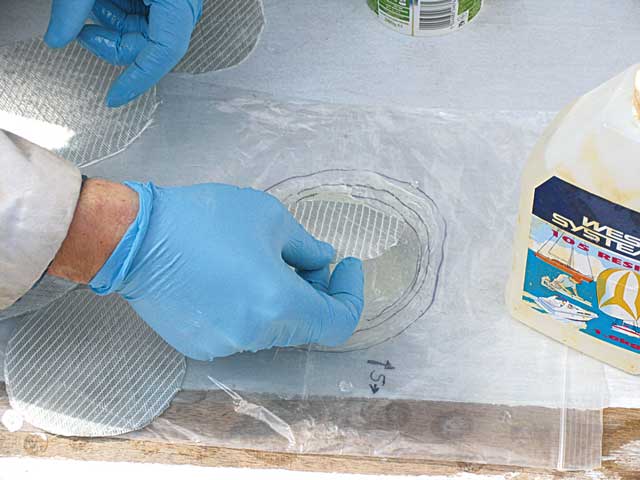
12: Place the smallest circle of fabric into the centre of the guide first, and then wet it out with epoxy. Try not to use too much.
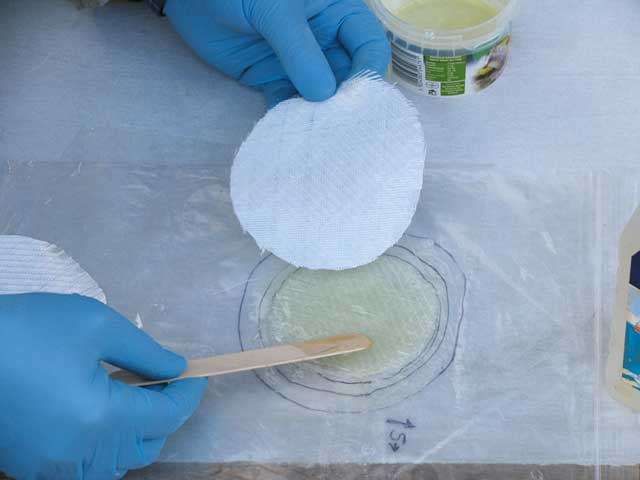
13: Once wetted, place the second smallest circle directly on top, staying within the guidelines, and wet out. Just keep going like this until all the circles have been laid one on top of the other. The biggest one will be last, and will be pressed against the hole itself.
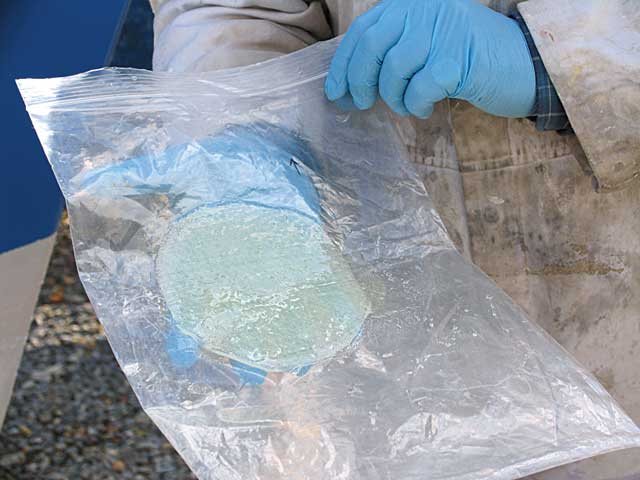
14: Mark the orientation on the polythene, and then pick it up. By now, the thickened epoxy painted onto the repair in stage 10 will be going tacky, which will hold the plug in place.
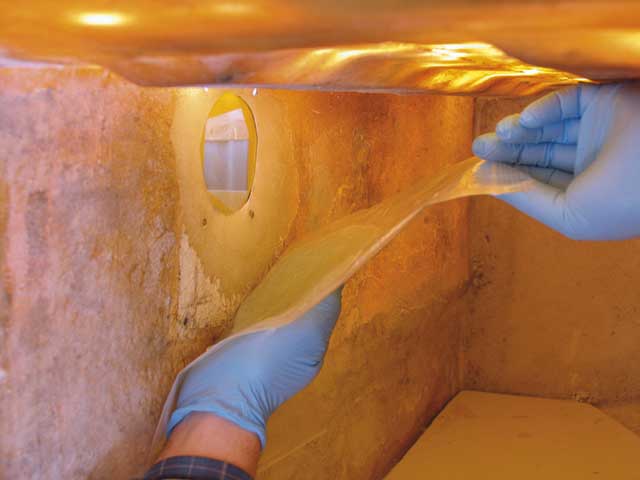
15: Using the polythene as an applicator, firmly press the plug onto the middle of the hole. If you have used the epoxy sparingly, it shouldn’t slump.
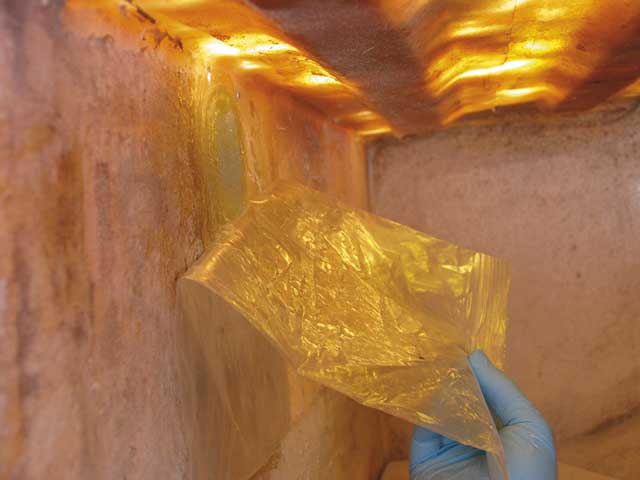
16: Peel away the polythene, and give the repair a last pass with a roller to drive out any trapped air. Leave to cure.
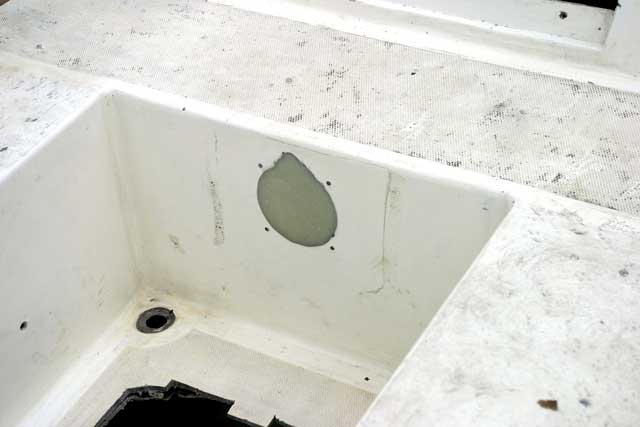
17: Once the repair has fully cured (usually a few hours, depending on temperature) the tape can be removed and the faceplate carefully pulled away. The epoxy should have formed a new surface flush with the old one. The repair can now be lightly abraded and then painted with an epoxy primer. Note: oil paints do not seem to harden over fresh epoxy, so use an epoxy primer first.
A short cut for small repairs
 A labour-saving short cut is simply to use the blanking sheet as normal, and put down a layer of thickened epoxy behind it in place of the circles of cloth. The repair can then be consolidated with an overlapping patch of reinforcing cloth. This method works well enough on small holes, such as this 19mm (3⁄4in) pump outlet. Any imperfections are made good with filler on the outside before painting. It’s not as neat, and may not be as strong, but will serve the purpose.
Repairing Inaccessible Damage
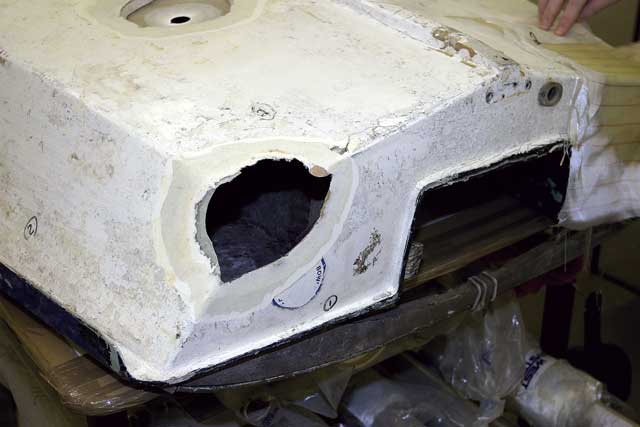
1: The corner of this dinghy has been taken off by a collision, but being a sealed buoyancy tank, it was impossible to access from the inside. Somehow, we had to get a backing plate behind the hole so we could build up against it. If an undamaged part of the boat matches the damaged area, it can be used as a mould for just such a backing plate. Firstly, the outer surface is cut back to make a shallow depression. The inside edges of the hole are also abraded and wiped with epoxy.
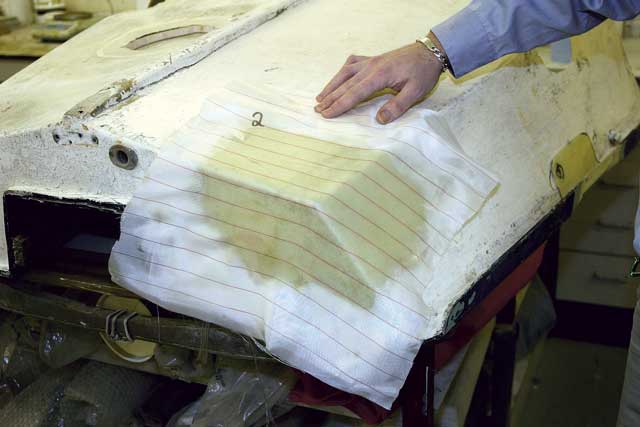
2: The undamaged starboard corner was a close enough match to make a mould from. (Better still, a dinghy from the same class could be used for a perfect mould.) The corner was coated with release wax, and then a layer of reinforcing cloth was laid over the top. It was taped down to create the shape, and then coated with activated epoxy. A sheet of peel-ply is placed over the top to give a roughened surface.
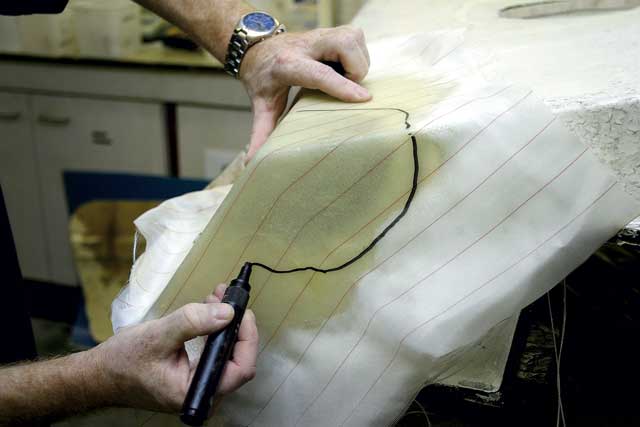
3: Once cured, the mould is transferred to the damaged area, and positioned over the hole. A pen line is marked around the damage, allowing about an inch of overlap. (The hole can be clearly seen through the cloth.)
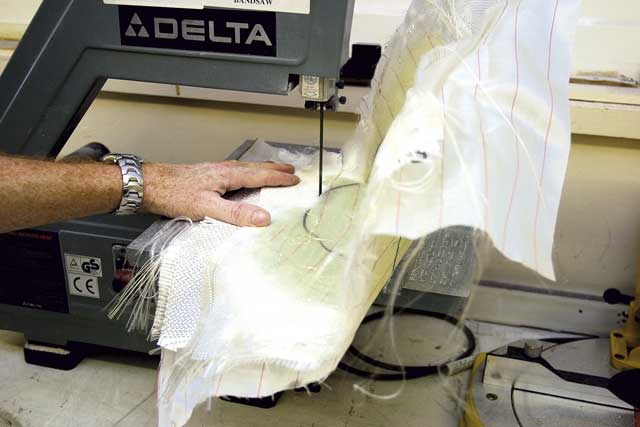
4: The mould is removed, the peel-ply pulled away, and the excess material removed with a band saw (you could use industrial scissors or a cutting disc).
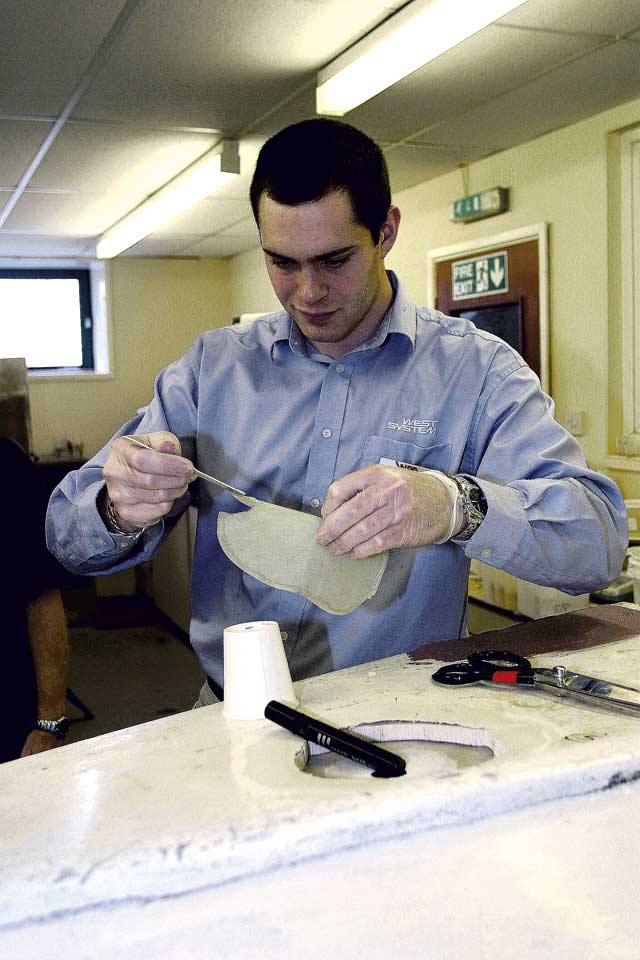
5 A screw is inserted into the central part of the backing plate, and the inside edges are then coated with five-minute epoxy.
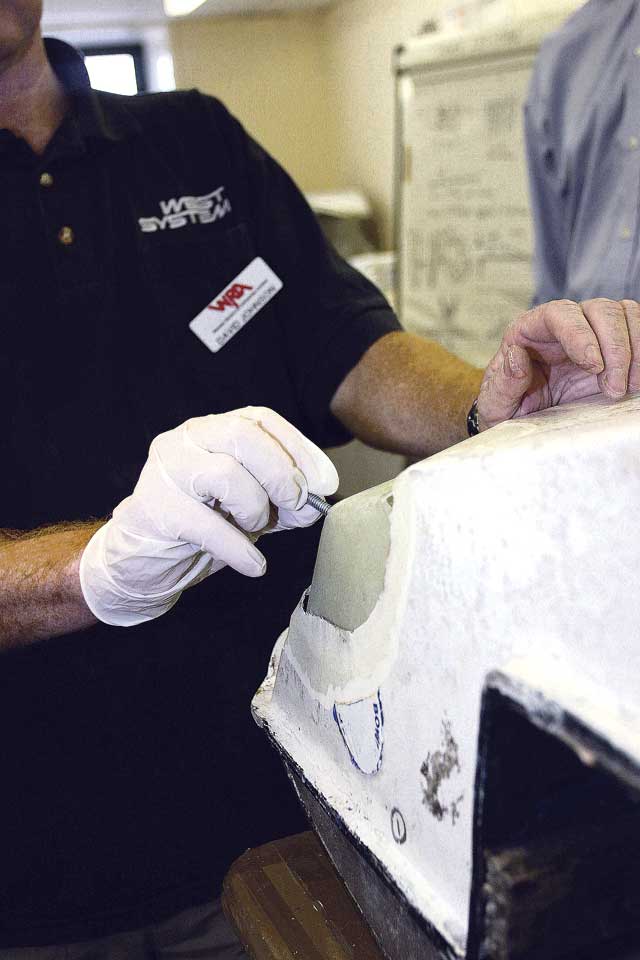
6: Although bigger than the hole, the plate is flexible enough to be inserted behind it and orientated to the correct position. It is then pulled back against the hull using the screw, allowing the five-minute epoxy to take hold. Now tacked into place, the backing plate gives a surface on which to build a repair. The inevitable gaps can be filled with some epoxy thickened with a filling powder.
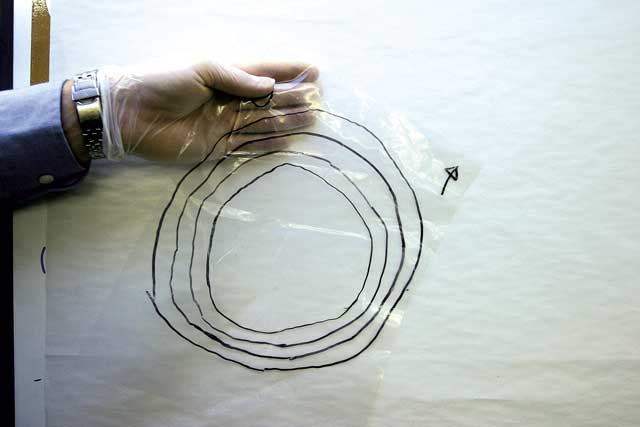
7: The building up of the hull is simply a re-run of the ‘ever-decreasing circles’ method. A polythene tracing sheet is laid over the depression, and a series of circles drawn on. These allow the sheets of cloth to be cut out, and then stuck down on the polythene. Once again, the smallest circle is stuck first, and the largest last. The sheet has to be marked for orientation.
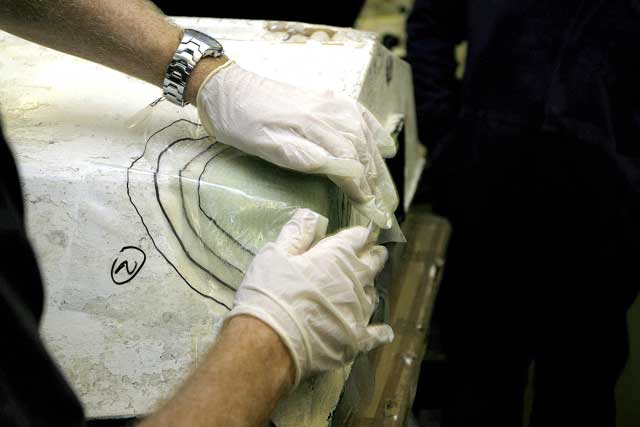
8: The sandwich is laid on to the hull and smoothed into place.
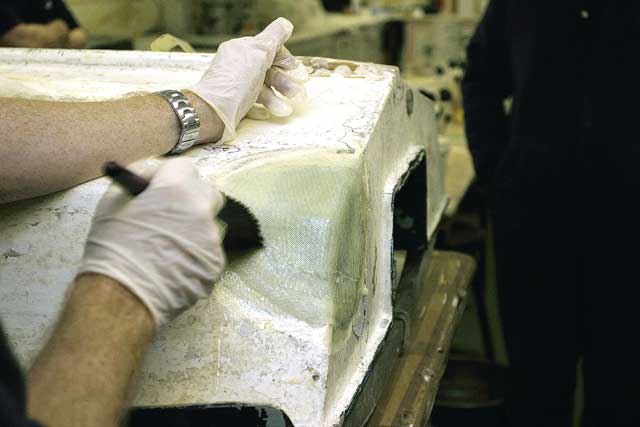
9: The polythene is removed, and a roller is used to smooth it all out. Once cured, the repair will have effectively rebuilt the hull thickness. The final stage is to smooth the repair over with a sandable filler, building the filler slightly proud. Using an orbital sander, this is then taken back until absolutely flush. The repair can then be painted.
Peel-ply
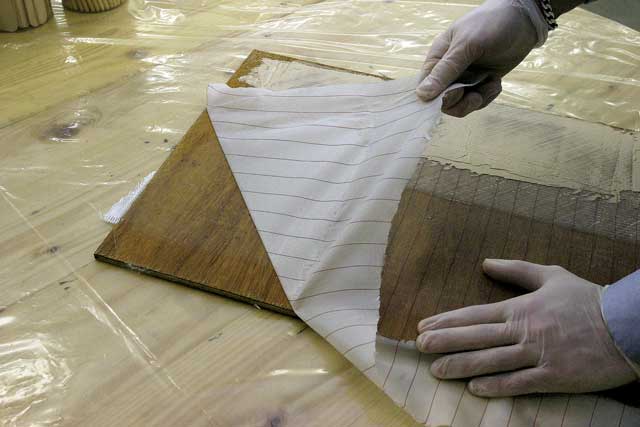 Once epoxy has cured, it leaves a shiny surface that has to be abraded before anything will stick to it. An answer to this is to roll down a layer of peel-ply, which is made from nylon. The peel-ply is simply torn away once the epoxy has cured (it is too slippery to be bonded) leaving a roughened surface, ideal for further sticking jobs.
Safety tips
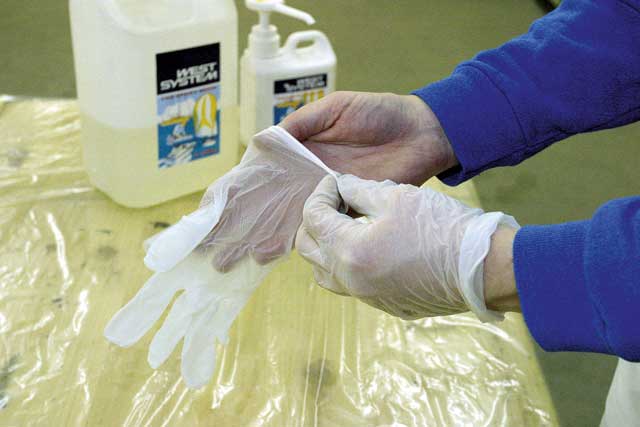
When using either polyester resin or epoxy, make sure you cover up well. Always wear gloves and, if rolling resin, then goggles are also advisable. Epoxy can cause dermatitis if in contact with sensitive skin; although with modern formulas this risk has been drastically reduced.
Conclusions
We found that these repairs were actually very simple to achieve, and that even the most appalling damage can be put right quite quickly. Better still, even if you make a mistake, the repair can be ground out and simply re-made.


