How to strip down and refurbish a Yanmar 1GM10 water pump
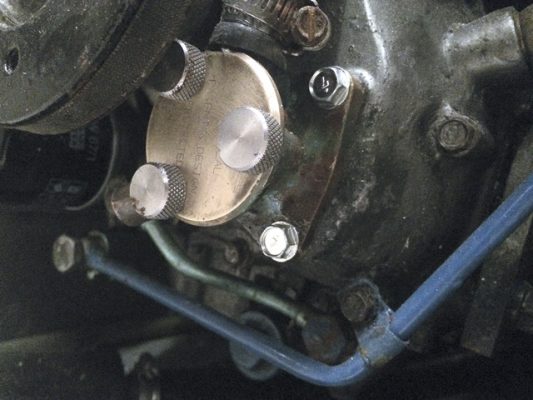
The Yanmar 1GM10 is a great little engine, which starts first time and runs reliably: but there are one or two design flaws. The worst is that the raw water pump is sited over the top of a ferrous oil pipe. When the seals give way, as they tend to do with alarming regularity, you get salt water dripping onto the oil pipes – which, if unchecked, can cause them to corrode through quite quickly.
When I noticed my water pump was dripping last winter, I serviced it to stop the problem happening again. I first rebuilt it seven years ago, replacing the bearings and shaft as well as the seals, and rebuilt it once since (three years ago), only replacing the seals as the shaft wasn’t too bad.
This time, the shaft’s scoring was too advanced to ignore, so it needed replacing – and at £96.71 for a short length of stainless shaft, that hurt the wallet. Luckily, the seals themselves aren’t too expensive (£14.26 for the pair). If you have a standard impeller cover, you’ll need a replacement gasket – but I have a Speedseal which only required re-greasing with silicone grease.

1: The first step, with the pump removed from the engine and the cover and impeller removed, was to use a pair of circlip pliers to remove the large circlip that retains the bearings.

2: Next I used a softwood dowel and hammer on the front end of the shaft to gently drive out the bearings and shaft from the pump body.

3: The bearings on their way out.

4: The next step is to remove the water seal and oil seal. It’s impossible to get these out without destroying them, but persevere with some needle-nose pliers and a screwdriver and you’ll get there in the end. Be careful not to damage the soft bronze of the pump.

5: You can then drive the shaft from the bearings, but beware the circlip between the two bearings. The scoring on the shaft was too deep to enable me to refit the shaft leak-free.

6: I used two steel rulers to hold the back bearing before using a punch to drive the shaft out, repeating for the second bearing.

7: Here’s the new shaft, with circlip fitted. Next, I used a hammer to gently drive the shaft home into the bearings, one by one.

8: Check that the bearings rotate properly, without any clicking or grinding noises.

9: Here are the new seals for water and oil.
10: First up is the water seal. Make sure it has the lip towards the impeller end of the pump.

11: Use a suitable socket and hammer (this one was 17mm) to gently drive it home.

12: Turn the pump over to check that the water seal is properly home – if there’s a gap between the back of the impeller housing and the seal, it will need tapping in further.

13: Now it’s time to refit the oil seal. This is the larger of the two, and goes in this way round. Once again, I drifted it gently into place with a socket.

14: Now the bearings and shaft can be refitted, again using a socket (this time a 19mm one), to tap them home.

15: Now the large circlip can be reinstalled, making sure it sits properly in its channel.

16: The pump, refitted to the engine. Upon starting the engine, it was drip-free!
You might also like:
Replacing a Yanmar 1GM10 cylinder head
How to remove, inspect, replace if necessary, and refit a Yanmar 1GM10 cylinder head - step-by-step
5 top causes of boat engine failure – and how to avoid them
Jake Kavanagh talks to Sea Start marine engineer Nick Eales about how to avoid the five major causes of an…
How to inspect a Yanmar GM exhaust elbow
Ian Pirrie explains how to check the condition of the exhaust elbow on Yanmar GM engines
Mend your own engine sea water pump
Peter Lyle refurbishes the seawater pump on his Jeanneau 36i for a fraction of the cost of replacement or professional…
Savings on Volvo Penta engine spares
When I bought Sacha, my Beneteau Oceanis 381, five years ago I changed the cam belt on the engine. It…
DIY engine cooling water alarm
DIY engine cooling water alarm
How to service a 2-stroke outboard engine
After a long winter indoors many 2-stroke outboards are reluctant to start. A simple service should make yours more reliable.…


