
Nic Compton follows progress on the home-built Western Skiff as PBO reader Jeremy Butler sheaths and fillets the hull planks

Boatbuilding can be a lonely business, especially if you’re stuck on your own in a cold garage trying to figure out how to hang your garboards.
Download your own set of free plans today: pbo.co.uk/western_skiff
Browse the complete set of articles in this series online
And it’s fair to say, the last time I went to see him, Jeremy Butler was having trouble not only with his garboards but his geralds too – that’s the bit where the overlapping planks on a clinker boat merge at the stem and transom. Nothing was sitting quite right, and he knew he still had an awful long way to go.

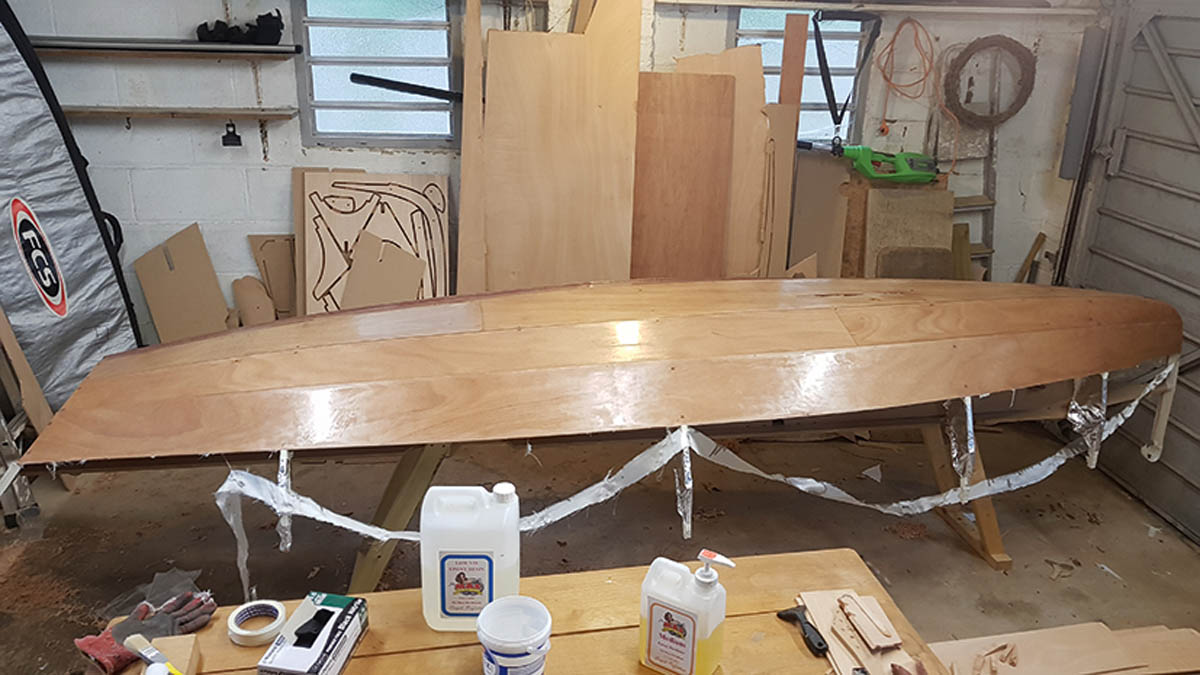
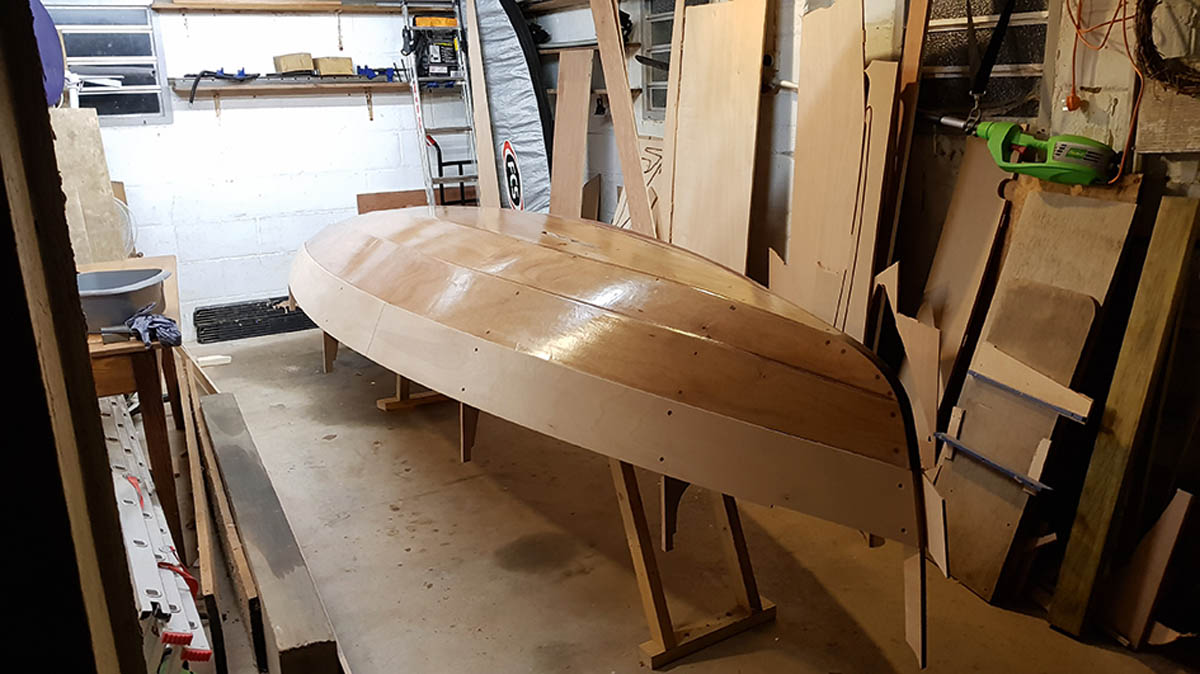
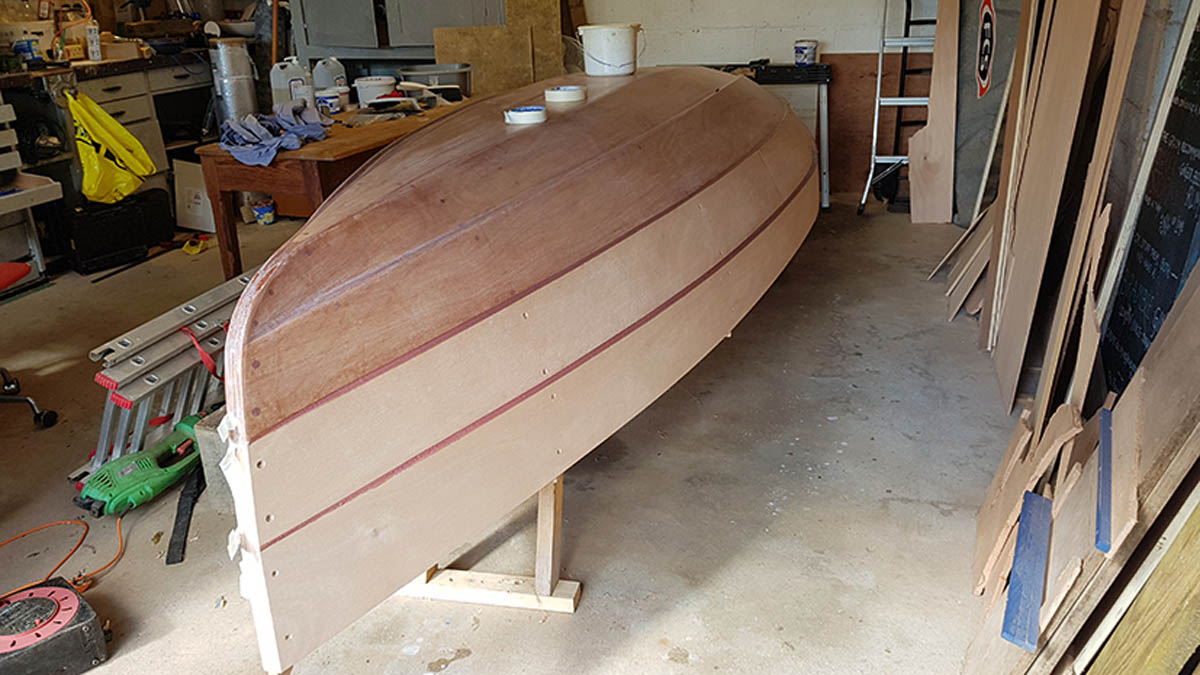
So it was a pleasure to visit him this month and find that, not only had he sorted out his garboards and geralds, but he had finished planking the entire boat and turned it the right way up – all in the space of two months, starting from scratch.
“It’s very satisfying to see the boat progress, because you can get quite a lot done quite quickly,” he enthused.
“It’s not classic boatbuilding; it’s more like boatbuilding for busy people, because you get to build something that looks and feels like a wooden boat, but very quickly. It doesn’t require too much effort, or too much skill – and a tiny number of tools. It’s really impressive.”
Regular readers will remember that Jeremy is building the latest version of the Western Skiff, a 14ft dinghy designed by Nigel Irens and Ed Burnett 22 years ago and now revived as a kit, available from Jordan Boats (www.jordanboats.co.uk), and as a set of free plans from the PBO website (www.pbo.co.uk/western_skiff).
Jeremy is building the first MkII kit, which consists of all the plywood components, plus an MDF building jig and MDF templates for all the solid timber parts. Although Jeremy has previous experience building epoxy ply dinghies, the ease of building of the Western Skiff is clearly still as appealing now as it was when the kit was first created.
In our first installment (Build your own Western Skiff part 1), Jeremy had erected the frames, laid the bottom board and hung the first two planks on each side. Unlike when I built one of the original kits 22 years ago, when I had sheathed just the bottom board and the garboards, Jeremy had decided to sheath the next plank up as well, to guard against damage when the boat is dragged up a beach (note the ‘beaches’ on the River Dart, where Jeremy and I both live, are mostly shingle rather than sand, so can be quite hard on a boat’s bottom).
Jeremy duly ordered a 5m sheet of 1.5m wide 200g/m2 glass cloth from East Coast Fibreglass Supplies which meant he was able to cover the area without any messy joins. Indeed, there was a bit of overlap on each side so that, when Jeremy hung the cloth over the boat for 24 hours to allow it to ‘relax’ over the shape of the hull, it looked like a magnificent silvery wedding dress.
Unlike me 22 years before, he didn’t bother priming the planks beforehand but applied the first coat of resin straight to the dry cloth – proving there’s more than one way of skinning a boat.
Managing overlaps
One of the problems with Jeremy’s approach was that, whereas the join between the bottom board and the garboards is a smooth chine – presumably to facilitate sheathing – the join between all the other planks are overlaps.

The join between bottom board and garboards is smooth, but thereafter planks overlap.
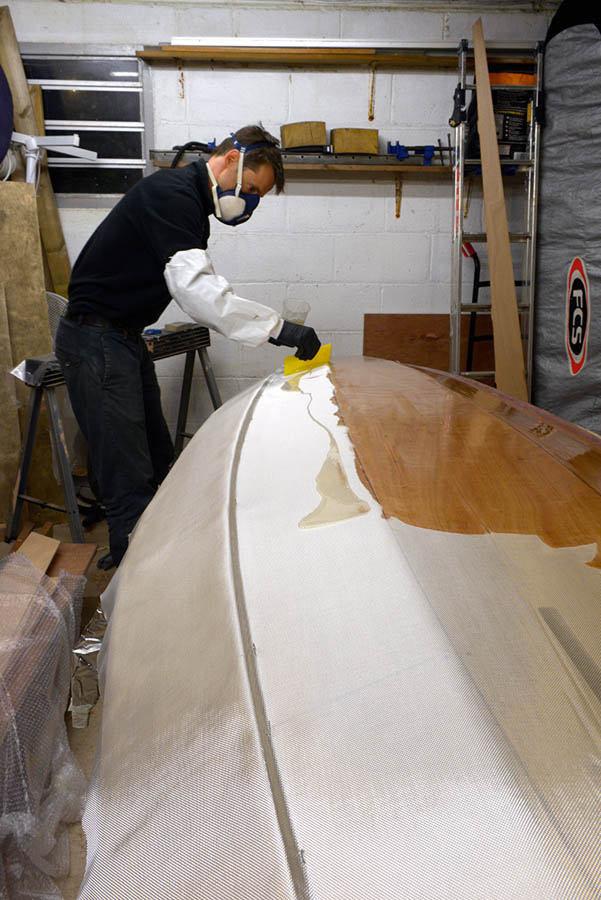
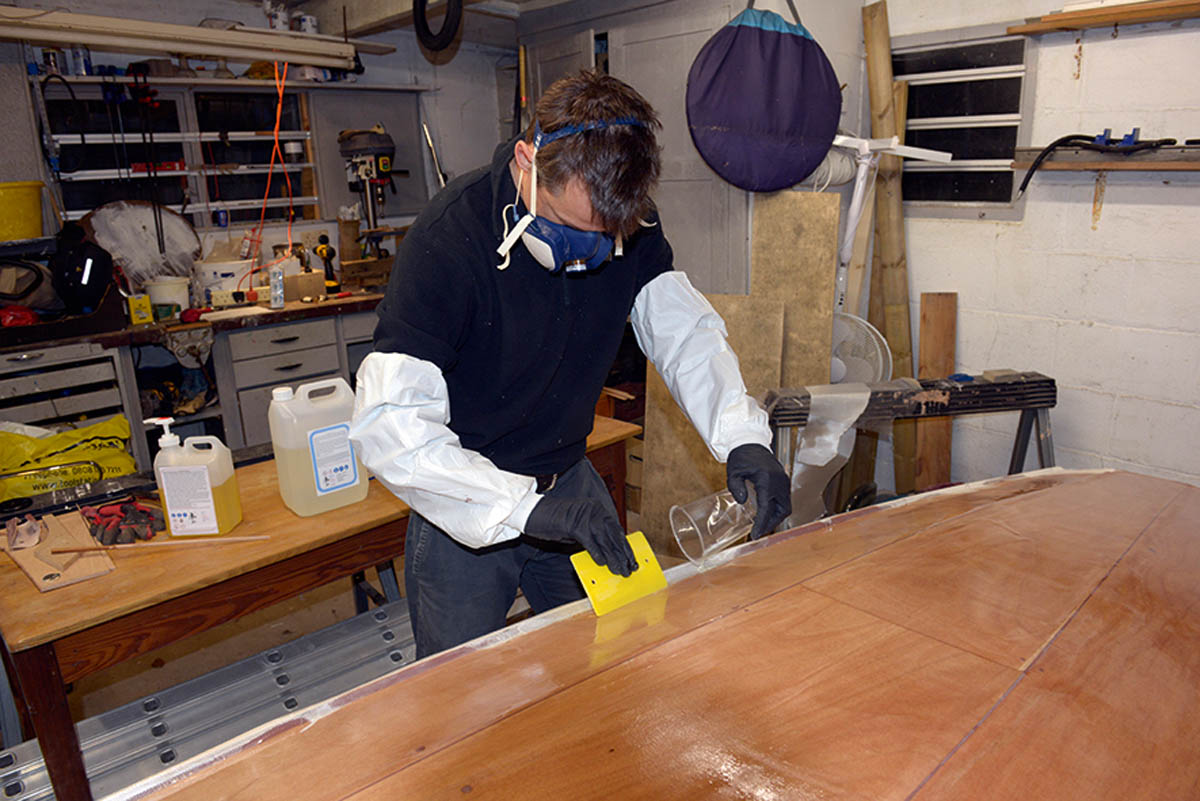
“One of my big worries was how the glass cloth was going to take the chine,” he told me. The solution was to tack the cloth in place with staples, just enough to hold it in place yet loose enough to be easily removed. Jeremy then used a low-viscosity resin without any thickener to achieve maximum penetration in the wood, which he literally poured onto the cloth and worked in with a special squeegee.
His only regret was that, as he was working in an uninsulated garage in mid-winter, he had ordered medium setting hardener, when in reality the temperature never went below 10°C and he would have been better off with a slow hardener. As a result, the resin thickened ever so slightly while he was working it, creating a couple of slightly unfair areas (though Jeremy is a perfectionist, and I’m quite sure no-one else will notice).
Jeremy wetting out the glass cloth on the garboards and lower plank with epoxy.
As soon as the first coat of epoxy was dry to the touch, Jeremy applied a second coat, both to fill the weave in the cloth and create a smooth surface, and to make sure the cloth wasn’t exposed when the bottom was sanded down for painting.
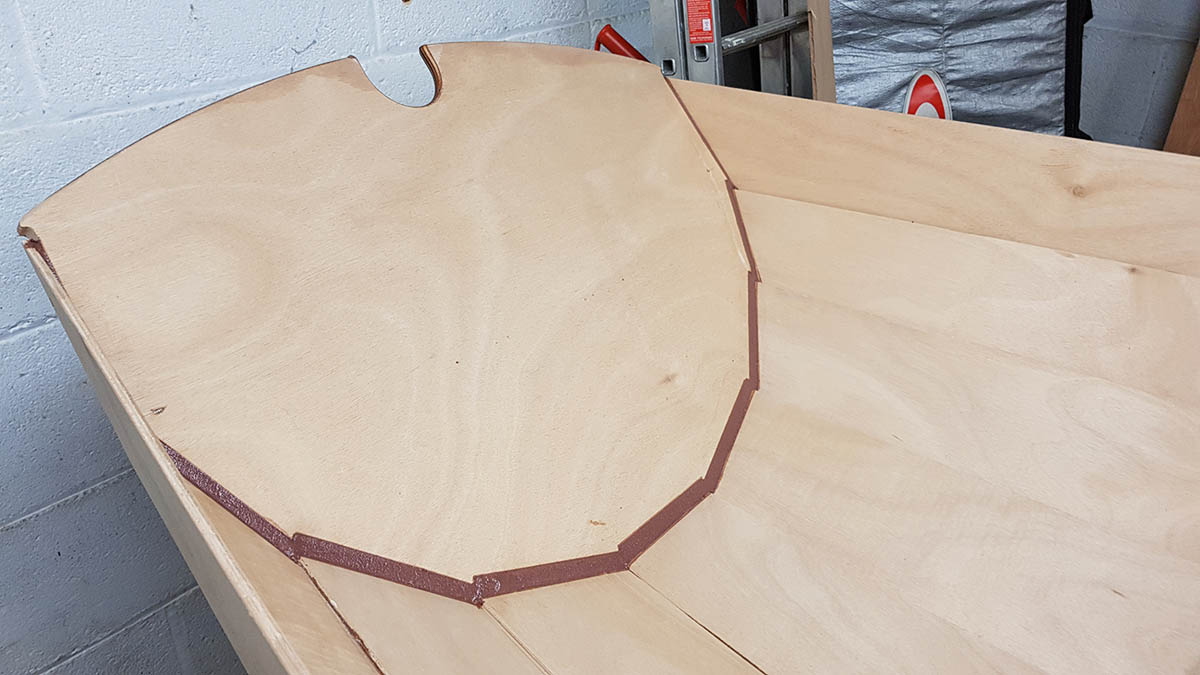
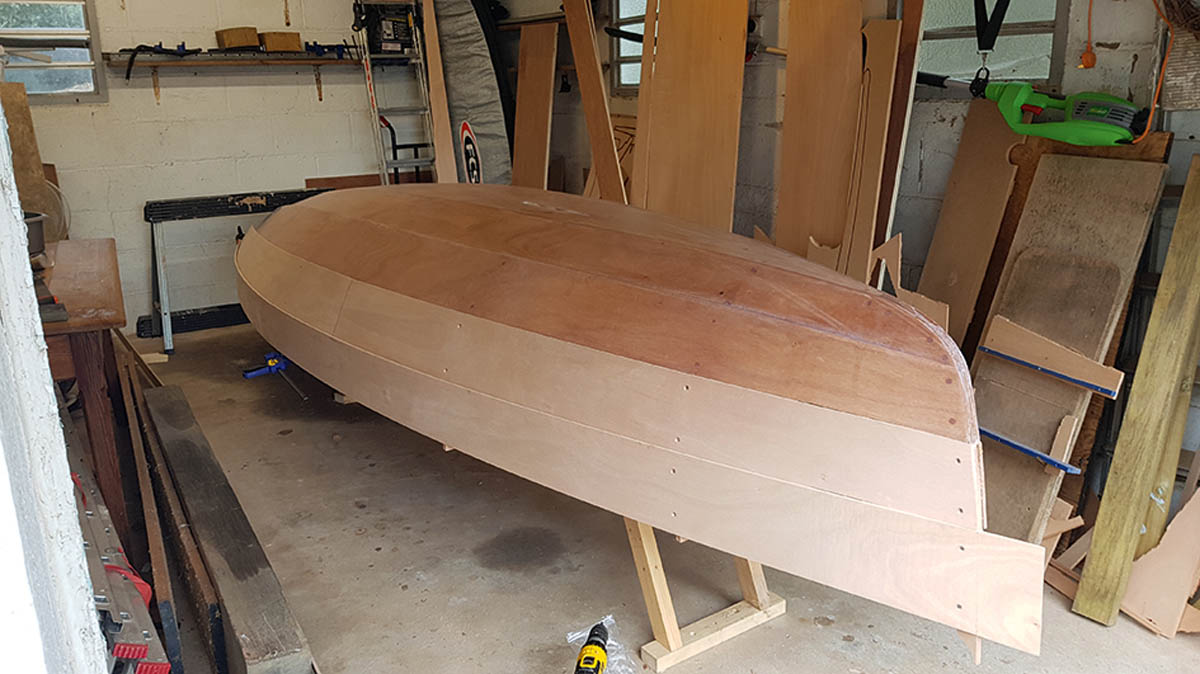
One of the distinctive features of this kit – along with many other kits cut by CNC cutters – is that there is no attempt to bevel the edges of the frames to the curve of the planks, or even the edges of the planks (the ‘lands’) to the angle of the neighbouring plank. Instead, the designers turned the CNC cutter’s limitations into a virtue by leaving the edges square and filling the gap with epoxy. This not only simplifies the building process but also creates extremely strong joints (arguably stronger than conventionally bevelled joints).
The drawback is there’s a danger that, when screwing the planks to the frames, you tighten the screws too much and introduce unseemly ‘flat spots’ in the planking. The trick, then, is to tighten the screws just enough to bend the planks round to a smooth curve without pulling them out of line.
“I tend to go too tight to start with, then check the line and back off with a manual screwdriver,” says Jeremy. “There’s always a bit of jiggery pokery. It’s a trade off between making sure it’s tight enough, but not allowing any unfairness to creep in. The top planks are more tricky because they are big and flapping all over place. I used clips rather than clamps because they hold the plank in place but still allow some wriggle room.”
Whereas the original instructions suggest using cable ties to join the planks together before filleting, Jeremy opted for screws instead, as he felt they were more easily adjusted and allowed you to hold a gap where necessary, eg between planks while filleting. By contrast, cable ties can only be tightened (not loosened) and allow too much ‘play’ between the planks when not completely tight.

View astern, again before the internal joints have been epoxy filleted.
With the planks in position, the endless job of filleting began. First, Jeremy ran a putty knife (or a pencil) along the seam and marked the limit of the intended fillet on the lower plank. He then applied a strip of masking tape ‘just proud’ of the line and another strip on the other side of the seam. He didn’t bother priming the seams on the basis that the area of adhesion was so great compared to the stresses on the hull that the joint was highly unlikely to fail.
“If I was going across the Atlantic,” he said, “I might think about it.”
With the seams taped up, he filled them with epoxy, thickened to a creamy paste with colloidal silica and microballoons.
“It’s really important to pack it first to the right level. Then you want a nice smooth run, with the flat edge of the knife scraping the masking tape and dragging the epoxy back into the joint, and the point giving a nice sharp edge to the fillet.”
The size of some of the epoxy fillets might look alarming but the end result is surprisingly strong.
With the filleting complete, Jeremy removed all the plank-to-plank fastenings and filled the holes with epoxy. As to the vexed question of whether to leave in the plank-to-frame fastenings or remove them to save weight, the jury was still out when I visited him – although he seemed inclined to leave them in on the basis that they might add a bit of longevity for a negligible increase in weight.
Sheer planks
With the penultimate planks in place, Jeremy hung the sheer plank on one side of the boat and made sure it had a nice shape. He measured the distance between the top of the plank and the top of the (slightly projecting) frames and transferred the dimensions to the other side of the boat. He then hung the other sheer strake in exactly the same position, to ensure the boat was symmetrical.
At last the big day came: it was time to turn the boat over. Although Jeremy had done this many times before, building boats on a piecemeal basis for Barrow Boats back in the 1990s, he was nevertheless delighted with the outcome.
“It’s amazing how stiff the boat is already – an equivalent GRP boat would wobble like crazy,” he says. “And it looked much bigger than I expected it. Emma [Jeremy’s wife] said, ‘Wow, it looks like a real boat!’”
Cost so far
Last month £1,282.98
This month £0
Total so far £1,282.98
Time so far (hours)
Last month 36¼
This month 20
Total so far 56¼
In pictures: Sheathing and filleting the hull planks
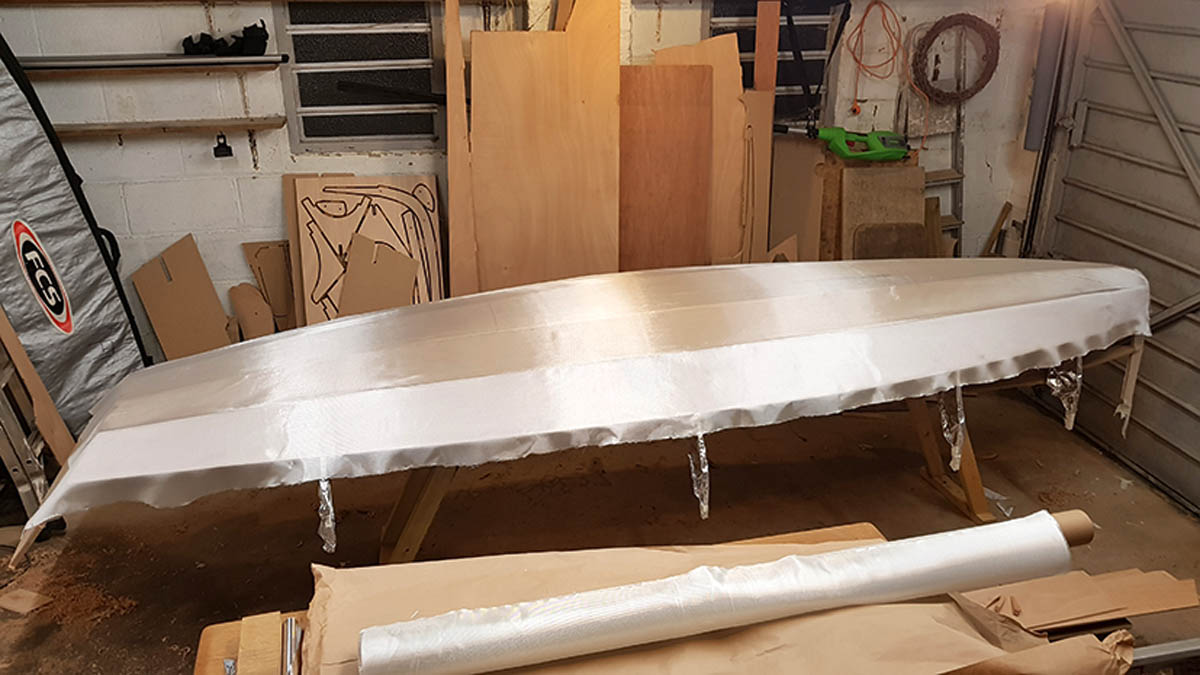
1. The bottom of the skiff looks resplendent in its shimmering silver gown. Jeremy left the glass mat to settle into shape for 24 hours before applying the epoxy.
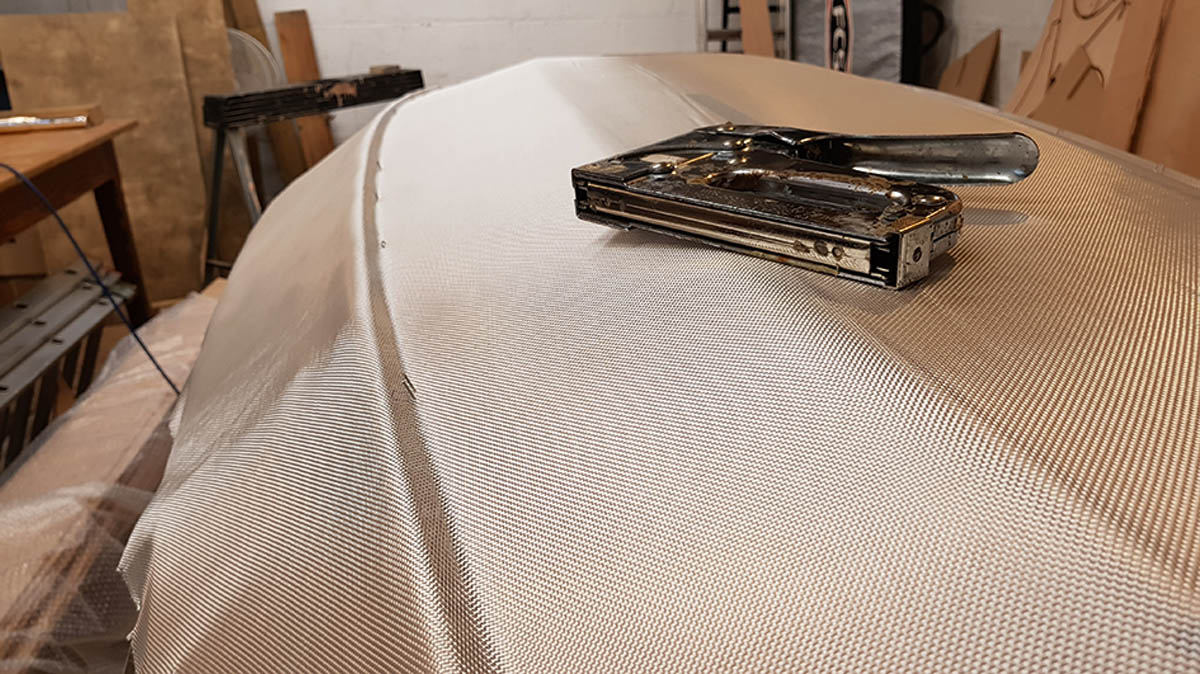
2. He used staples, left slightly proud, to wrap the mat around the chine. The staples were removed as soon as the epoxy had cured.
Wetting out the glass mat with epoxy. The aim with the first coat was to use just enough resin to saturate the mat, but not so much that it lifted it off the wood.
4. While the epoxy was still ‘green’ the excess mat was trimmed off with a sharp knife. Note frames wrapped with silver foil to protect them from spillage.
5. The third and fourth planks were much easier to hang than the first two. Note the long gerald at the bow, which allows the higher plank to overlap the lower one as they join onto the inner stem.
6. Jeremy took care to ensure the port sheer plank sat nicely before measuring it against the frames and then mirroring it on the starboard side.
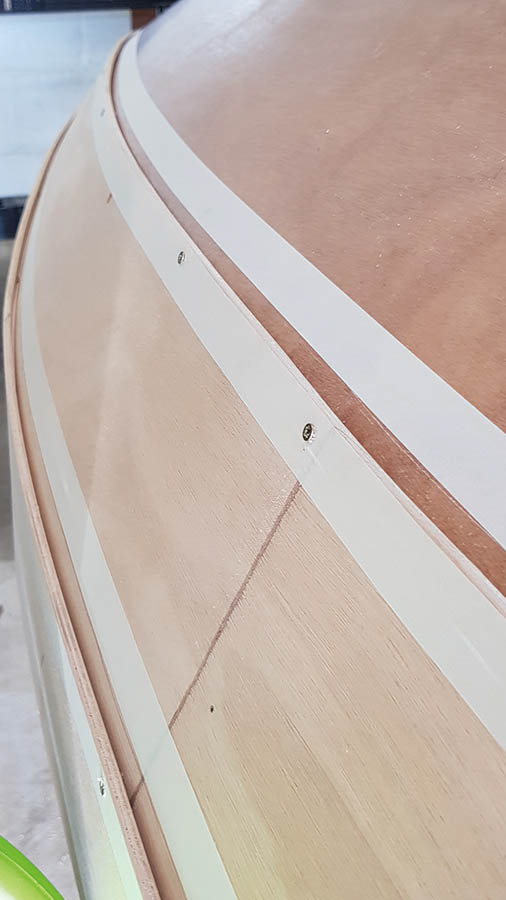
7. Jeremy marked off the inside line of the overlapping planks and masked off both sides of the seams with tape before filling them with epoxy.
8. The result is a set of beautifully even fillets and unblemished topsides. All in all, a much neater job than the author did 22 years ago…
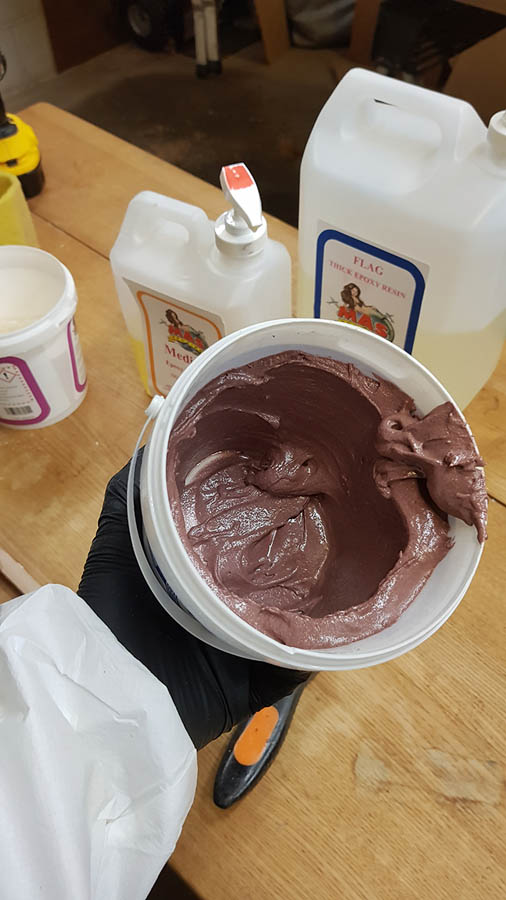
9. For the fillets, Jeremy used MAS epoxy thickened with a 50/50 mix of colloidal silica and microballoons. Once mixed, get the paste out of the tub and on to a flat board or stick to reduce the chance of an exothermic reaction, ie the mix self-heating.
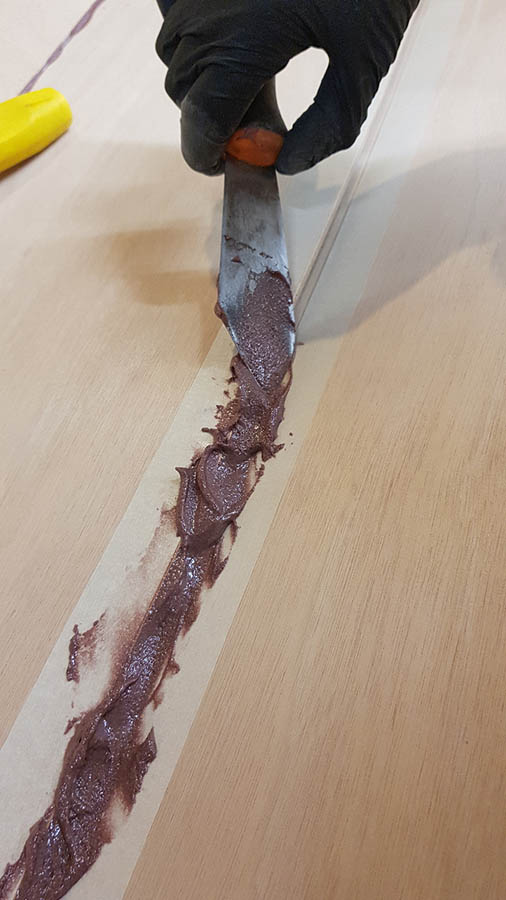
10. Jeremy used the same marking then masking technique to fillet the inside of the seams, first working the epoxy into the seam…

11. …then smoothing it with the putty knife, using the point to leave a sharply-defined edge.
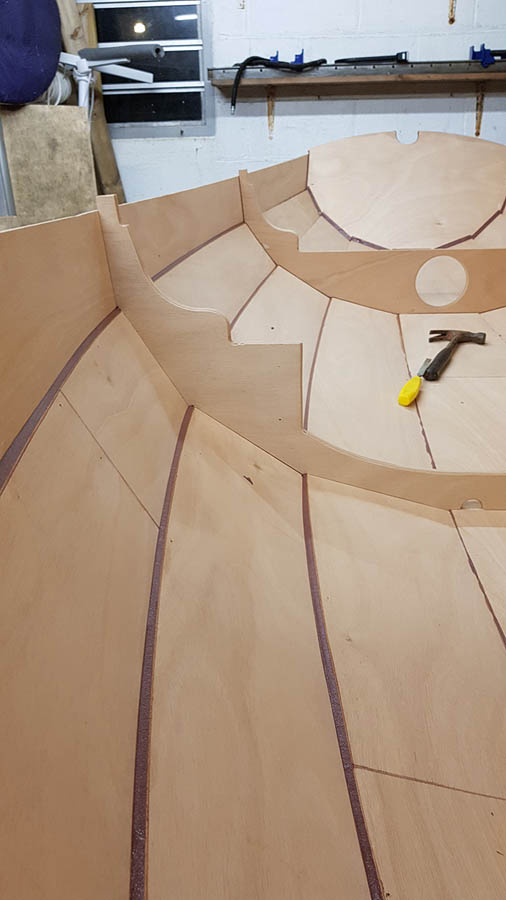
12. Tape removed and the results speak for themselves. This is quick ‘n’ dirty boatbuilding minus the ‘dirty’.
 About the author
Writer and photographer Nic Compton has written 18 books about boats, sailors and the sea. His latest, readily available from retail booksellers, is Off the Deep End: A History of Madness at Sea.
How to get free plans
How to turn free plans into plywood parts and templates
- A set of PDF plans (excluding the sail plan and outboard conversion) for personal use only is available free of charge, but please, please don’t forget a small donation to the Ed Burnett memorial fund: justgiving.com/fundraising/bill-burnett1
- The 39 pages of plans (size ‘A zero’) should be printed (black & white is fine; printing firms are available online).
-
Once printed, join together individual sheets by matching the corresponding numbers in each corner and aligning the target marks.
-
Affix the templates directly onto plywood sheets (2440mm x 1220mm / 8ft x 4ft), aligning the edges and you are ready to cut the parts. We estimate
- 4 1/2 sheets 6mm ply
- 1 sheet 9mm ply
- 1 sheet 15mm ply
- 1/4 sheet 12mm ply
- 2 sheets 12mm MDF
- Solid timber (eg. 1in Douglas Fir) for thwarts, etc
Instructions for free Western Skiff plans – click here to download
Overview pdf of Western Skiff plans (10 pages of A4) – click here to download
Full set of pdf plans of Western Skiff (39 pages of A0) – click here to download
Rig dimensions & sail plan – click here to download
Building an outboard well during skiff restoration in 2015, by Nic Compton
Browse the complete set of articles in this series online