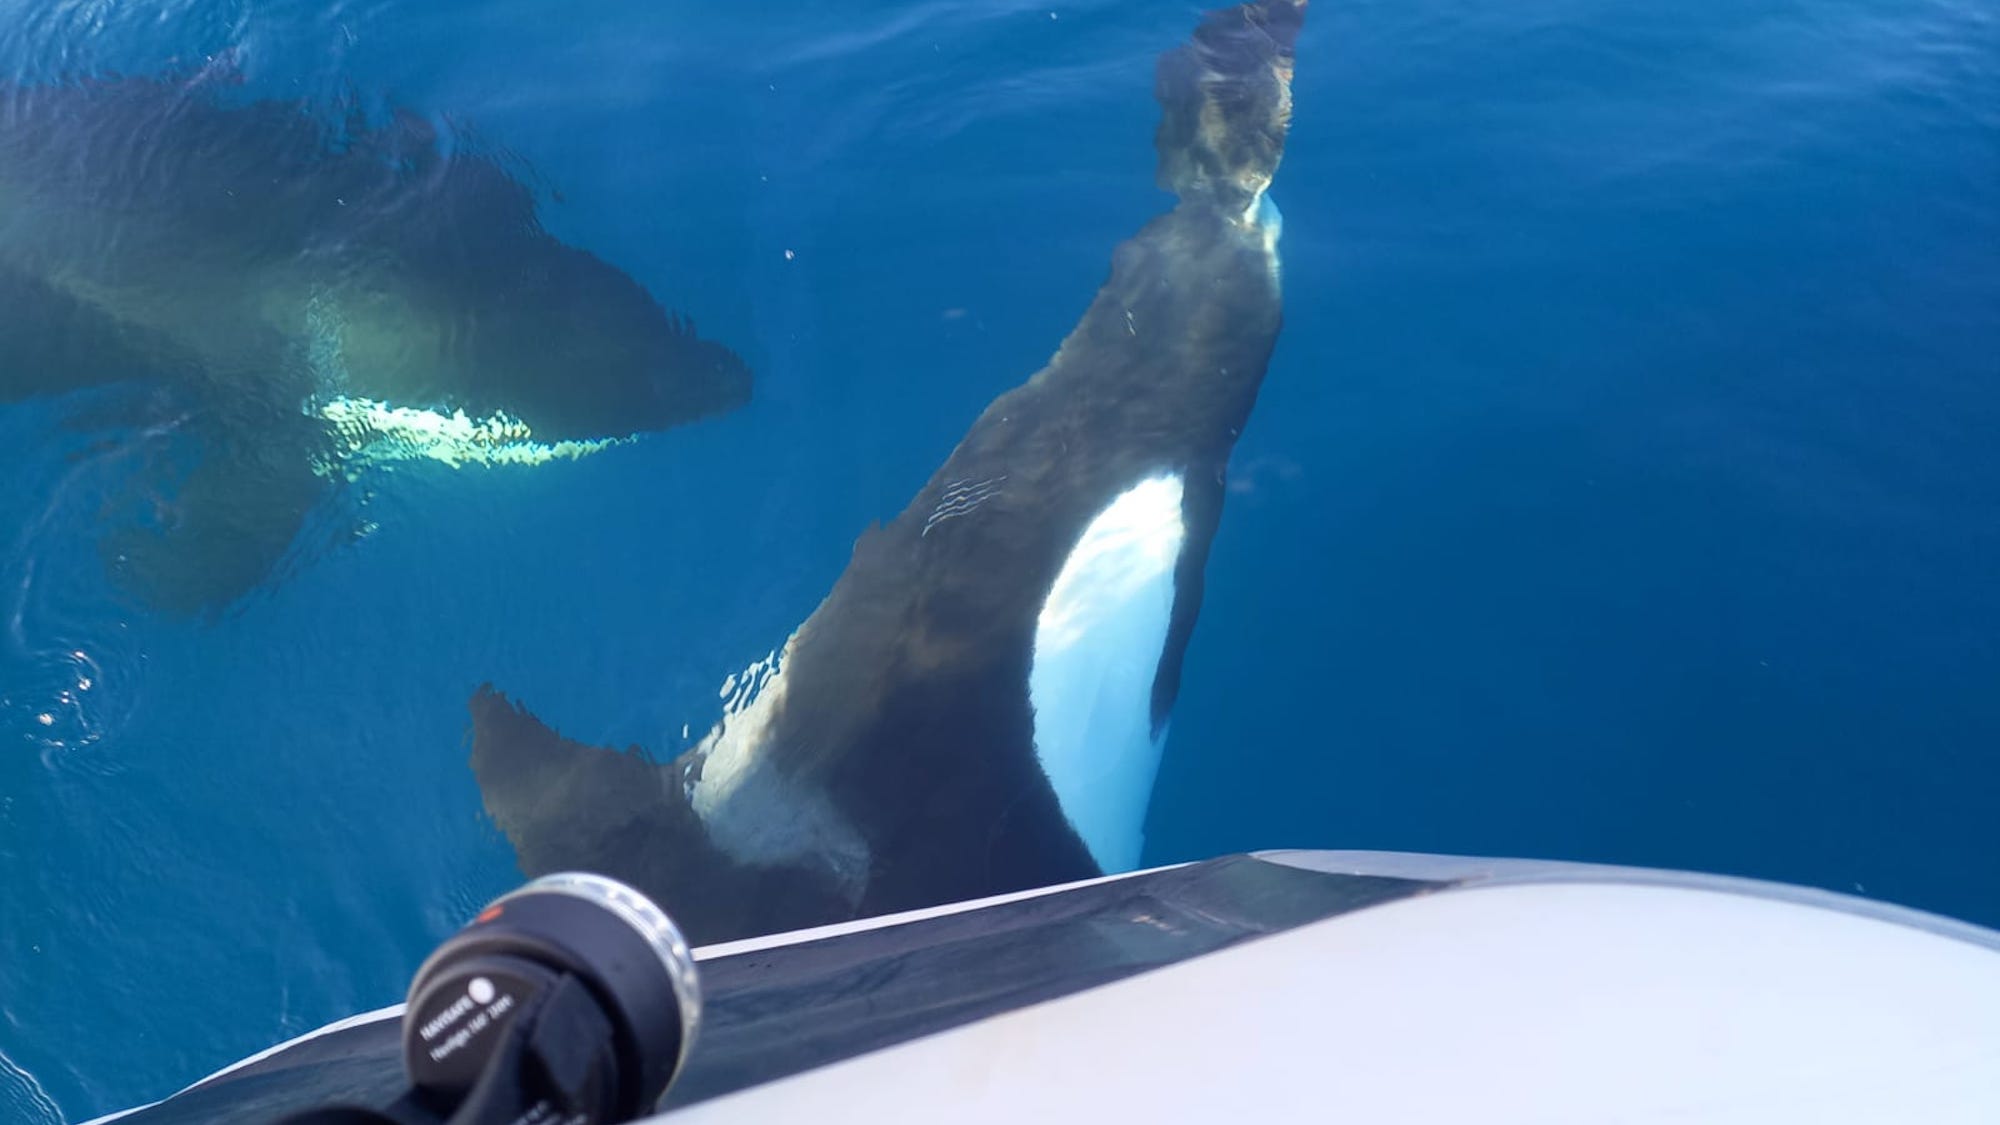
Hitting a submerged object destroyed Mike Gudmunsen’s rudder...so he set about making a new one
How to build a rudder
The Blackwater estuary above Osea island dries at low water, writes Mike Gudmunsen.
Over the years, wooden jetties, fish traps and even barges have been left to decay at the margins, presenting hazards for the unwary – along with more recent man-made obstacles such as the causeways to Osea and Northey islands.
The spring tides were pretty big and the river had swelled, covering the surrounding salt mashes. Northey island had all but disappeared, apart from the hillock upon which the farm building sits.
I’d enjoyed a good sail around Osea island in my Pegasus and had time for a brew in Goldhanger Creek, but on leaving I became disorientated due to the unusually large expanse of water.
I strayed into an unfamiliar inlet and this was my undoing, as no sooner was I in than I was aground.
Frantic engine manoeuvres and rocking the boat on its keels released the boat, then as I proceeded back towards the main channel there was a resounding crash, the boat stopped dead and the tiller was wrenched from my grasp – I’d hit a submerged object and, whatever it was, it was pretty hard.
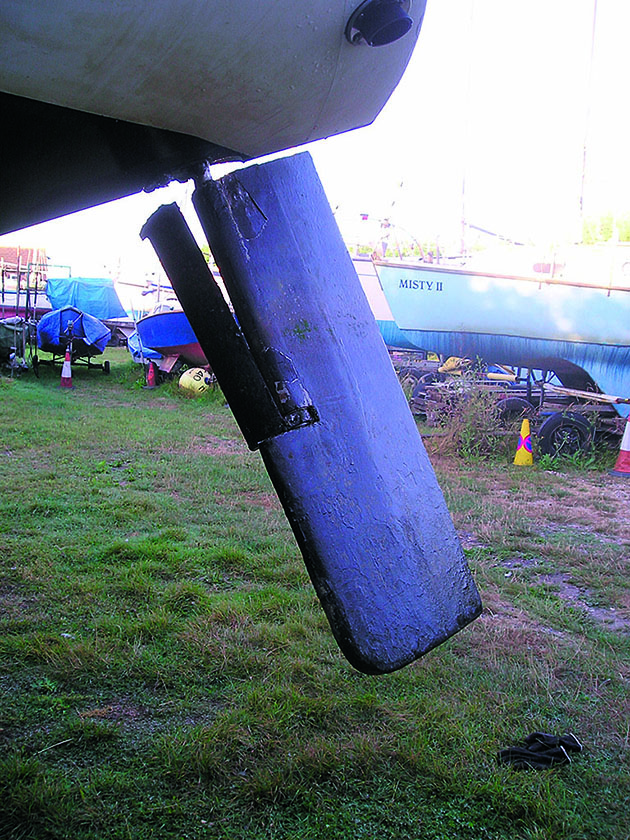
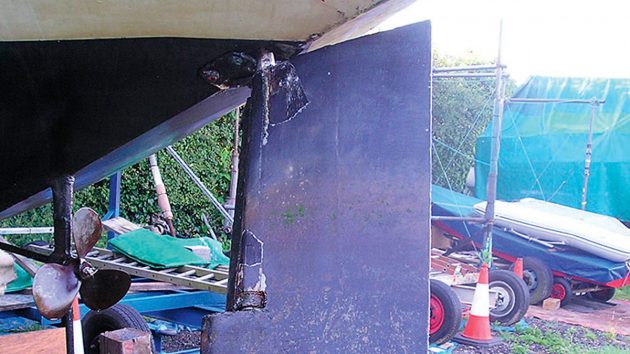
Although Mike had previously reinforced the hull around the rudder connection, the grounding still did damage. Credit: Mike Gudmunsen
From the tiller angle and the visible damage to the transom top in way of the upper rudder bearing, something was very wrong.
With minimal steerage, we limped back to our mooring further upriver to contemplate what to do next.
When we hauled the yacht out and inspected the damage, we found the rudder horn had parted company from the palm, leaving the two sides of the palm still bolted to the boat hull.
I’d reinforced the hull around this connection back in 2009 as I was concerned about the potential effects following an impact on the rudder – fortuitously, as it turned out.
Without this additional reinforcement, I suspect the bolts would have been pulled through the GRP and I could have been looking at a total loss.
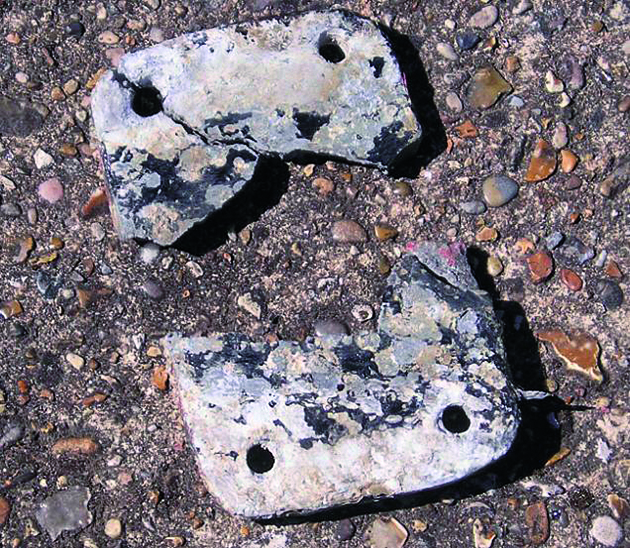
The remains of the palm. Credit: Mike Gudmunsen
Pegasus yachts have a rather unusual rudder arrangement.
A cast aluminium rudder horn, which forms the leading edge of the rudder for about half its depth, is bolted via a palm to the hull.
At its lower end, a pintle bearing supports the rudder and takes most of the lateral rudder force.
A hollow stainless steel shaft passes through the pintle bearing and terminates above the transom at the tiller head.
Having removed the rudder and unbolted the remaining bits of the palm, I toured various boatyards and marinas hoping to get the rudder repaired.
The builders of Pegasus yachts went out of business many years ago, and it was evident that a replacement cast rudder horn was as rare as hen’s teeth.
So, the only option was to design and fit a spade rudder and move away from the original ‘mariner’-style rudder arrangement.
Designing a new rudder
The helm has always been light and responsive, so I was anxious to maintain those qualities in the new rudder.
I kept the original rudder dimensions and aspect ratio and also the rudder stock position relative to the leading edge.
The original rudder had a chord of 410mm and a maximum thickness of 63mm.
A NACA 0015 aerofoil is very close to these requirements, and I was able to get the section offsets from a site on the internet.
There are important differences between the original ‘mariner’ rudder and the proposed spade rudder.
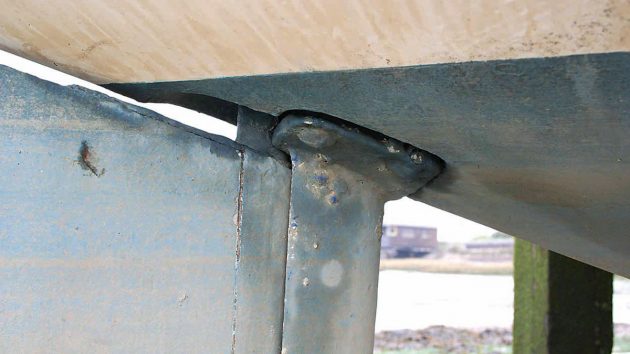
A cast aluminium rudder horn, which forms the leading edge of the rudder for about half its depth, is bolted via a palm to the hull. Credit: Mike Gudmunsen
The original carried the rudder lateral force via the pintle bearing and into the rudder horn which resists bending at the bolted connection to the hull.
With this arrangement, the rudder stock essentially only carries the rudder torque and, as a consequence, the shaft can be hollow and of modest diameter.
Mine was 38mm diameter with a 3mm wall thickness.
For a spade rudder, the stock itself has to resist bending, shear and torsion, and would clearly need to be a lot thicker and possibly solid.
Calculating the loads on the rudder
A quick trawl on the internet will give numerous references to methods to calculate the forces on a rudder.
They basically all use the blade area (Ar) and the boat speed (V) in knots, together with a few other parameters such as lift coefficient, blade aspect ratio and so on.
For my chosen aerofoil section, I took the design lateral force (Dlf) on the rudder blade, measured in Newtons, to be:
Dlf =100A(V+3)2
The eagle-eyed will notice that lift coefficient and aspect ratio don’t figure in this equation as my 3-knot augmentation of the speed may be considered to compensate for these effects.
The original rudder was 980mm high with a chord of 410mm, giving an area of 0.4018m2.
I took the design speed of my 26ft yacht to be 5 knots. Hence, the lateral force came out to be 2,572N (262kg).
This force acts at the vertical centre of the blade area and, for the NACA section I had selected, at 1⁄3 of the chord from the leading edge.
Continues below…
Do you know your rudders?
Do you know rudders? Boatyards are a great place to get to know different types of keels, rudders and other…
Adding a rudder to a small outboard
Jim Miller suggests a neat way to add a rudder to a Honda BF2.3 outboard motor to aid steering at…
How do you close the gap between the rudder and propeller?
Practical Boat Owner reader David Blackborow is trying to find out the best way to close the gap between the…
Orcas left us rudderless! Yacht couple tell of terrifying ordeal off Spain
Zoe Barlow shares her experience of losing a rudder during sustained attacks by orcas whilst sailing her Sun Odyssey 40…
Having decided on the location of the upper and lower bearings, a simple moment calculation about the top bearing gave the reaction force at the lower bearing (3,983N): likewise, taking moments about the lower bearing gave the reaction force at the upper bearing (1,411N).
By multiplying the lateral rudder force by the distance from the blade centre of area to the lower bearing, the bending moment was determined:
Mb = 0.483m x 2,572 N = 1,242Nm
The torque on the rudder (Mt) was calculated by multiplying the lateral force by the separation between the shaft axis and the centre of pressure.
For my rudder it worked out to be 2,572 x (0.41 x 0.33-0.10) = 91Nm; roughly 10kg.
Interestingly, classification societies set a minimum separation value of 0.12 x chord, which results in a larger torque of 127Nm.
Will the shaft be thick enough?
The rudder shaft would be of 316-grade stainless steel.
Although stainless does not exhibit a yield point, a value of stress for a defined percentage of plastic strain is generally used to represent the nominal yield.
Data from the internet gave a UTS (ultimate tensile strength) of 485N/mm2 and a nominal yield value of 210N/mm2.
The shaft diameter would be limited by the diameter of the existing rudder trunk and also the thickness of the rudder blade.
The rudder trunk had an internal diameter of 50mm.
The rudder blade thickness of 63mm, less two layers of 9mm ply, permits a maximum shaft diameter of 45mm, so it was clear that 45mm would be the largest diameter that could be accommodated in association with these physical limits.
In order to confirm the structural adequacy of the shaft, a few basic calculations needed to be undertaken.
A 45mm-diameter shaft has the following attributes:
The shear area
A = π r2 = 1,591mm2 s
Section modulus
Z = Ππ d3/32 = 8,946mm3
The torsional constant
J = Ππ d4/32 = 402,578mm4
The bending stress in the shaft
Mb/Z = 1,242 x 1,000/8,946 = 139N/mm2
The average shear stress
F/As = 3,983/1,591 = 2.5 N/mm2.
The torsional stress
Mtr/J = 91 x 1,000 x 22.5/402,578 = 5.0 N/mm2
From the results, the dominant stress is the bending stress, and this provides a factor of safety on the nominal yield of 1.5.
The shear and torsional stresses are so small I basically ignored them.
Now I had the shaft diameter, the bearing dimensions could be calculated.
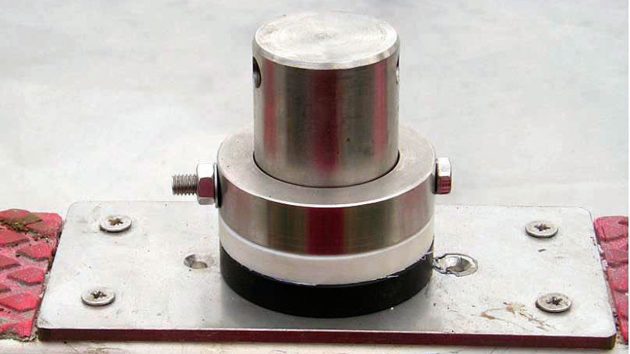
A Delrin spacer ring had to be arranged below the rudder carrier ring in order to take up the clearance. Credit: Mike Gudmunsen
Delrin has a good track record for rudder bearings – it’s easy to machine and has a very low moisture absorption characteristic, particularly when compared with nylon.
Published data on bearing pressures for synthetic bearing material suggests that the design pressures should not exceed 5.5N/mm2.
Based upon the bearing forces of 3,983N and 1,411N, I needed bearing areas of 724mm2 and 256mm2 respectively.
From a purely practical point of view, the bearing depths finally selected were 16mm at the upper bearing and 45mm at the lower bearing, both of which resulted in more than double the minimum areas needed.
The rudder build
The rudder shaft would be subject to some significant machining, and tangs would need to be welded to it in order to transmit the rudder torque to the shaft.
A local marina workshop did the job.
The rudder blade would be laminated from 9mm marine-grade plywood which, after shaping and fairing, was skinned with GRP and finally epoxied.
The bolting location of the original palm provided a convenient location for the new lower bearing.
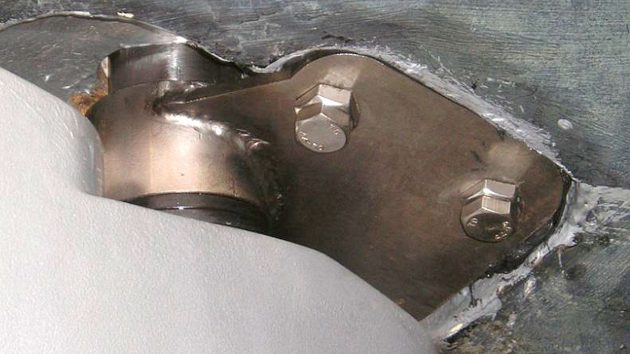
The bearing plate bolted in place. Credit: Mike Gudmunsen
Using a suitable mandrel as a dummy shaft, I fashioned a cardboard template for the lower bearing plate.
To be honest, I probably made three or four templates before I was satisfied that it was as dimensionally accurate as could possibly be.
A stainless steel tube carrying the lower bearing would need to be welded to this lower bearing plate at precisely the correct angle.
A local engineering shop produced the upper and lower bearing plates, the bearing tube, the Delrin bearings and the rudder carrier ring for me.
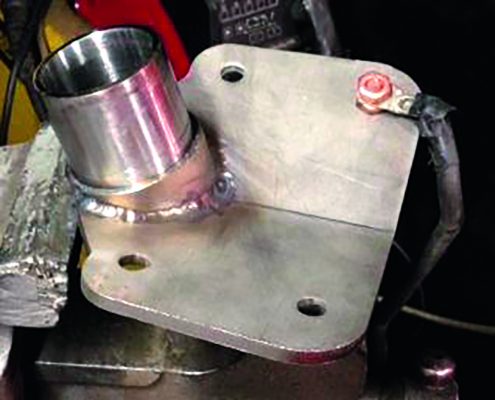
The final welding of the bearing tube to the lower bearing plate was carried out by a fellow club member using TIG welding. Credit: Mike Gudmunsen
A steel bush was used as a dummy bearing so the bearing tube could be tack-welded to the lower bearing plate while the rudder shaft was in situ.
Delrin apparently melts at around 160°, so it’s best kept away from the welding process.
Once removed, the final welding of the bearing tube to the lower bearing plate was carried out by a fellow club member using TIG welding.
Even though we left the dummy bearing in place, heat from the welding did cause the bearing tube to warp slightly, so the Delrin bearing had to be adjusted to fit.
The final fitting
The new spade rudder was considerably heavier than the old one and took two of us to offer it up through the rudder trunk, while another assembled the upper bearing components and carrier ring.
Once in place, the lower bearing plate was through-bolted to the hull.
When measuring the shaft length I’d added a 10mm margin to the overall length just in case things didn’t fit as planned.
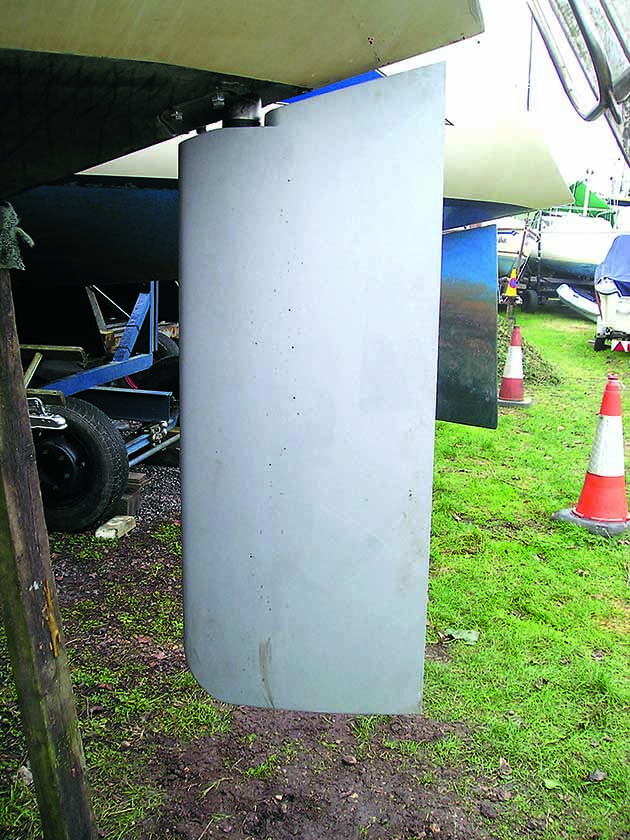
The final rudder assembly. Credit: Mike Gudmunsen
In the end it proved 8mm over length, so a Delrin spacer ring had to be arranged below the rudder carrier ring in order to take up the clearance.
A club member donated the Delrin and carried out the machining for me.
Completion of the rudder replacement – including producing drawings for the marina and machine shops and calling upon a number of helpful club members to carry out machining and welding – took just over three months.
The whole project proved to be very rewarding and is well within the skills of most practical boat owners.
Enjoyed reading How to build a rudder for your boat? 
A subscription to Practical Boat Owner magazine costs around 40% less than the cover price.
Print and digital editions are available through Magazines Direct – where you can also find the latest deals.
PBO is packed with information to help you get the most from boat ownership – whether sail or power.
-
-
-
- Take your DIY skills to the next level with trusted advice on boat maintenance and repairs
- Impartial in-depth gear reviews
- Practical cruising tips for making the most of your time afloat
-
-


