Chris Mardon fabricates a removable wooden bunk headboard
Many new (and some not so new) yachts are not fitted with headboards to their bunks, probably to reduce manufacturing costs, writes Chris Mardon.
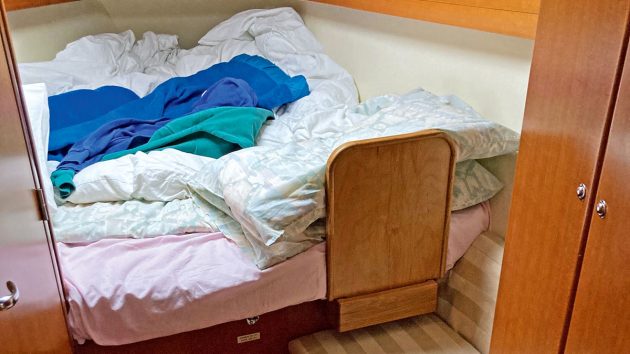
My wife has a convenient bulkhead to lean her head against but on my side of the bunk, the mattress ends with a sheer drop to the floor.
I’d been making do with a wedge of foam to stop my pillows falling off but it wasn’t very successful and it didn’t support my head when reading in bed.
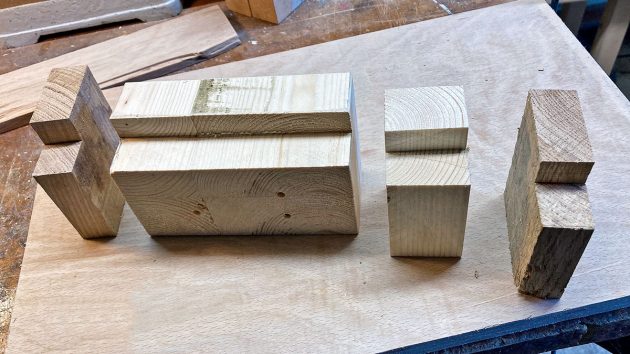
Components for the mounting bracket. Credit: Chris Mardon
With little else to occupy my mind on a cold winter’s night, I had a lightbulb moment when I suddenly realised the benefits that could be gained from having a headboard at the end of my side of the bunk.
I could find nothing online, so the only solution was to make my own.
But first I had to consider what features I wanted to include:
- Best made from wood
- Easily removable so it wouldn’t obstruct us from making the bed
- High and wide enough to support my head and pillows
- Strong enough to resist the high leverage load
- Must not obstruct access to the bunk nor to the under-bunk sail bin locker
- Should be easy to stow
The whole assembly comes in two parts, a headboard and a mounting bracket.
The mounting bracket had to hold the headboard 75mm aft from the bulkhead so it would clear the lip of the under-bunk stowage lid.
Anyone considering this project should choose a width and height that suits their own yacht’s dimensions.
With the help of scissors and sticky tape, I made a mock-up in cardboard which helped me decide on the most suitable dimensions.
Materials to make a headboard
I chose good quality 18mm WBP plywood to make the headboard.
I did consider using marine ply but the very minor difference in looks didn’t justify the extra cost.
For the mounting bracket, I used oak because it’s very strong, looks good and stays stable once properly dried.
The fact that I have a plentiful supply of oak in my woodshed might have influenced my choice but because its moisture content was higher than ideal I had to let it dry indoors before I could use it.
Any other hardwoods (teak, mahogany, iroko etc) would work well; the nearer it matches the interior wood of your yacht the better it’ll look.
Tools and glues
I used a bench saw, a chop saw, a band saw, a belt sander and a router to make this project but it could easily be made with fewer tools.
After the wood is cut to size it would only be necessary to drill, clamp and stick it all together, then sand the two components and varnish them.
Continues below…
Best boat varnish: 7 top options for gleaming woodwork
Few things are as quintessential to the archetypal sailboat as gleaming, iridescent woodwork that is indicative of a recent coat…
DIY bunk ladder for getting in and out of berths easily
Don Fitzroy Smith fashions cheap, light, easy to stow and make bunk ladder and headboards for getting in and out…
Boat berth upgrade: a cheap and simple way
Barry Pickthall makes a cheap and simple sleeping comfort upgrade - a double boat berth
I decided to use an expanding PU adhesive because it was on my shelf and superbly suited to this application.
PU expanding glues are excellent at gap filling but they must be clamped while setting or they could blow the joint apart.
They have about ½ hour working time before they start to cure.
Making the mounting bracket
Ensure the front and back wooden plates on either side of the slot in the bracket have their grain running parallel to the long edge of the slot (unlike me).
Use the same species and sources of wood.
To start with I used different species of wood with its grain running vertically which was an unsightly mistake.
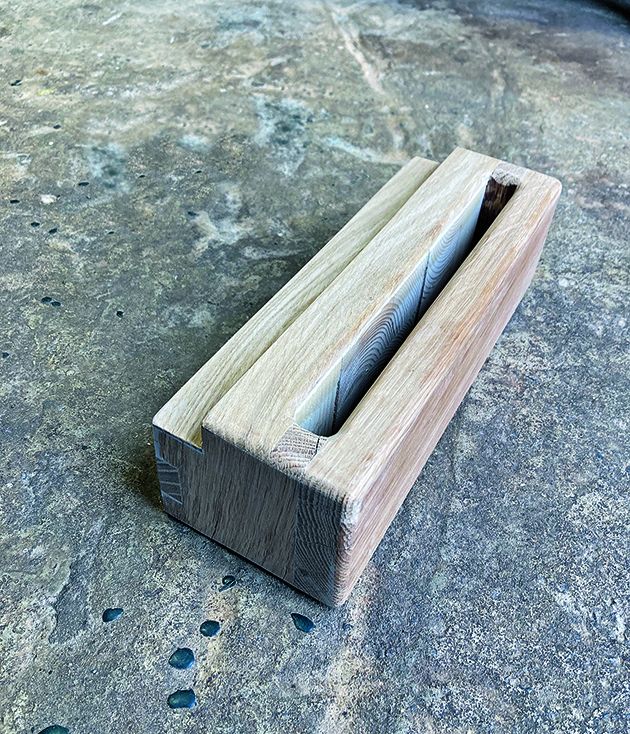
Finished mounting bracket with rounded edges and ready for varnishing. Credit: Chris Mardon
The rebated step in the bracket is to accommodate the bunk’s base board which is also the sail bin lid where it overhangs the bulkhead.
I fixed the front plate part of the mounting bracket to the two end plates with dowels and glue, which was neater and stronger than screws.
Once assembled I used a router to round off the corners.
Making the headboard
I cut the headboard plywood using my cardboard mock-up as a pattern.
I used a paint tin with a suitable radius to mark out the top two curved corners and sanded off the saw blade marks from the cut edges.
To cover the ugly cut edges of the ply I ripped off some strips of oak to 25 x 15mm section and rounded three of their four corner edges with my router.
The fourth edge would be a flush fit with the ply on the pillow side – I didn’t want a hard rib of oak digging into my head.
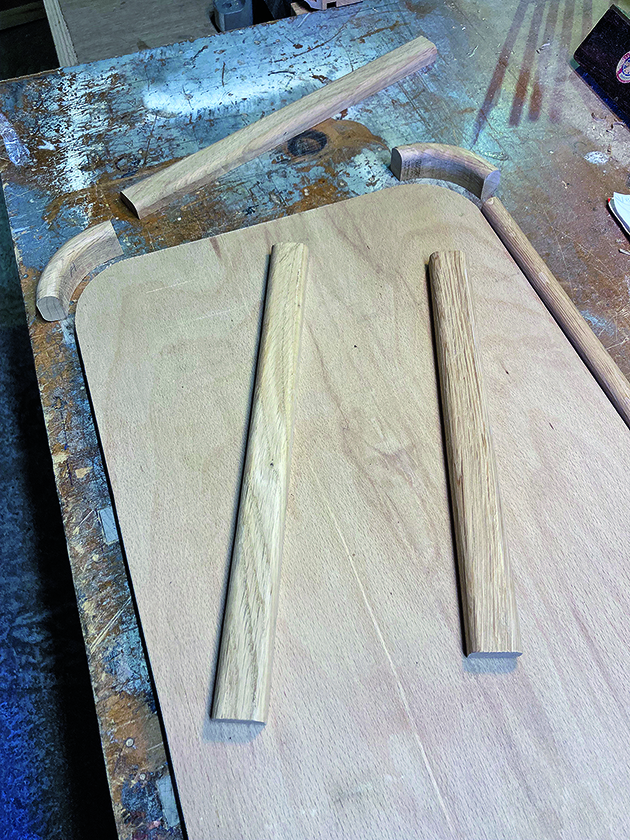
Plywood headboard and edging pieces ready for assembly. Credit: Chris Mardon
To make the two curved corner pieces I ripped some oak 100 x 25mm with its grain diagonal.
I used the curved corner of the headboard to mark the inside radius on the edge pieces which I cut out with my bandsaw so that the grain ran diagonally across the corner.
I got to work with my belt sander to remove the bandsaw marks, making good use of the sander’s end spool to get inside the corners.
If you don’t have the tools or the patience for this type of ply edging you can buy self-adhesive wood veneer with heat sensitive glue that you simply iron into place over the ply edges and then sand off the excess.
You could also simplify construction by having square or 45° corners on your headboard.
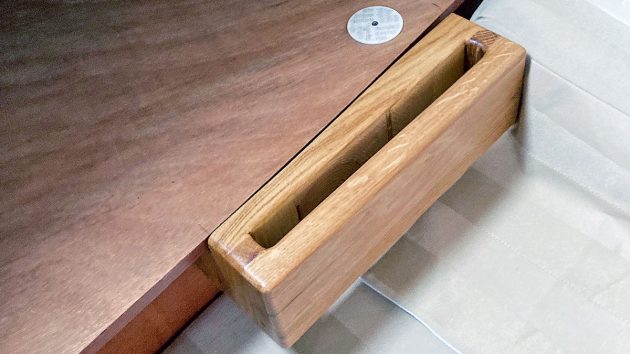
Mounting bracket screwed into place on the boat. Credit: Chris Mardon
I glued and clamped all the oak edging strips to the ply headboard.
The only gripes I have with expanding PU glue is that it froths out of the joints and has to be clamped and cleaned off afterwards which is a rather tedious and time consuming task – but the end result is worth it.
Masking off the areas adjacent to all glued joints would be a way of reducing tedious cleaning and sanding off excess glue after it has set.
I then cut out the bottom two corners of the headboard to form the tongue that was to fit into the mounting bracket’s slot.
The headboard doesn’t have to be central to the bracket – its position would depend on its best fit to the bunk.
Finishing
I gave it all three coats of varnish, then left it to cure for at least a week after the final coat to avoid any risk of the headboard and bracket sticking to each other when slotted together.
The mounting bracket is simply fixed with 2 x 60mm screws back through the plywood sail bin bulkhead.
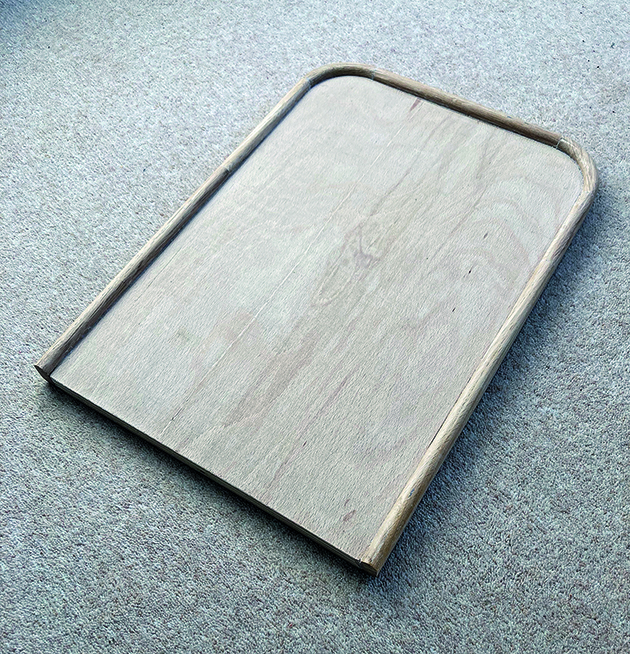
Completed headboard just needs base tab cut to fit into mounting bracket slot. Credit: Chris Mardon
I’ve used my new headboard on many occasions, easily lifting it out of its slot when making the bed and I have to say it has been a great success.
I can now prop my head up for reading, I don’t lose my pillows on the floor and I can get past it with ease.
I used an offcut from an old piece of 18mm plywood for the headboard and the solid oak was from offcuts (firewood) from a timber frame house manufacturer.
Glue and varnish were also from existing stock so my costs were virtually nil.
Enjoyed reading Making a headboard for comfier sleeping on board? 
A subscription to Practical Boat Owner magazine costs around 40% less than the cover price.
Print and digital editions are available through Magazines Direct – where you can also find the latest deals.
PBO is packed with information to help you get the most from boat ownership – whether sail or power.
-
-
-
- Take your DIY skills to the next level with trusted advice on boat maintenance and repairs
- Impartial in-depth gear reviews
- Practical cruising tips for making the most of your time afloat
-
-


