
Stu Davies shares useful maintenance tips on how to keep your 2-stroke and 4-stroke outboard motors running sweetly
Small outboards: we all have one to drive our dinghy. Simple, cheap to run, seemingly indestructible.
However, the 2-stroke outboard motor’s days are numbered with legislation stopping the sale of new ones in the UK and Europe nowadays.
They unfortunately are ‘dirty’ in terms of their exhaust, although I’d argue that in the grand scheme of things their contribution of exhaust fumes to our world is not that great.
But keeping them running and looking after them is relatively simple.
A little bit of history first, though.

The tool kit kept in Stu’s dinghy bag. Credit: Stu Davies
The British Seagull was the forerunner. A simple, robust and indestructible bit of kit, running on 16:1 2T mix (that was smoky!), you could drop it in the sea and it would come up for more after a quick swill with fresh water.
No fancy magnet effect ignition on these! Just an old-fashioned brass flywheel with magnets embedded in it and robust coils and a set of points to produce a spark.
The carburettor was simple, easy to dismantle and clean. However, it could be a cantankerous bit of kit with much winding of bits of rope and pulling to try and start it.
Much like the motorcycle industry, the market was overtaken by Japanese outboards and their derivatives.
They were more reliable and lighter – a big plus when the outboard was being transferred from the mother boat to the dinghy.
Advanced aluminium techniques and superior coils and magnets made them bulletproof.
They originally had points but the superior coil technology overcame some of the shortcomings which came with points.
Later, the engines were fitted with magnet effect ignition systems that did away with points and their reliability and ease of servicing increased.
The carburettors were cleverly designed so that instead of having internal passageways to address low throttle settings, they used the throttle slide needle to control fuel flow at idle and so avoided the issues we have today with idle jets and their orifices becoming clogged with ethanol-related issues.
Yamaha, Tohatsu and Mercury became collaborators and rumours spread of one factory producing all of the small engines and badge engineering them!
How to service an outboard engine: 2-stroke
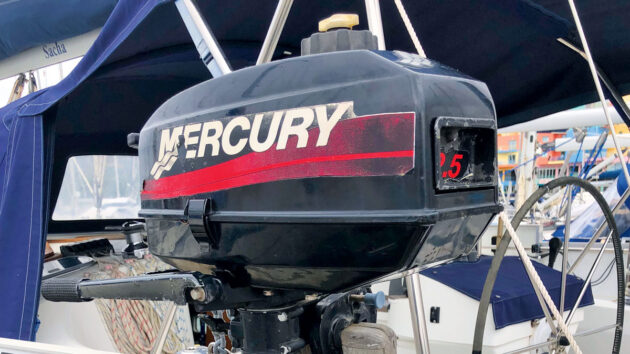
I have used my Mercury 2.5hp as the example for this article but the Tohatsu, Mariner and older Yamahas are almost the same.
If servicing other types of 2-stroke outboard, the general principles apply.

Outboard engine service: The top cover is removed, revealing the general layout of the two-stroke outboard engine. Credit: Stu Davies
Basically, there is the power head with a spark plug, a flywheel with a powerful trigger magnet and a coil that produces an impulse to fire the ignition coil.
The carburettor is a simple device as described above. The transmission is driven by a shaft from the engine power head to a right-angle gearbox which drives the raw seawater pump and propeller.

The flywheel coil can just be seen inside the flywheel. Credit: Stu Davies
The pump is usually behind the propeller but on some of the bigger engines, it is found above the lower gearbox housing – but it’s still driven by the shaft from the engine.
Servicing one of these engines is a spark plug check, a transmission oil level check, a water pump impeller check and a carburettor check, along with a bit of lubrication on the bearing surfaces on the thrust side of the leg.

Ignition coil driven by flywheel coil and magnetic sensor. Credit: Stu Davies
The zinc anode on the leg also needs to be visually checked. It is usually held on by a 6mm bolt.
How to service an outboard engine: 1. Plug Check
To check your spark plug, access it by dropping the inspection hatch as in the picture below, and using a purpose-made spark plug socket (they have a rubber insert to protect the ceramic insulator), undo the plug.
Don’t forget, righty tighty, lefty loosey!

Spark plug access hatch – just pull it down gently. Credit: Stu Davies
The cylinder head is aluminium, and the plug is steel, so be careful tightening it up so as not to strip the threads.
The picture of my spark plug (below) is a perfect example of a good plug, with a clean burn and no oily deposits.
I run my engine with a 50:1 mix, although at one time, the manufacturers used to recommend a 100:1 oil mix.
That recommendation gently disappeared, I suspect some customer problems helped with that! That plug is going back in for another season.

Access hatch with the spark plug lead off. Credit: Stu Davies
If your plug is oily or carboned up, it can be cleaned with a brass wire brush.
Some people say don’t wire brush them, I have done so for 60-plus years and have never had an issue after doing so.
Spark plug gaps and types varied slightly through the years.
I currently use an NGK BR5HS plug which suits my set-up perfectly.

The excellent colour of the spark plug indicates a good clean mixture. Credit: Stu Davies
Gapping the spark plug is part of the service and consists of placing a feeler gauge of the correct size, in my case 24 thousands of an inch, between the electrodes and gently tapping the bent electrode until it just grips the feeler gauge.
For us older ones, a Woodbine ciggy packet was just the right thickness.
How to service an outboard engine: 2. Transmission oil level check
The gearbox oil is a standard automotive hypoid gear oil and to check it, the top screw should be removed to the level shown in the picture below.
The bottom screw is to drain it and pump new oil in. It is the standard ‘remove two screws and pump it in till it overflows’.
The water pump on my engine is found behind a plate, behind the propeller.
To access the impeller, the prop is removed by pulling out the split pin and gently sliding it off the drive shaft.
The propeller is driven by a shear pin through the shaft which engages with a slot in the plastic prop, so be careful that it doesn’t slide out and drop into the sea.
Remove the pin and then with 10mm spanner heads, remove the two bolts; the plate will then slide off to reveal the impeller.
To gently remove the impeller, use a pair of thin-nosed pliers. There is also another pin through the drive shaft to drive the impeller – which is also a loose fit.
Transmission oil level check: step-by-step

Credit: Stu Davies
1. Gearbox oil fill. Top tip: hang a bucket underneath so you don’t lose parts or tools in the sea!

Credit: Stu Davies
2. To remove the propeller you’ll first need to straighten and pull out the split pin that secures it to the shaft.

Credit: Stu Davies
3. Prop off. Be careful not to drop the drive/shear pin that goes through the shaft and sits in the prop slot… I did!

Credit: Stu Davies
4. Now the prop is out of the way you can use a 10mm spanner to remove the water pump cover.

Credit: Stu Davies
5. With the two securing bolts removed the water pump cover can be slid off the prop shaft.

Credit: Stu Davies
6. Using a pair of needle nose pliers to withdraw the rubber pump impeller from its housing for inspection as part of the service on the outboard engine.

Credit: Stu Davies
7. The water pump impeller is driven by a pin through the shaft – don’t drop it!
How to service an outboard engine: 3. Water pump impeller check
The water pump impeller can then be checked. You can see mine, which has been in service for 10 years or so, has distorted.
This is caused by the impeller stopping with one of the vanes in the water transfer passage. However, there are no cracks or signs of wear.

Clean the seal at the back of the pump housing and pack it with waterproof grease to extend its life. Credit: Stu Davies
This will go back in until the new one I ordered arrives.
People used to change their impellers every year in both the outboard and the main engine.
I used to do that but after ending up with a pile of hardly used impellers in my ‘handy to keep bits’ I decided to use the tried and tested method of checking thoroughly and replacing when necessary.

Distorted old pump impeller. Credit: Stu Davies
I check by robustly bending the vanes and inspecting the roots for cracks or wear, I also check the faces of the vanes where they rub the water pump faces.
The metal bonding between the drive shaft and the rubber vanes is also carefully checked to make sure it hasn’t come adrift.
A top tip with water pumps is to clean the seal area at the back of the impeller, including where the seal spring is and fill it with silicone grease; this helps to lubricate it on a dry start.
The impeller blades can go back in any way, at the first turn of the engine they spring into position.
Be careful when reassembling, the two cover bolts only need nipping up. They break easily!
How to service an outboard engine: 4. Carburettor check
The carburettor needs to be drained after use and if the engine is being stored for an extended time.
The old way of turning the fuel tap off and running it dry is no longer valid in these days of ethanol blend fuel. The float bowl must be emptied.

Drain the carburettor after use. Credit: Stu Davies
The reason for this is that ethanol in petrol is hygroscopic, it absorbs water. If you run the carburettor dry it leaves a small amount of fuel in the float bowl.
This then evaporates and leaves a drop of water in the bowl, which reacts with the carburettor metals and causes jet-blocking gunge.

Base of carburettor looking upwards – use the drain screw to empty the float bowl. Credit: Stu Davies
The drain screw can be seen in the inset photo, top right on the opposite page.
To finish off, a light spray all over with WD40 containing lube oil or something similar, and a wipe with an oily rag will make it look good and help protect the finish of the paint.
Winter storage
If putting the engine away for the winter or long periods a simple regime to follow is as follows.
My engine is a direct-drive engine, so has no neutral gear. The bigger 3.5hp engines have a gear shift and can be placed in neutral. So on my engine, when it is running, the prop spins.
I remove the prop and place the engine leg in a bucket of fresh water.
The engine can then be started and run for a few minutes allowing fresh water to be circulated through the engine cooling passages.
A small amount of old-fashioned glycol-based antifreeze can be put in the bucket; this contains anti-corrosion products and will help to preserve the cooling system.
The fuel tap can then be switched off and the majority of fuel in the carburettor will burn off.
Next, remove the drain screw in the carburettor float bowl to let it drain completely.
In the olden days, ‘fogging oils’ were available to lube the engine for winter storage but my personal view is that today’s hi-tech 2-stroke oils are so good that this isn’t necessary.
The engine stays lubed for prolonged periods.
How to service an outboard engine: 4-stroke outboards
These are now the only outboards available from new and they’re basically the same as 2-strokes from the point of view of servicing plugs, the gearbox transmission and the ignition system.
However, the carburettors are a different kettle of fish with internal pilot jet orifices and jets that can become easily blocked if care is not taken with their fuel supply.
I recommend that the more expensive fuels are used and that the fuel is kept scrupulously clean.

Rubbing some lube on the thrust collar. Credit: Stu Davies
They’re heavier than 2-stroke outboards, a factor that needs to be taken into account when older owners, such as myself, are transferring them from the boat to the dinghy.
They have mechanical air intake and exhaust valves which have to be checked as part of regular maintenance and of course, 4-stroke engines have an oil sump which has to be dealt with when transporting them on their side.
If you lay them on their wrong side, the crankcase breather allows the oil to trickle into the inlet manifold and then into the cylinder.
Hydro locking then occurs and the spark plug has to be removed to expel the oil.
They can be vicious if the pull start isn’t done correctly; a nasty rap on the knuckles from the tee piece can easily occur!
Servicing and winterising a 4-stroke are similar to a 2-stroke except the valve clearances have to be checked now and again, and the engine oil changed yearly.
Most small outboards can be serviced by a competent boat owner, but for any differences in a servicing regime check your engine handbook.
Continues below…

How to troubleshoot an outboard engine – video guide
This is our guide to basic outboard troubleshooting for a small petrol four-stroke outboard engine. If you’ve got a problem…

Seized outboard engine – how to bring a Mariner 2hp back to life
The trouble began when I bought a rowing dinghy to use as a tender instead of a borrowed sailing club…

Petrol or diesel, inboard or outboard: which boat engine is best?
When it comes to a boat engine, which is best? Petrol or diesel, inboard or outboard? Stu Davies answers your…

How to choose the right electric outboard engine
Marine electrician Jamie Marley explains what you should look out for when choosing an electric outboard engine for your type…
Want to know more about boat maintenance?

A subscription to Practical Boat Owner magazine costs around 40% less than the cover price.
Print and digital editions are available through Magazines Direct – where you can also find the latest deals.
PBO is packed with information to help you get the most from boat ownership – whether sail or power.
-
-
-
- Take your DIY skills to the next level with trusted advice on boat maintenance and repairs
- Impartial in-depth gear reviews
- Practical cruising tips for making the most of your time afloat
-
-
Follow us on Facebook, Instagram, TikTok and Twitter