
In preparation for an extended voyage, Kerry and Fraser Buchanan replace all below waterline through-hulls with composite fittings

How to replace ageing through-hull fittings
Usually my husband Fraser and I sail our 1984 Maurice Griffiths-designed Barbican 33 Barberry around the coasts of Ireland and Scotland, but in preparation for a more challenging journey, the boat needed to be upgraded.
One of the last jobs on the list was the replacement of all below-waterline through-hull fittings.
Barberry’s appeared to be original, or at least very old. They were of good quality bronze, and there was no sign of ‘pinking’ visible, but as we were planning to set off on a long voyage, and as there could be all sorts of degradation going on where we could not inspect, we decided we’d sleep better if we replaced them.
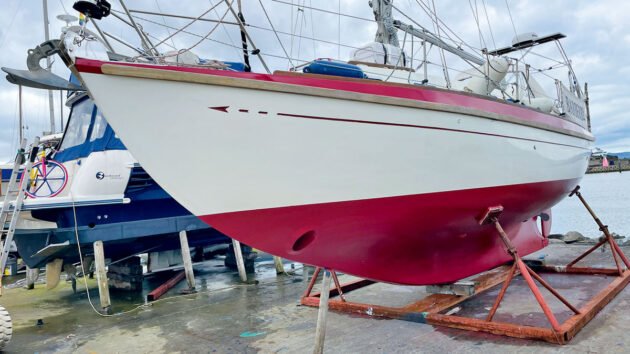
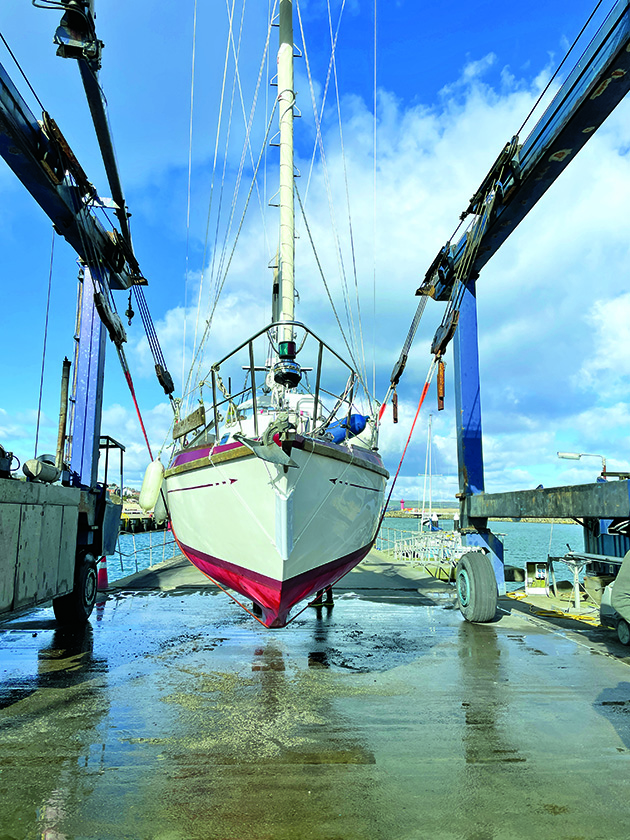
In preparation for extended cruising, Barberry needed to be upgraded. Credit: Kerry Buchanan
Once that decision was made, the debate began about what type to replace them with.
Fraser is a retired professor of materials engineering (albeit medical materials involving implants), so he applied decades of research into hip joint replacement materials, where the object is to find one that gives 20-plus years of useful life in a body (in this case, a body of salt water, but the principle is the same).
Composite through-hull fittings
One option was to replace like with like. That was our first intention, but Fraser was concerned that modern bronze might not be of the same quality as the original bronze through-hull fittings, and it seemed difficult to find information on the exact composition of bronze fittings currently available.
In addition to that, metal fittings are potentially vulnerable to electrolytic or galvanic corrosion.
We had read about composite through-hull fittings, and these looked attractive.
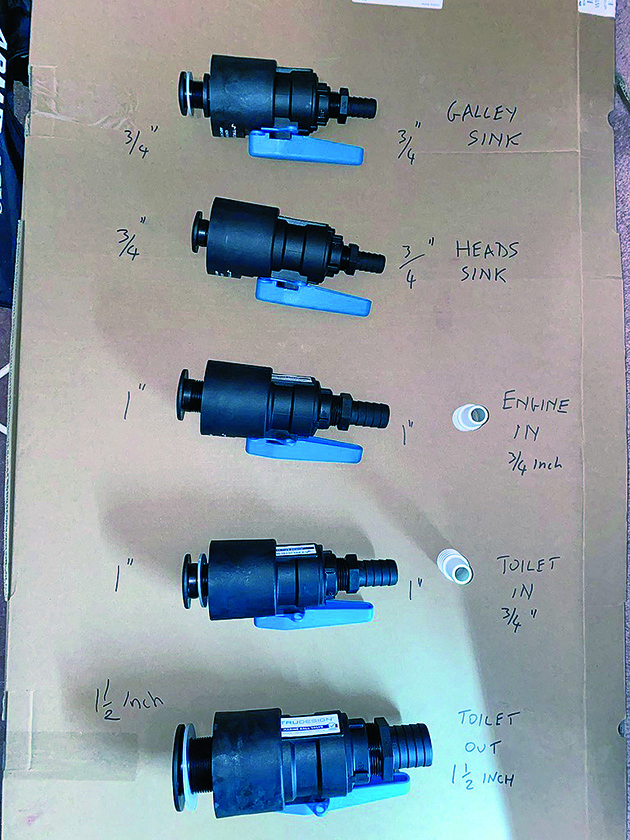
New TruDesign fittings with sizes, ready to go. Credit: Kerry Buchanan
My concern was plastic becoming brittle with age, but Fraser assured me that these were not plastic but glassfibre nylon composites, not dissimilar to Barberry’s own hull construction.
Also, these fittings will be below the waterline and therefore not subject to much UV light, which is a major cause of degradation in plastics.
When he showed me the difference in cost between the composite fittings and modern bronze (or bronze-ish) fittings, I was finally convinced.
Advantages of composite through-hull fittings
- Lightweight.
- Compatible with all hull construction types up to 100mm thickness
- Immune to electrolytic and galvanic corrosion, which is a significant worry now we’re all packing our boats with so many electrical gizmos.
- Resistant to damage by chemicals, eg diesel, petrol and antifoul, so they can be painted and coated with antifoul
- UV-resistant
- Cheaper than good quality bronze fittings
- Theoretically lasts the boat’s lifetime
Disadvantages
- A bit chunkier than their bronze counterparts, which can make fitting them in tight spaces challenging
- More expensive than the cheap brass through-hull fittings often fitted to new boats (although these can have limited life expectancy and, according to the Recreational Craft Directive should be replaced every five years)
Tools and materials needed to replace through-hull fittings
- Multitool with blades for both metal and wood
- Large screwdrivers, hammer, pliers, spanners, hacksaw, and a large steel rod for leverage
- Gloves
- Eye and face protection
- A partner to hold and rotate the outer dome fitting while you adjust which orientation enables the valve lever to move fully – although there is apparently a tool you can buy from Tru Design that it claims allows the job to be done single-handed
- Plywood and epoxy if needed to provide a flush surface inside the hull for fixing
- Hose clips (two for each fitting)
- Wooden bungs, drilled for a piece of string and attached near each through-hull in case of failure once the boat is relaunched. Also, a hammer placed where everyone can find it in an emergency, to knock the bung into the hole
- New through-hull fittings
- Sikaflex 291i and gun
We chose Tru Design fittings, designed and manufactured in New Zealand. They have been around for long enough now that if there were any major problems, the forums would be sending up smoke signals.
In fact, I found it hard to find any bad reviews for these composite through-hull fittings.
Preparations for replacing through-hull fittings
We awoke early on Barberry’s scheduled lift-out day to find the ground and car covered in inches of snow.
Luckily it wasn’t windy, and as it turned out the snow was strictly local so when we parked our mobile igloo at the boat yard (10 minutes down the road from our house), everyone gave us strange looks.
Barberry was lifted out on schedule by the ever-dependable Johnny from BJ Marine.
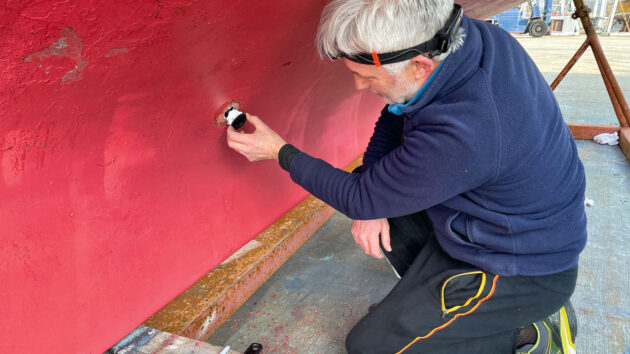
It was time for all our last-minute preparations, such as sanding and antifouling the hull, replacing anodes, repainting her red go-faster stripe (we need all the help we can get), cleaning, lightly sanding, and oiling her teak rubbing strake, etc, so this was the ideal time to replace the through-hull fittings.
1. Removing old through-hull fittings
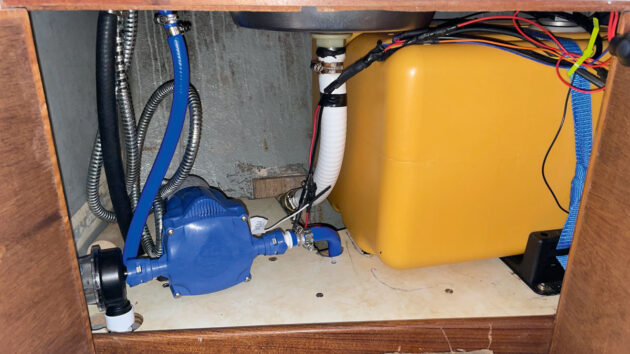
The five skin fittings we replaced were the galley sink drain (just below the waterline), difficult to access inside the boat because it’s at the back of a small cupboard under the galley sink; the engine intake (horribly inaccessible down under the hull from the outside and at full arm’s reach from inside); the heads water intake, also hard to get to from outside but not quite as bad from inside; the heads sink drain, which is wedged up against the holding tank Fraser fitted a couple of seasons ago; finally the heads outlet, which is the biggest of the fittings and also in a very tight area inside the boat.
Fraser had researched the job thoroughly as well as watched numerous YouTube videos.
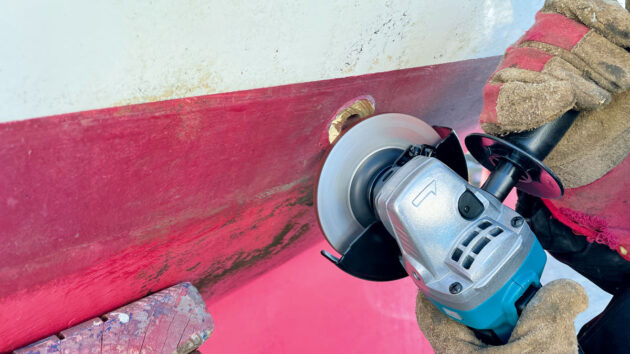
Using an angle grinder on the brass fittings outer lip until it could be freed. Credit: Kerry Buchanan
The plan was to use an angle grinder on the outer lip of the brass through-hull fittings until they could be freed from the section that passes through the hull.
The danger with this technique is that you could very easily damage the GRP of the hull with a moment’s inattention.
The first one he attempted was for the galley sink drain, which exits the hull only just under the waterline.
It was a nice, smallish, easily accessible one to start with and not too tough on the back.
The angle grinder worked beautifully, revealing pristine bronze all the way through.
2. Alternative technique
Fraser had barely begun when our friend, Brian, turned up. The sound of an angle grinder or drill invariably attracts him, because he can’t bear the thought of someone else drilling holes in boats, his own favourite occupation.
Brian has replaced many through-hull fittings over the decades, and his advice was to leave the outer lip nicely stuck to the hull with whatever sealant was used 40 years ago, and use that to lock the component, allowing you to use leverage on the inside to simply unscrew all fittings.
Grinding out the old fittings. Credit: Kerry Buchanan
With that done, you can insert a heavy-duty screwdriver or bar and lever the outer skin fitting until the seal breaks down and it pops out neatly. Fraser put down the angle grinder, somewhat regretfully, and disappeared up the ladder into the boat to try Brian’s method.
A third alternative recommended by another acquaintance is to hammer in a wooden bung, cut it off flush with the hull, and then use a hole cutter to cut out the entire thing, especially if upgrading to a bigger fitting, but we didn’t have the kit for that and it felt like overkill for the job in hand.
We had five through-hull fittings to work on and we found that both methods work.
Mole grips to lever out the old fitting. Credit: Kerry Buchanan
I recommend trying the Brian technique first, but if the fitting is in an awkward place to reach, or is seized, angle grinding from the outside works extremely well.
Three of the fittings were removable from the inside, although a huge amount of leverage was required to free up the seized screw fittings.
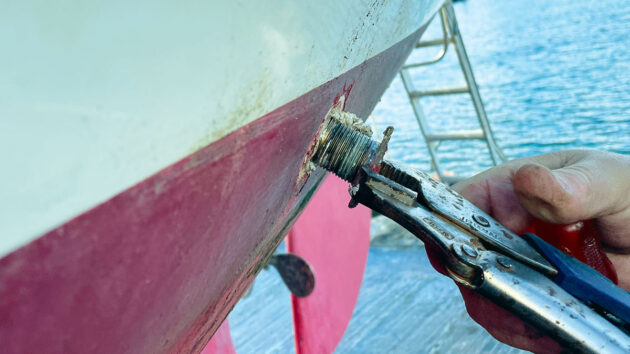
In the case of the engine intake, deep in the bilges and at full reach for Fraser lying on his stomach in the confined space, he ended up having to cut through the nut and part of the fitting to release its grip.
The other two were removed by grinding away the outer part of the domed skin fitting first.
3. Why, oh why did we bother?
The heads intake needed Fraser’s body weight standing on a long spanner to loosen the fitting from the hull once the nut had been removed.
He was seriously concerned that the hull might give way before the fitting did.
He said he was glad this boat is so solidly laid up because, with a more modern boat, the glassfibre hull might have given up the ghost first.
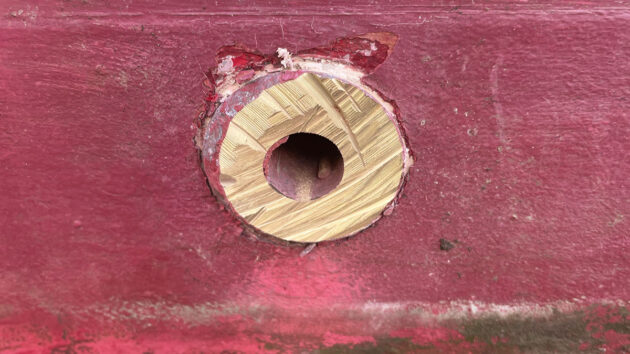
It’s only once the fittings are removed via destruction that any corrosion (or not!) can be detected. Credit: Kerry Buchanan
They built them to last in the old days.
After removal, none of the through-hull fittings showed any obvious signs of corrosion.
No sign of pinking or pitting, extremely heavy, the metal still as thick as the day they were originally fitted, almost 40 years ago.
It’s an interesting comparison to some more modern boats, where the owners have found significant corrosion or thinning in some parts of the fittings after a relatively short time (less than 10 years).
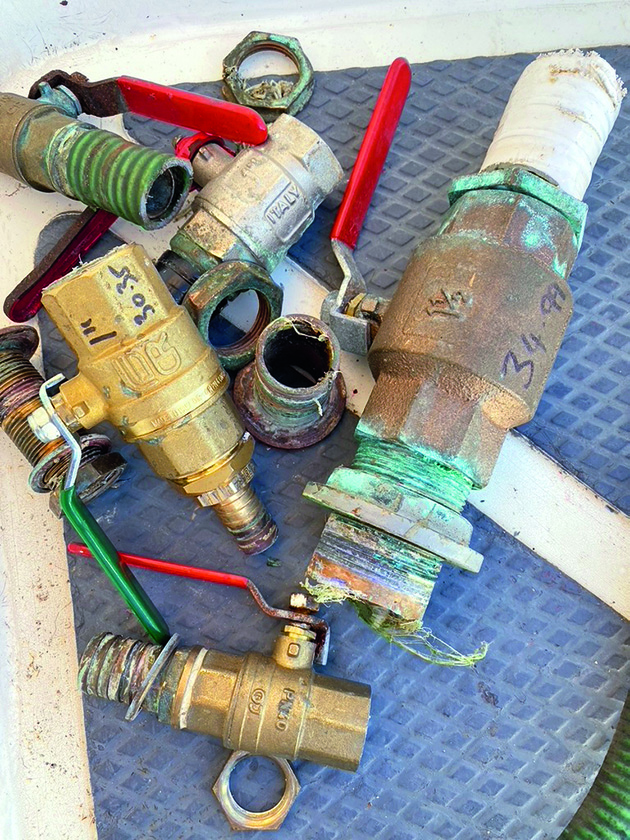
Old seacocks showed no signs of deterioration. Credit: Kerry Buchanan
Through-hull fittings were traditionally made from bronze, which lasts incredibly well in seawater, and Barberry’s fittings were clearly made of excellent quality bronze.
However, there’s been a trend over the last few decades, presumably for reasons of price related to the cost of tin, to use brass instead of either DZR bronze (dezincification-resistant bronze) or traditional bronze fittings in new boats.
They look much the same to the naked eye, but there’s a world of difference between the different alloys.
Bronze is an alloy of copper and tin; brass is an alloy of copper and zinc.
What do we commonly use for our sacrificial anodes? Zinc.
I’m not even going to begin to talk about the risks from stray electrical currents in marinas and the arguments for and against the installation of a galvanic isolator when you’re using shore power.
That’s an entire article on its own.
4. Backing plate preparation
With all the old through-hull fittings removed, Fraser had to re-seat some of the plywood backing plates, which were all in perfect condition but three out of the five had not been bonded in any way to the hull.
He seated them on a layer of Sikaflex, holding them in place until it set using a homemade clamp consisting of a couple of bits of old timber, a long bolt and yours truly on the outside, holding it all steady and complaining loudly about the cold (although he says he couldn’t hear me through the thick hull).
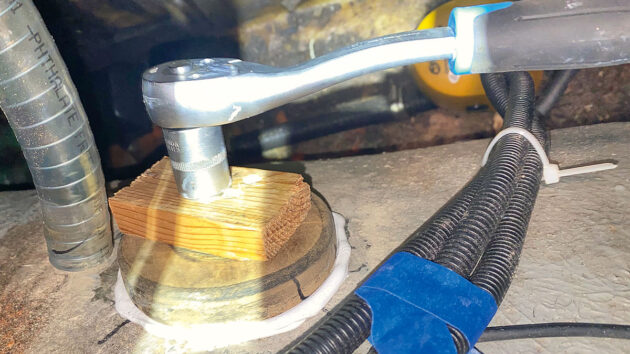
Re-seating ply backing plates. Credit: Kerry Buchanan
Two of the newer-looking backing plates had been bonded to the hull, and we’re guessing that these might have been changed at some stage of the boat’s life as the sealant used resembled Sikaflex whereas the other three had been sealed in place using a type of caulking material.
5. Dry fitting the new through-hull fittings
Once the Sikaflex had set, we started dry fitting the Tru Design replacements.
Because there’s restricted space inside the nether regions of most boats, there’s a risk that the fitting could end up placed in such a way that the lever cannot be turned.
Mark on hull to line up with fitting mark. Credit: Kerry Buchanan
For that reason, we made a mark on the exterior domed fitting so we could line it up with a second mark on the hull once we’d tested the setup as a dry fit (trying to leave some allowance for the thickness of sealant).
6. Marking and fitting
Most of the through-hull fittings lined up quite easily, except for the last one, which is in a particularly tight space next to the holding tank.
By then the cold and exhaustion had got to both of us and Fraser’s shouted directions of, “It needs to turn roughly(!) 110° clockwise,” became harder to interpret – 110° clockwise for him was 110° anticlockwise for me, but I was bent double at the time, mostly underneath the boat, and angles were more guesswork than geometry.
Besides, I’d forgotten my reading glasses, so from close up the whole thing was a blur.
7. Sealing
The next step, having made my mark on the hull (in that one case, multiple marks), we set about applying Sikaflex to the neck of the fitting that would pass through the hull, ready to receive its backing nut and the valve.
By then, both our hands were a bit shaky with tiredness and the cold, but the weather forecast for the next few days was awful, so we soldiered on.
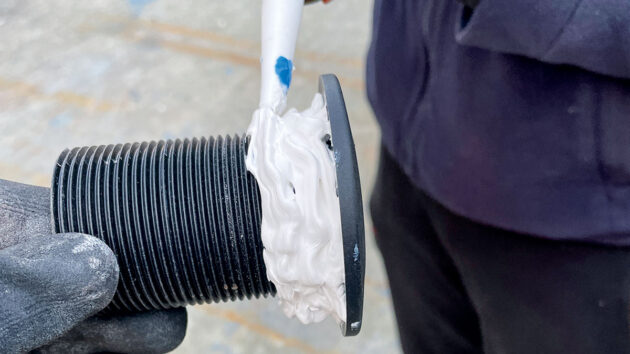
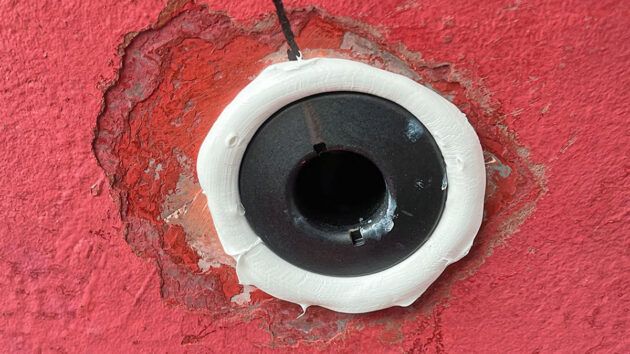
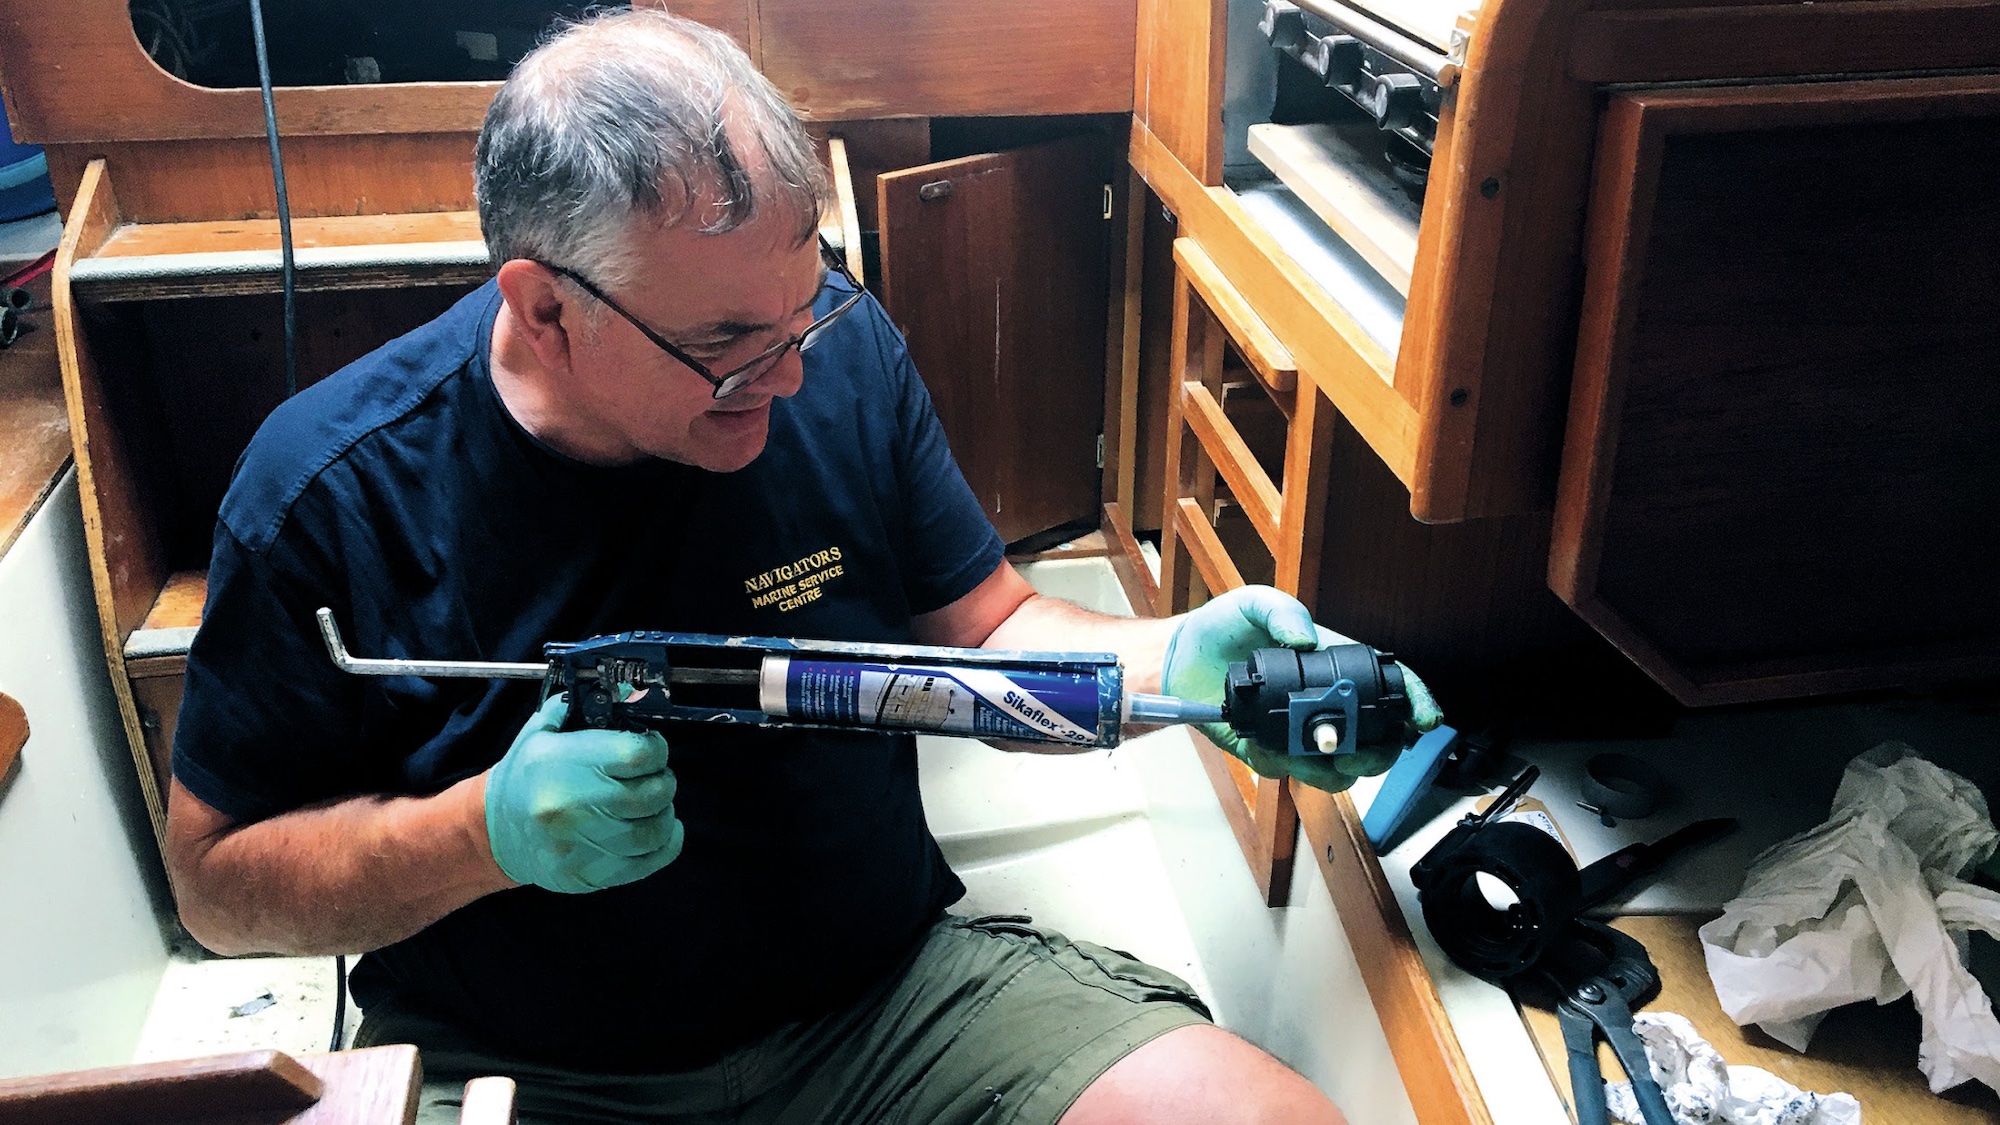
Contrasting coloured Sikaflex applied to fitting neck…
It helps to have one person slowly rotate the fitting while the other person applies the Sikaflex in a steady stream for uniform coverage.
By close of play that second day, (or rather day-and-a-half since the first day had only been a few hours after lift-out) we had all the outer fittings Sikaflexed into place.
…ready to receive its locking nut and valve. Credit: Kerry Buchanan
We were the last people in the yard, as everyone else had long ago given up and gone home for the day.
Note: Some of the inner threaded sections of the Tru Design domed skin fittings needed to be adjusted in length to fit in correctly.
This was done with a hacksaw, taking care not to damage the thread.
8. Final touches
On Day 3, with the Sikaflex setting nicely despite the cold, Fraser attempted to turn the nut one last time, as directed by Tru Design.
However, in two of the five, the sealant was well and truly set (we used a lot!) so he didn’t manage it.
Also, he painted all the plywood backing plates with bilge paint to protect them from any water that might reach them before screwing the valves into place and replacing the hoses, securing each one with doubled-up hose clamps.
9. Load-bearing collars
We purchased load-bearing collars with all our through-hull fittings, because although Tru Design fittings are certified to ISO 9093-2 without the collars, it felt the safest decision to make.
In order to satisfy US ABYC H-27 compliance, the collars need to be fitted.
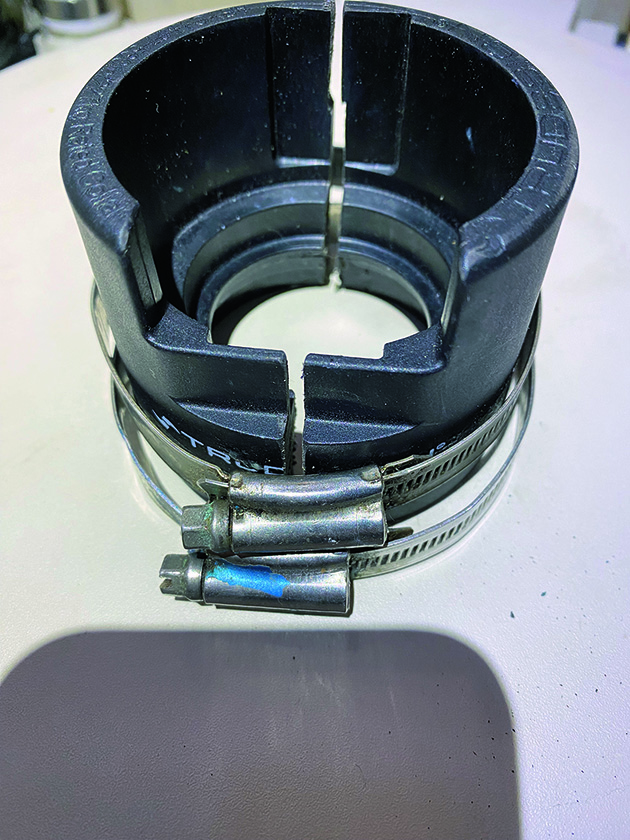
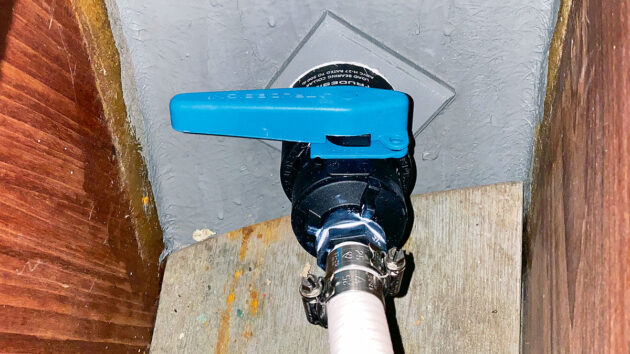
Ready to fit – split collar and hose clamps. Credit: Kerry Buchanan
The composite collars fit inside the hull, adding extra support to the valve fittings.
The only one that presented a challenge to fitting the collar was the heads sink drain, our smallest fitting at ¾in.
Access to this was difficult, and it was too close to the holding tank to be fitted conventionally, but Fraser decided that even if he had to split the collar and secure it with oversized hose clamps, it would still be stronger than with no collar at all.
Space challenge
The load-bearing collar was therefore split in order to be fitted into the cramped space around the holding tank.
A shelf required trimming next to holding tank. Credit: Kerry Buchanan
In some cases, removing the handle and then refitting it once the seacock is screwed into position can work, but this didn’t seem likely in our case as the space was severely limited.
Although the new composite fittings on the whole replaced the original bronze ones like for like, they are chunkier, which made fitting fiddly at times.
Conclusion
We could probably have left all our through-hull fittings in place for another 40 years without endangering the boat, but unfortunately, we only knew that after we destroyed them during removal and found them in as-new condition.
The reality could have been very different.
Fittings in place, double hose clamped. Credit: Kerry Buchanan
Even though there was no evidence of pinking or pitting, the corrosion could have been in a part of the valve impossible to inspect without removing the fitting.
Like most boat owners, we keep a correctly sized bung by every seacock and have a hammer readily accessible in case of emergencies to push the bung into place, but I think we both slept better on the long journey we had ahead knowing the fittings have all been replaced with composite Tru Design ones.
Tips and Tricks for replacing through-hull fittings
- To grind away the outer dome fittings, use a small angle grinder (115mm) to reduce risk of hull damage and help keep control
- When working on the underside of the hull in awkward positions, get a little seat to sit on, piling on the personal protective equipment (PPE), but remember reading glasses under goggles where appropriate
- Have a second person to rotate the dome fitting while you apply the Sikaflex before final fitting. Much less messy
- Apply Sikaflex to the male threaded component, the part that goes from the outside of the hull to the inside, rather than to the inner valve as the latter method can result in excess Sikaflex blocking the tube and it’s quite hard to push it through to clear the tube afterwards. Of course, this depends if it’s accessible or not!
- Check that the entire through-hull fitting is clear of sealant
- Contrasting coloured Sikaflex is recommended (white in our case against black fittings) rather than matching the colour. This makes it much easier to see where you have applied it.
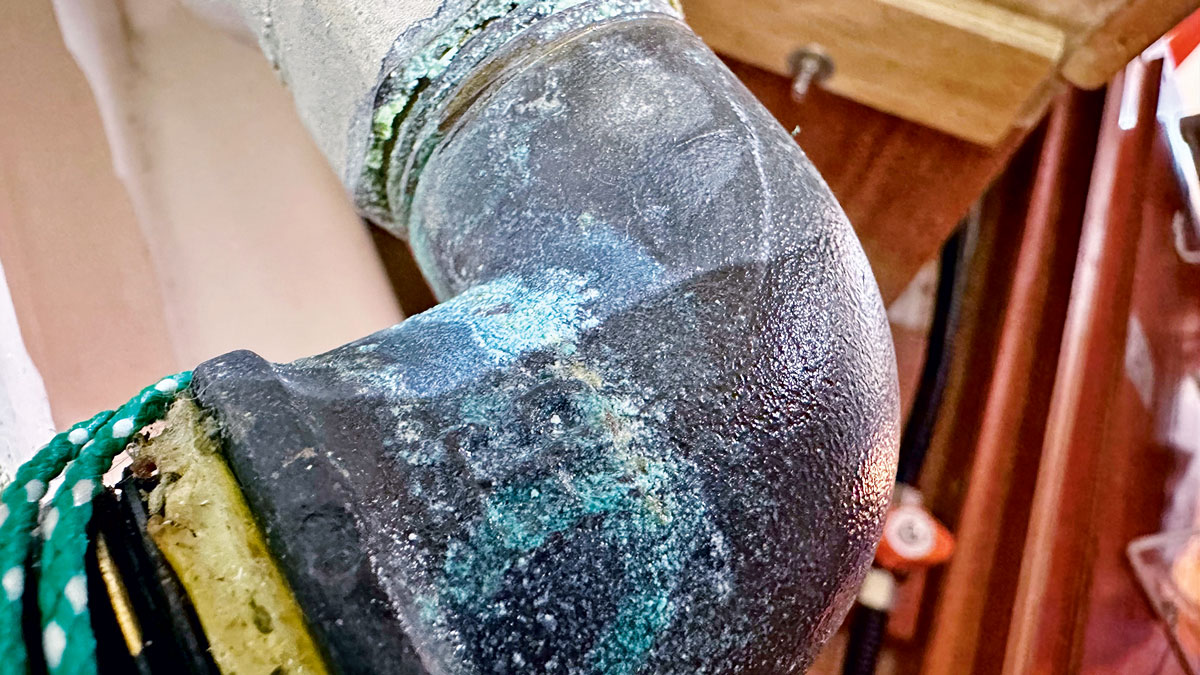
Why is there a film on the seacocks?
PBO reader Camilla Ransom has found a "strange film" on one of the boat's seacocks. What should she do? Surveyor…
Fitting new seacocks and skin fittings on the PBO Project Boat
Maximus, our PBO Project Boat, had four seacock fittings that need changing – three ball valves in the forepeak (1…

How to find the best boat insurance
Boat insurance costs are rising but you can still get the right cover for your kind of cruising if you…

How to get more life out of sailboat lines: step-by-step
Dena Hankins shares how to make your running rigging last that little bit longer
Did you enjoy reading How to replace ageing through-hull fittings?

A subscription to Practical Boat Owner magazine costs around 40% less than the cover price.
Print and digital editions are available through Magazines Direct – where you can also find the latest deals.
PBO is packed with information to help you get the most from boat ownership – whether sail or power.
-
-
-
- Take your DIY skills to the next level with trusted advice on boat maintenance and repairs
- Impartial in-depth gear reviews
- Practical cruising tips for making the most of your time afloat
-
-
Follow us on Facebook, Instagram, TikTok and Twitter