
You’ve replaced your impeller, but the engine’s still not pumping cooling water as it should. Jake Frith recommends chemical backflushing

Backflushing an outboard motor: step-by-step
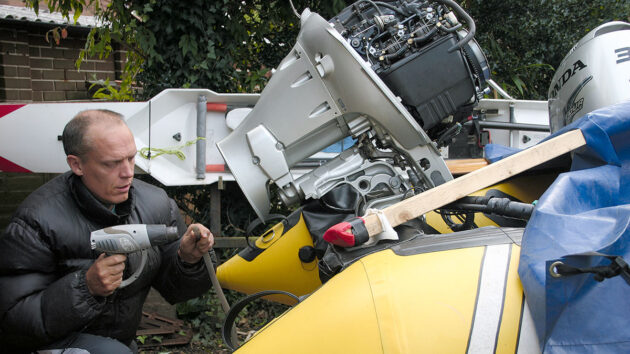
I recently bought an inflatable with a 30hp four-stroke Honda on the back.
It’s a nice outboard engine that’s clearly seen little use, but I noted on the first outing that the telltale was dripping rather than squirting water as it should, and it seemed to be running a bit warm for my liking too: so I shut it off and retired to the workshop before things got even more expensive.
Of course, the first move in a case like this is to replace the rubber impeller and, in the case of all but the smallest engines, check the impeller housing liner too. (Most engines above about 10hp have a replaceable impeller housing in case it becomes scored by ingested detritus or a damaged impeller).
The impeller looked fine: you’re principally checking for missing vanes or the rubber part turning independently of its metal centre.
However, impellers can appear fine, even to expert inspection, but age can reduce their flexibility, springiness and therefore pumping efficiency just enough to cause problems.
With all this in mind, I replaced the impeller with a full service kit that included the impeller, housing liner and shaft key.
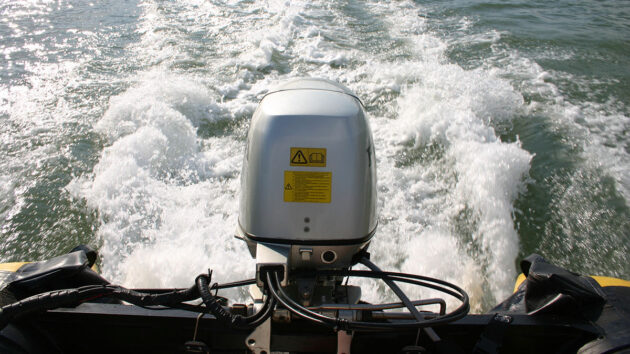
This engine, while in visibly clean condition, was getting hot and not pumping more than a trickle out of its telltale, even here at half throttle. Credit: Jake Frith
This work ruled out the impeller as the problem, as putting the lower unit back on and running the engine resulted in the same dispiriting trickle from the telltale.
It was an expensive way not to fix a problem, but at least we were moving in the right direction and ruling the most likely things out first.
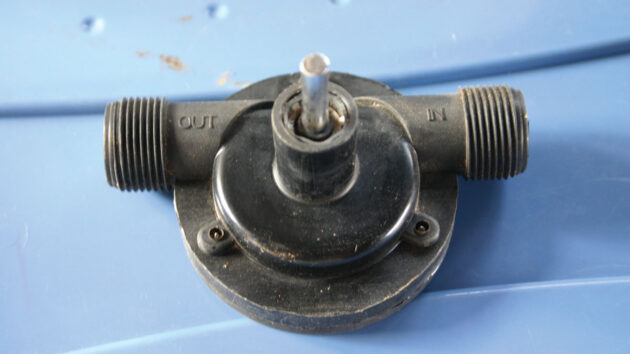
Moving on from the obvious to the slightly less so, almost all engines will have a thermostat to reduce the flow of cooling water until full operating temperature is
reached.
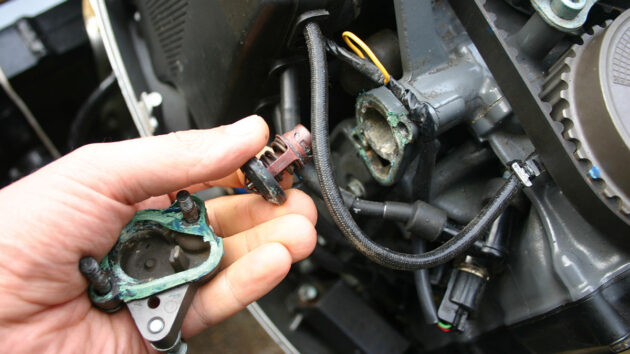
It’s a five-minute job to remove the thermostat from its housing and perform a basic test of the part.
It’s also good to check the thermostat and housing for deposits and clean out as much as possible while you’re at it.
To test it properly you need a thermometer and need to know the temperature the thermostat should open at, which is normally marked on it somewhere.
The test consists of simply heating it up in a jug on the stove and observing that it opens at the right temperature.
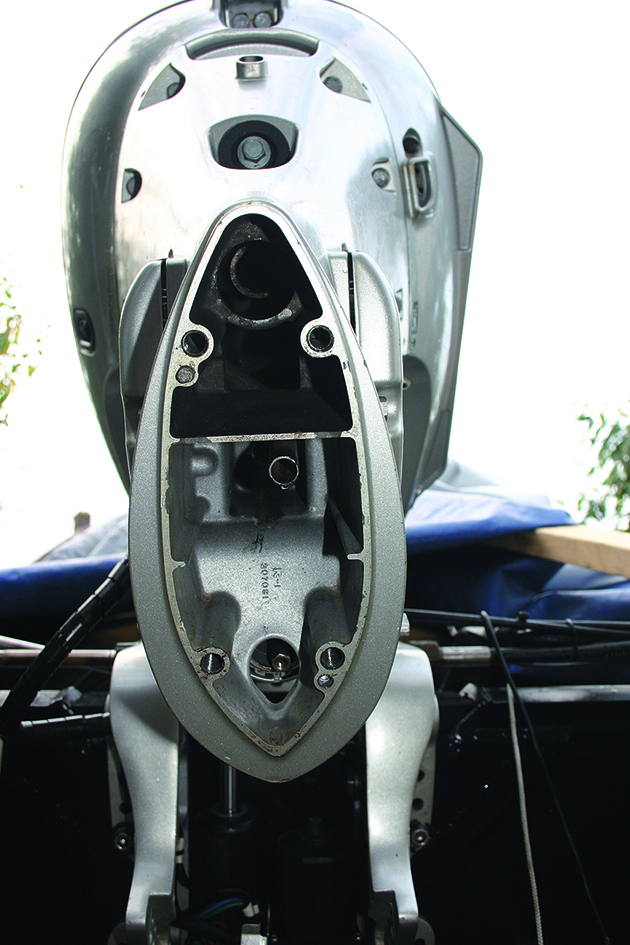
An early step should always be to remove any parts of the cooling circuit that will allow access and mechanically clean and dig out as much scale as you can. My engine has this removable plate under the thermostat housing, although there was not much in the way of blockages in the galleries behind it. Credit: Jake Frith
A quicker test, which I performed here, is to chuck it in boiling water and see if it opens, which tells you enough most of the time.
It’s fairly rare for a thermostat to open at the wrong temperature: it’s a simple part that usually works or doesn’t.
For the sake of my diagnostic job, I could be fairly sure that the part was fine when it passed the boiling water test.
Further to this, though, I replaced the housing and ran the engine without the thermostat, and it displayed the same issues – thus ruling out this component as the culprit.
Many engines, mine included, have plates that can be removed to access parts of the cooling circuit.
Behind the thermostat housing sits such a plate on my engine.
Removing it showed very little corrosion, salt or other blockages inside, but what was there I cleaned up.
A common issue with outboards that are used infrequently or have been neglected is that the impeller dries out, sticks in its housing and disintegrates upon start-up, sending bits of itself into the waterways of the powerhead.
It’s crucial in these situations that the bits of impeller vane are all counted back out again, but it’s unfortunately common that some owners stick on a new impeller and hope for the best.
There was no such errant impeller vane jammed behind the inspection plate as I was hoping for, so it was out with the big guns and time to backflush.
Backflushing the outboard
The principle is a simple one. An engine spends its life circulating water (and all sorts of other unwanted rubbish) in the same direction.
Any elbows or corners that catch detritus, or slow the flow enough to encourage deposition of circulating solids in suspension, will remain corners or elbows to that incessant flow in the same direction, slowing the flow and attracting more crud.
If you can get a flow going the ‘wrong’ way for a bit, then there is a chance you will dislodge any moveable obstruction.
If you flush with an acid that will eat away at mineral deposits, or hot acid which will react faster and more strongly (so I hoped), it might be enough to remove
sufficient material to fix such a flow problem.
Starting the backflushing process
Poor cooling flow is most usually due to a damaged or worn impeller!
Once I had ascertained that it was not the impeller by replacing it and retesting the engine, I was able to begin preparing the engine for the backflush.
Because of this, I’d had the lower unit off only days before to do the impeller.
NOTE: At no point during this whole process do we start, turn over or run the engine.
Credit: Jake Frith
1. I first removed the lower unit. (Follow the workshop manual for your specific engine, or ask someone trustworthy on an online outboards forum how to do it). I was then able to locate the impeller tube – roughly in the middle of the leg. This is where the water will jet out from.
Credit: Jake Frith
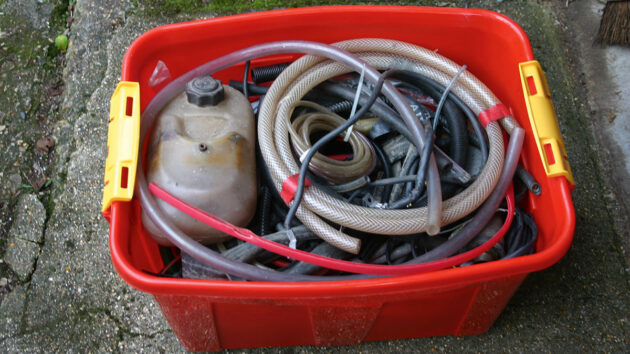
2. If you’re anything like me you’ll have multiple boxes of roughly organised consumables collected from projects over several decades. This one contains various flexible pipes and pipe-related paraphernalia, without which this job could have been expensive.
Credit: Jake Frith
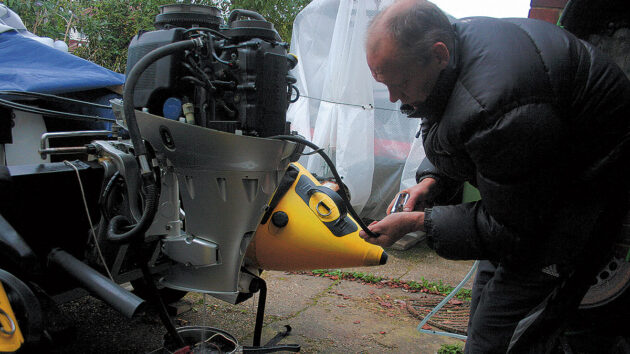
3. For making various sizes of rubber and plastic pipes fit each other snugly, a heat gun was invaluable to soften them up a bit. I also needed various short lengths of metal tubing of different sizes and hose clips to cobble the system all together.
Credit: Jake Frith
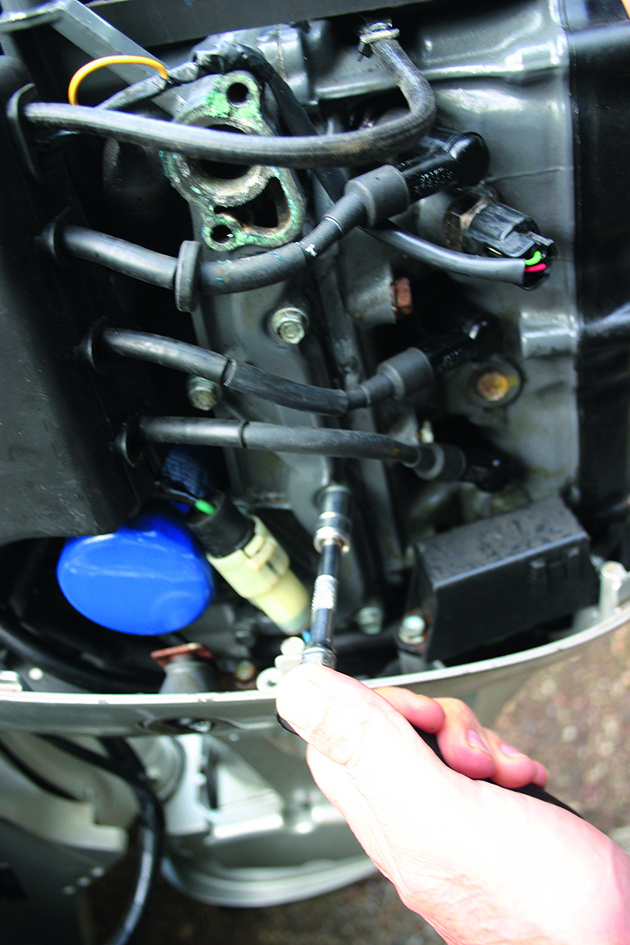
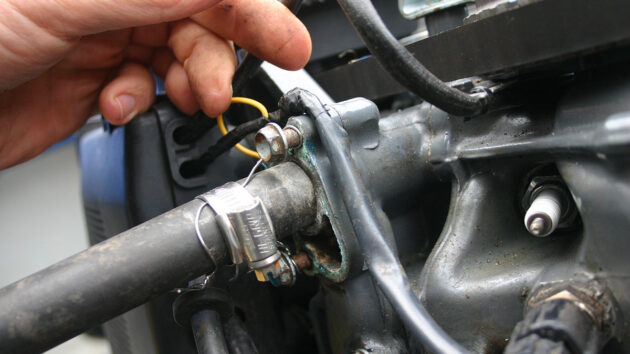
4. With the engine cowl off I then located the thermostat housing on the powerhead and removed the thermostat from within. This would be the point on the engine where I would pump in the descaling fluid, so I needed as leak-free a join as I could get here.
Credit: Jake Frith
5. I found a rubber pipe that exactly jammed into the thermostat housing without having to seal it with rags, plumbers’ tape etc. I also used a hose clip and little stirrups cut out of Monel wire looped round the housing bolts to hold the pipe in place in a belt-and-braces approach.

Credit: Jake Frith
6. After locating the pipe to the telltale I pulled it off its outlet in the engine’s undertray and initially blanked it off with a bolt while getting the process started, as it would be one less leak to deal with. Later I would remove this bolt to flush this part of the system too
Credit: Jake Frith
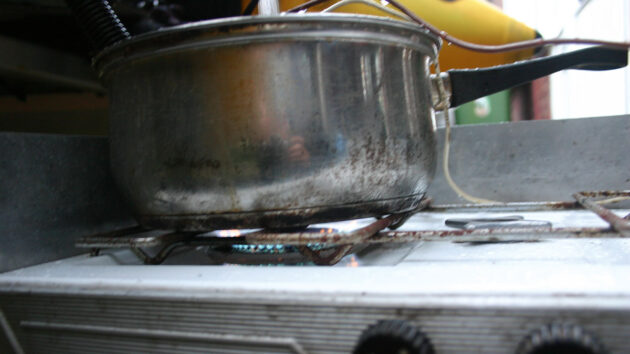
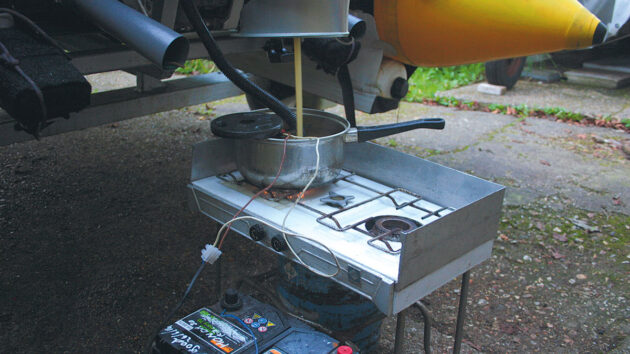
7. I decided this plan would only work if there was a vessel with the descaling fluid in it to pump from and return to: I chose a retired stainless steel cooking pot, and placed it on a camping gas stove so I could also introduce a bit of heat. The pump was an old 12V bilge pump connected to a car battery, and via various pipes to the thermostat hole.
Credit: Jake Frith
8. It took a bit of trial and error to get it all to stay put and circulate without leaks or splashes, so I set it all up first with fresh water. The pale green column that looks like a solid pipe in this picture is the acid (by this point neutralised – it starts out yellow) returning to the pan at pressure. The circular dumbell weight simply holds the pump in place.
Credit: Jake Frith
9. Here, I have removed the bolt that was blanking the telltale pipe and am blasting air down this pipe with an air line while the pump is still circulating the acid. The first few times I did this, the pressure and bubbles released some additional material from the powerhead which I saw as soon as the air line was removed, and I let the telltale pipe flow freely again.

Credit: Jake Frith
10. Despite the stove being on full heat, the water being constantly circulated meant the engine itself never got anything beyond warm. Warm acid has to be more
reactive than cold, so I felt the additional hassle of heating was worthwhile. I changed the fluid whenever its integral pH indicator prompted me to do so – three times in all.
Credit: Jake Frith
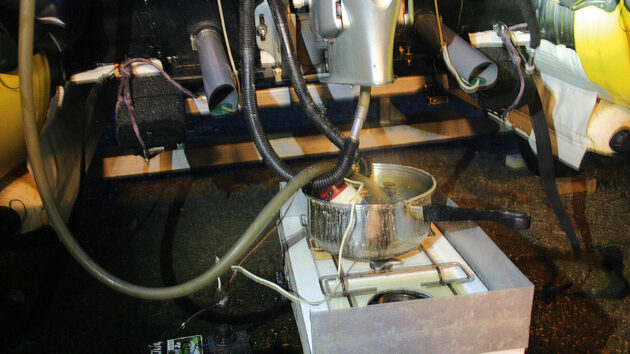
11. All told, I flushed for a couple of hours. I also ‘front flushed’, as seen here. Here the water is circulating the ‘normal’ way; up the impeller tube, (via the black corrugated pipe looped up), and returning through the thermostat pipe (clear pipe coming from bottom left) and also (messily) from the exhaust in the leg.
Credit: Jake Frith
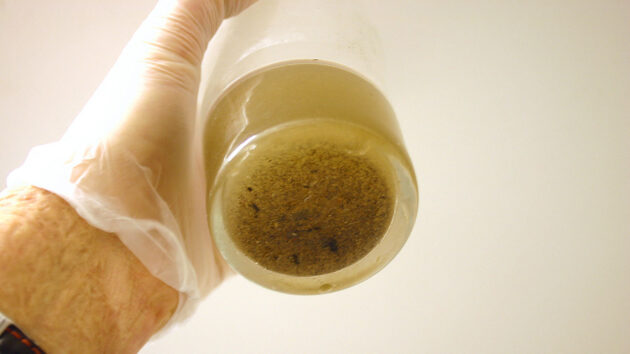
12. It was quite pleasing to retain the crud for more detailed inspection. Three pans full of this sort of stuff came out of this clean, little-used engine. This, though, was just the stuff the acid didn’t dissolve: more useful was the fact that I neutralised three pans of about 4lt each of acid descaler.
Did it work?
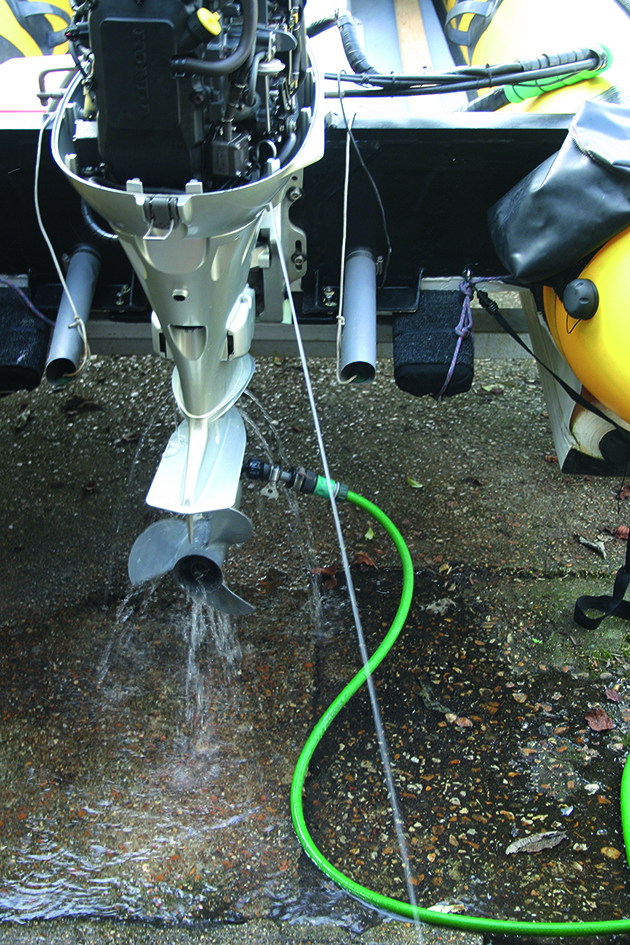
The white line shows the rod-like jet-wash gush. Credit: Jake Frith
Although I’d been really impressed and surprised by the visible solids and solids in suspension I’d removed by the chemical flushing, it was not until I got the lower unit back on and tested it the next morning that I would see the results.
The dribble from the telltale was replaced by this rod-like jet-wash gush, and extensive on-water testing has proved the engine is running at normal temperature under load.
Pump preference
Credit: Jake Frith
When planning this job, I had been intending to use this cheap drill-powered pump. This one was less than £10 from eBay and only has three parts, but I couldn’t find it when I did this job. Always the way!
Still, I was delighted with the performance of the 20-year-old Rule bilge pump I had to reluctantly use instead.
I really wasn’t expecting it to successfully pump hot acid and crud round an engine for two hours, as it’s really not what it was designed for.
I’m pleased I went for this option in the end though, as two hours of constant use is, on reflection, also not what a power drill is designed for.
Choosing your acid
The reason we go for acid is that engine deposits are usually alkaline, so an acid is more likely than anything else to dissolve and dislodge them.
There are lots of acids commonly available, from spirit vinegar to ‘Salt-Away’.
Most have been used for chemical backflushing with varying degrees of success.
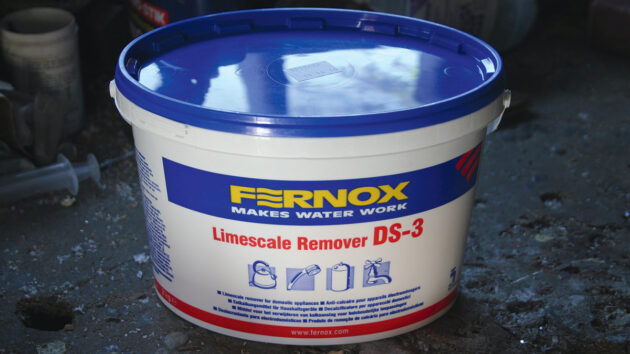
Fernox DS3. Credit: Jake Frith
At the top of the tree, strengthwise, is brick acid (usually hydrochloric acid), but this would only be used as a last resort for an engine that would otherwise be scrap, as any areas of unpainted or oxidised aluminium inside could be eaten away very fast with possibly damaging results.
It works well on steel heat exchangers, but I wasn’t prepared to risk this on an aluminium outboard so I went with a weaker acid formulation called Fernox DS3 –
a sulphamic acid limescale remover for household central heating systems.
It is kinder, and has also been used successfully on marine heat exchangers: it has a pH indicator within it so it changes colour once it is spent (and has returned
to neutral pH), which was handy for this application.
Suitable gloves and eye protection are a must when working with these materials.

How to service an outboard engine: step by step
Stu Davies shares useful maintenance tips on how to keep your 2-stroke and 4-stroke outboard motors running sweetly

Buying a new or used outboard motor? Professionals share their tips to make sure you avoid the pitfalls
From horsepower to shaft length and tilt-angle to 2- or 4-stroke, Ali Wood highlights the different features you should consider…
Want to read more practical articles like Backflushing an outboard motor: step-by-step?

A subscription to Practical Boat Owner magazine costs around 40% less than the cover price.
Print and digital editions are available through Magazines Direct – where you can also find the latest deals.
PBO is packed with information to help you get the most from boat ownership – whether sail or power.
-
-
-
- Take your DIY skills to the next level with trusted advice on boat maintenance and repairs
- Impartial in-depth gear reviews
- Practical cruising tips for making the most of your time afloat
-
-
Follow us on Facebook, Instagram, TikTok and Twitter