
Stu Davies shows you how to check and replace an engine’s raw water pump impeller, and explains why it’s an important job
Part of the engine winterisation process is checking the raw water pump impeller and changing it if required.
This is a skill every boat owner should have.
If the impeller goes wrong, sod’s law says it will happen in the middle of bad weather and the thought of changing one in a boat being bashed around by big seas and in a stinking hot engine compartment doesn’t bear thinking about.
So checking and changing the water pump impeller before things go wrong is important.
Almost all inboard engines (there are a few air-cooled ones out there) have a raw water pump to pump seawater to the engine to cool it either directly or indirectly.
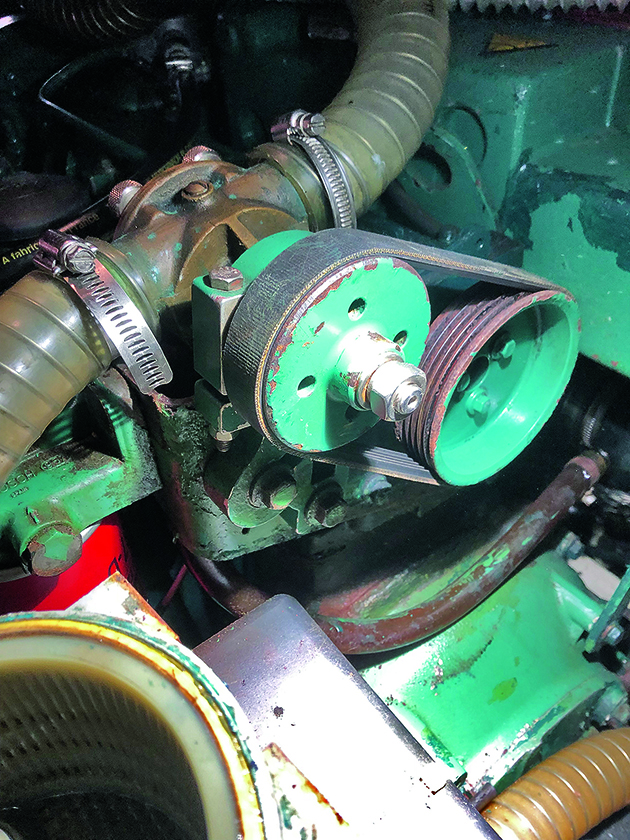
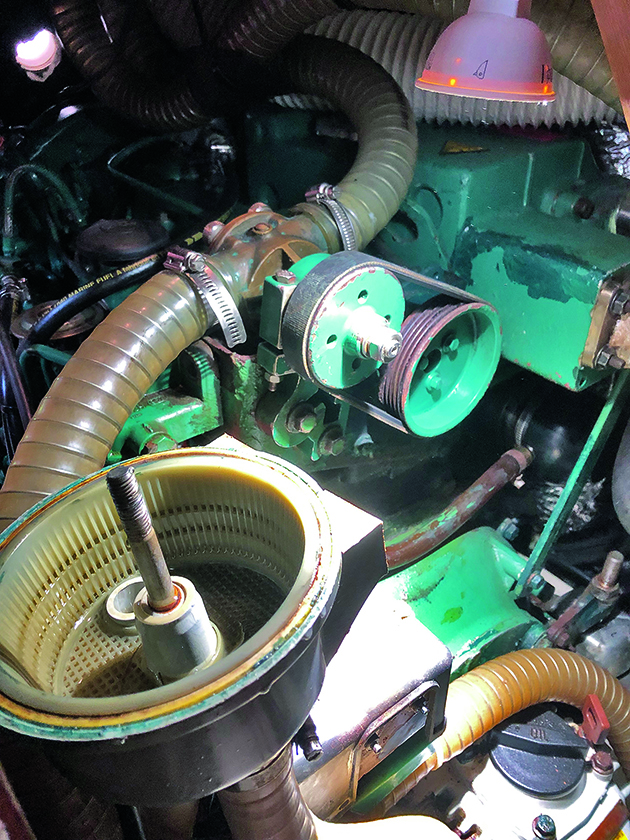
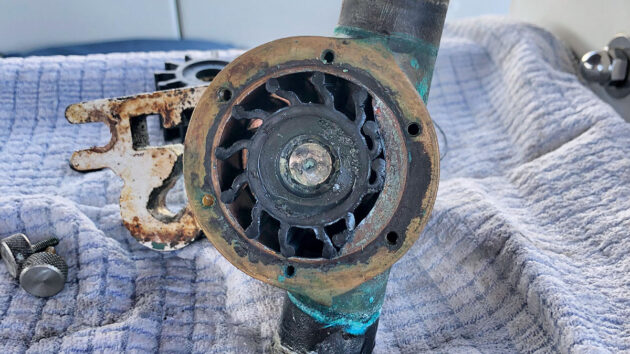
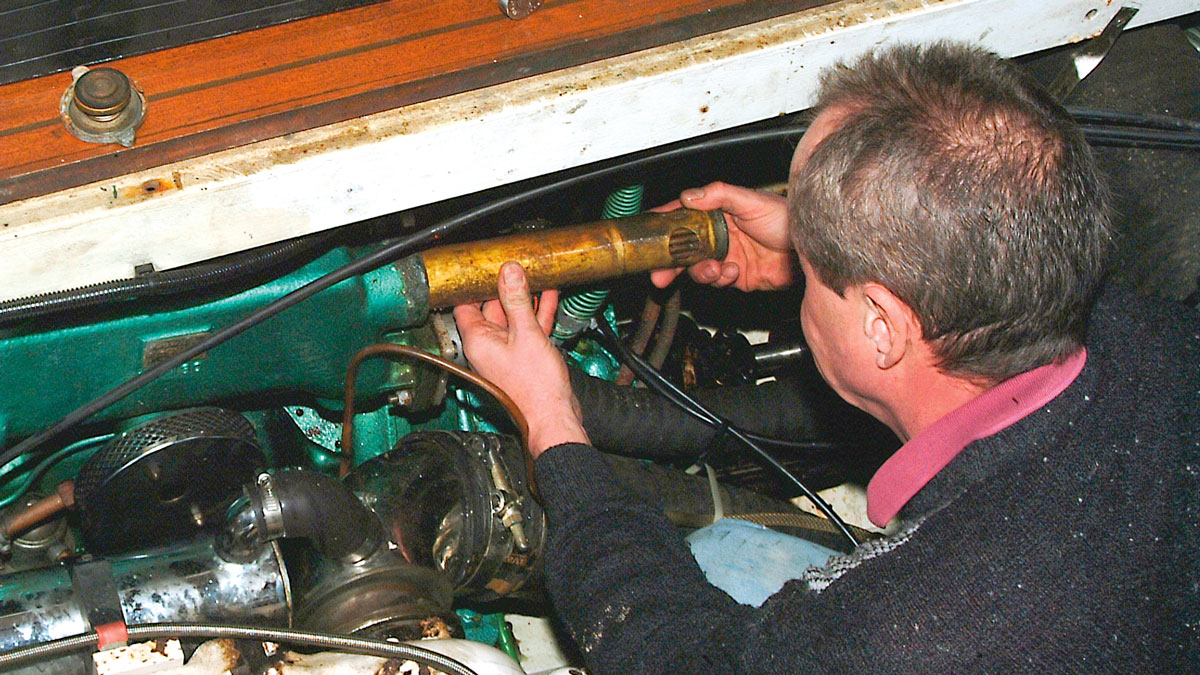
Water pump on Stu’s Volvo Penta MD22 engine. Credit: Stu Davies
Directly means that the seawater is pumped straight in around the engine cooling passageways and then out to the exhaust to go overboard; it’s an older system not seen too much nowadays.
Indirectly is when the raw water is pumped around an intercooler/heat exchanger and then out to the exhaust to go overboard.
The intercooler/heat exchanger is usually a bundle of tubes in a casing or manifold where raw water is pumped through the tubes and fresh water and coolant in the engine’s sealed system are pumped over the outside of them and around the engine.
The combustion heat of the sealed system is then transferred to the raw water and out overboard.
But first, waste raw water is normally pumped into the exhaust elbow where it mixes with the exhaust gases and cools both the elbow and the gases.
It then usually goes to an exhaust collector/silencer and is pumped by the exhaust gas pressure along the exhaust pipe to exit the boat via a through-hull fitting.
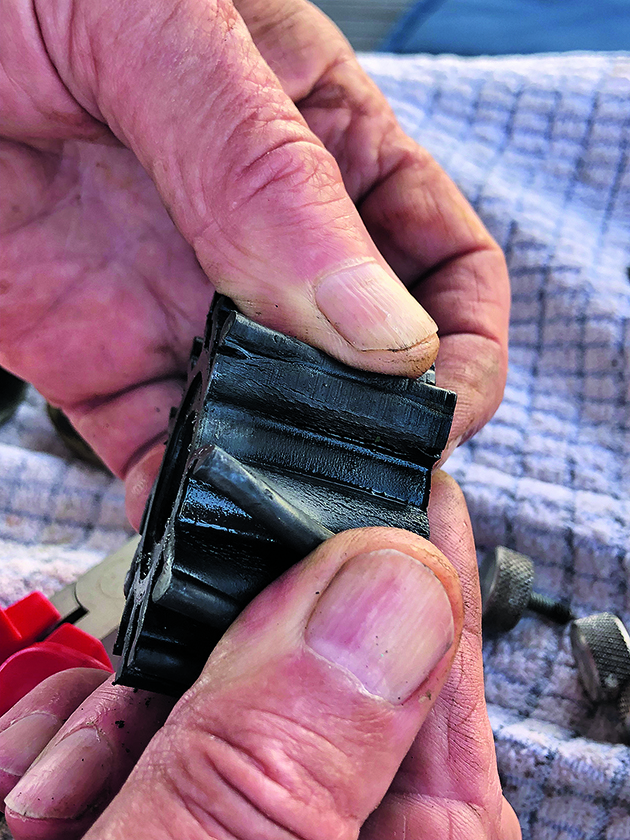
With cracks and perishing in the vanes, the impeller needs obvious replacement! Credit: Stu Davies
The exhaust collectors can be made of metal but are usually plastic or glassfibre; the exhaust pipe is usually made of wire-reinforced rubber.
The raw water cools these components as well, and the hot exhaust gases are also cooled sufficiently to prevent damage to the vulnerable components.
The typical whoosh-whoosh of the exhaust is caused by the raw water being pumped out of the collector box by the exhaust gas pressure.
The raw water pump waste water fills the collector/silencer until the exhaust gas pressure builds up sufficiently to eject it with a woosh, causing the sound we hear.
An important point to remember if you’re cranking the engine for a prolonged time without it starting is that no start means no exhaust gas to pump the raw water out of the collector.
This causes it to fill up and back feed into the exhaust manifold and then into the cylinders, causing a hydro lock. That can really spoil your day!
To prevent this, close your water intake through-hull fitting if you’re spinning the engine, for instance, to bleed the fuel system.
The pumps are nearly all made by Jabsco or Johnson and modified by the engine manufacturer to suit their application.
They’re driven either by a belt (like mine) or are attached directly to the engine and driven by gears internally.
Some older engine modifications used shaft drive directly from the front engine pulley.
Although they use a rubber vane impeller to pump the water they are typically positive displacement pumps which simplistically speaking means that, unlike a centrifugal pump (which is used in the fresh water system being cooled), they can ‘suck’ water and don’t need priming.
They are also capable of delivering quite a pressure.
They work by revolving the impeller in a circular housing where the vanes are compressed by a ‘hump’ which creates a vacuum and then when the blades ‘relax’ they create positive pressure which delivers the water to the outlet.
Because it relies on a vacuum to work, the fit of the lobes of the impeller blades is important, as is the side clearance of the impeller against the pump housing and cover plate.
If they wear then the pump becomes less efficient.
The ‘hump’ in the housing can also wear reducing the efficiency of the pump.
This can catch people out, the hump wears and they think the impeller is to blame when the pump becomes less efficient.
This is why you shouldn’t run a standard pump dry; it can quickly wear the impeller and seal faces.
One of the clues the impeller is becoming less efficient is that the sound from the exhaust outlet becomes more noticeable and the whooshes become less. Less water means more exhaust noise.
Change a raw water pump impeller: step by step
So to the nitty gritty, how do you change your impeller? I’m using my installation as an example but as I’ve said previously, they’re mostly made by Jabsco or Johnson and are all very similar.
To start, turn off your through-hull valve feeding the engine.
Then, if you’re lucky and can remove the pump from the engine easily, do as I do and remove it.
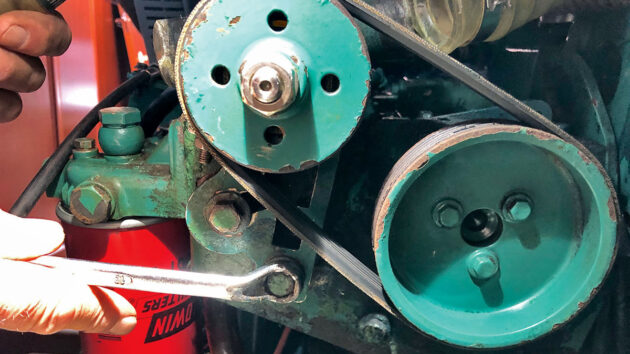
Remove the 13mm bolts which hold the water pump to its supporting bracket. Credit: Stu Davies
Most Perkins engine (Volvo Penta) derivatives have the pump at the front of the engine and are usually easily accessible.
Some Yanmars have them at the back of the timing case and are difficult to access.
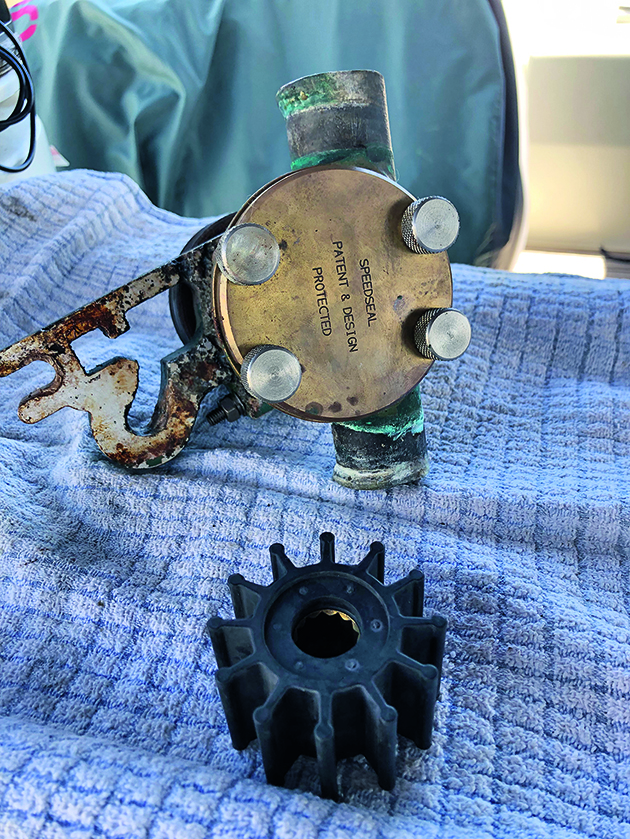
A Speedseal cover, which I have on my pump, was a supplier of an aftermarket kit which allowed quick and easy thumbscrew access to the impeller.
When removing the pump hoses, it’s a good idea to make sure you empty the raw water strainer first to avoid a substantial spill into the engine compartment. Credit: Stu Davies
It can also run dry for a limited time due to the Teflon washer as a cover plate ‘bearing’.
This is one of the reasons why the RNLI and the armed forces used Speedseal, although unfortunately it appears the firm has ceased trading and I’m not sure if another business has taken up the manufacture.
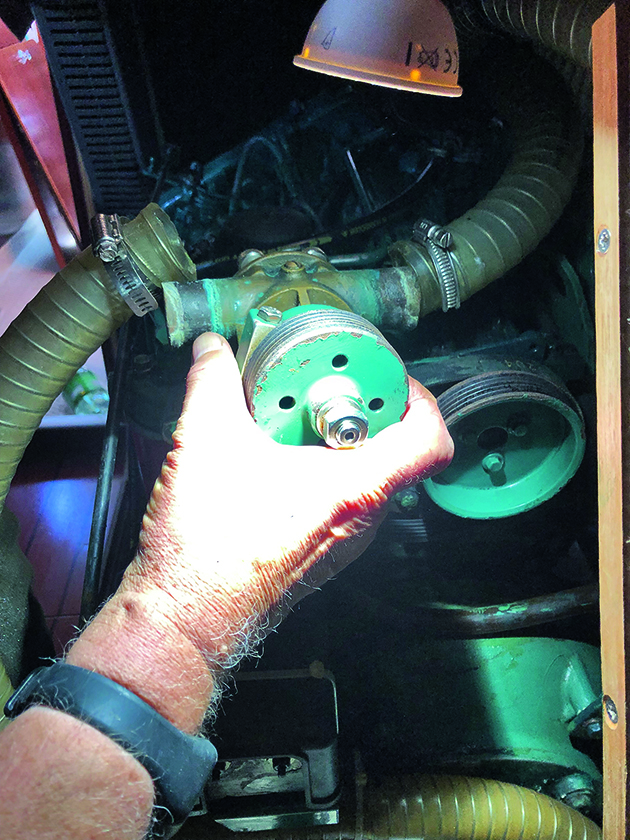
Undo the hoses and lift off the pump – not all engine set-ups are as easy as this one. Credit: Stu Davies
Whatever fitment you have, the front cover of the pump needs to come off.
The basic fitments are six cheese head screws; my Speedseal has just four knurled head screws so I don’t need a screwdriver.
Undo the retaining screws (knurled Speedseal ones in my case) and remove the cover. Credit: Stu Davies
Take all of the screws out and remove the cover plate and you’ll see the impeller looking at you. I use needle nose pliers on the vanes to GENTLY pull the impeller out of the housing.
It can be tight. But gentle fiddling and pulling usually gets them out (impeller pullers are available but they’re pretty expensive).

Beneath the cover, the Speedseal has a wear plate and a Teflon washer. Credit: Stu Davies
Some impellers, like mine, have drive splines, while others have a threaded drive pin with a screw in the housing which can be undone so the pin can be slid out to remove the impeller.
Once removed, the impeller can be carefully inspected.
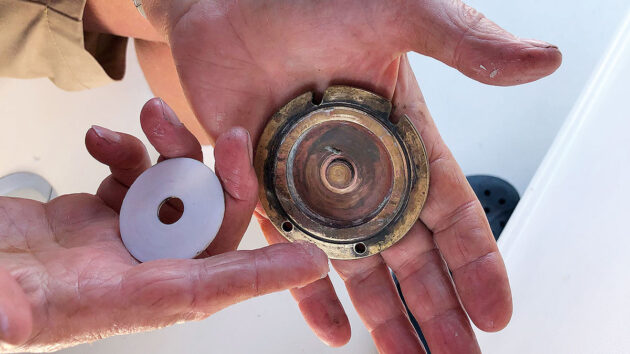
Remove the Teflon washer to check it over and give the cover a clean while you’re at it. Credit: Stu Davies
You’re looking for wear on the tips of the vanes, cracks in the vanes and whether the inner metal bushing of the impeller is still bonded to the rubber.
A surprising number of people get caught out by this; the bushing looks fine but when the engine is running the bushing doesn’t drive the impeller properly and the engine starts to overheat.
The tips of the vanes should be rounded; if flat, this indicates wear.
Here’s the impeller within the pump body. Now it just needs teasing out with needle-nose pliers. Credit: Stu Davies
Bending the vanes will show whether cracks are starting to form in them.
The sides of the impeller should be free of deep scores as should the cover plate and back of the housing.
Slight bending or setting of the blades is not too serious and will come out once the impeller is spinning.
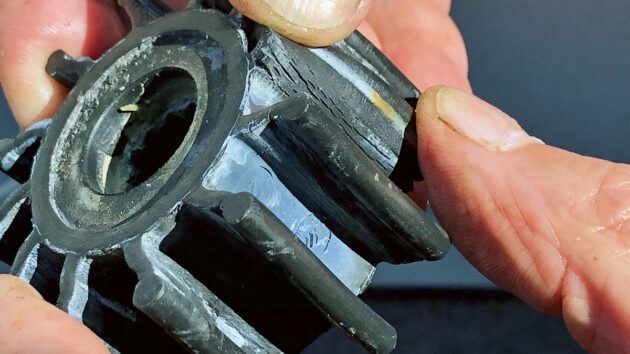
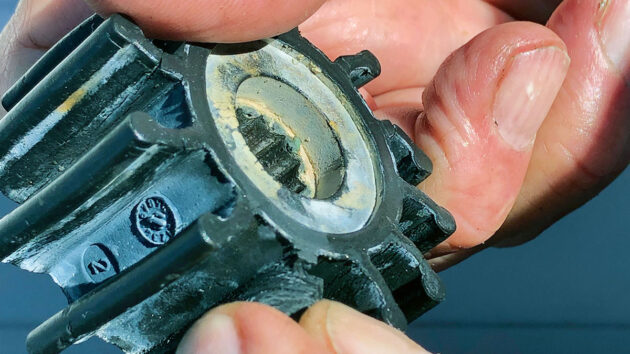
Now give the impeller a thorough inspection – this one has bad cracks beginning to appear. Credit: Stu Davies
The ‘hump’ needs to be checked to make sure it is not too worn and the condition of the seal at the back of the impeller can be checked.
Look for torn/worn lips or evidence of water getting out through to the drip hole on the shaft at the back of the pump.
To re-assemble a raw water pump impeller
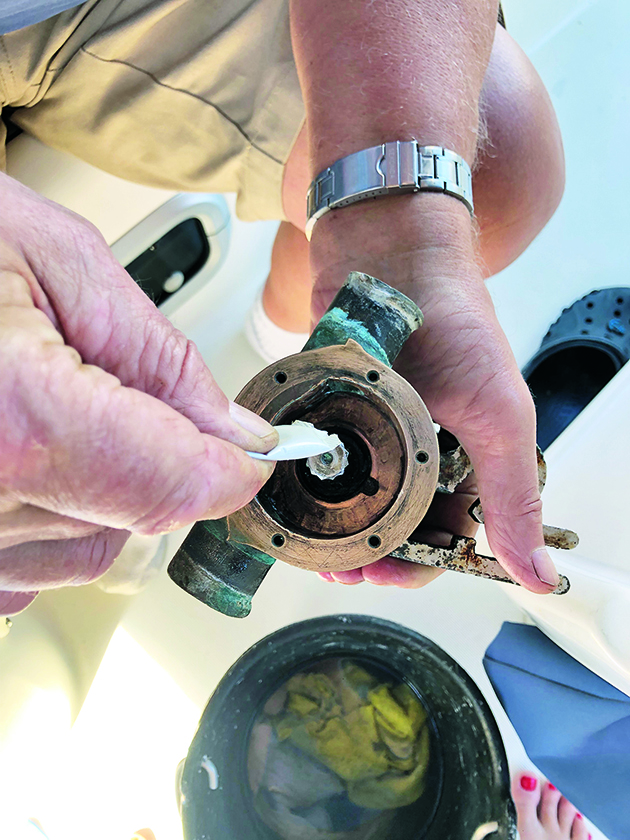
TOP TIP: clean any gunk out of the lip on the seal and put some silicone grease in there, it helps lube the seal and protects the spring. I was taught that years ago by an old mechanic and this old man is passing it on to you now!
Ensure you clean the cover plate and mating face, I use a dulled Scotch pad.
People worry about the vanes being bent the wrong way when putting the impeller back. Don’t. One turn of the engine and they orient themselves.
Clean the seals faces then lubricate the impeller and inside the pump body with silicone grease. Credit: Stu Davies
Slather the new impeller with the supplied gunk/lubricant and ease it back into the housing, ensuring that whichever drive method it uses is OK.
Use the gasket or O-ring supplied with the impeller kit for the cover plate, refit it and gently tighten up the fixing screws.
How often should you change the impeller?
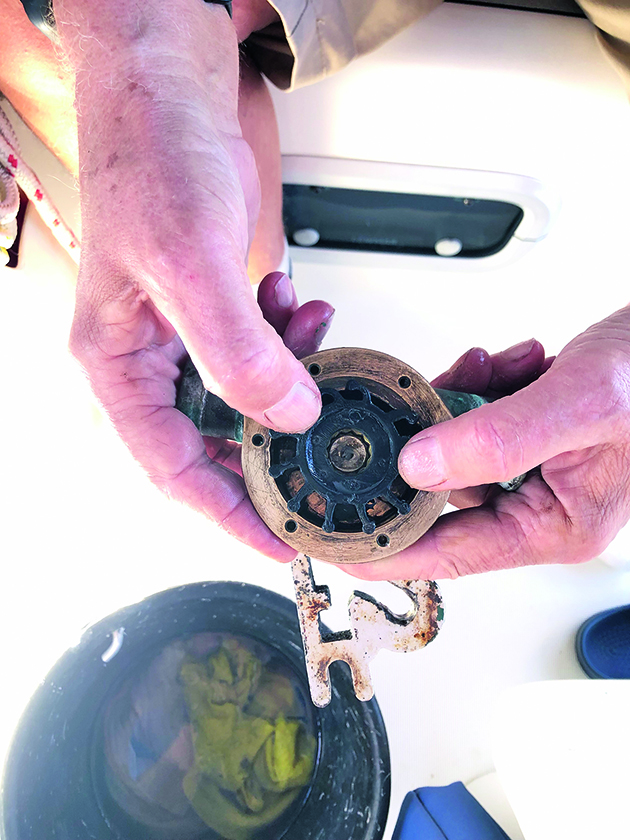
The new impeller in place. Orientation doesn’t matter – it’ll sort itself out once the engine runs. Credit: Stu Davies
I was once part of the implied wisdom group that said to change it every year and keep the old one for a spare.
I ended up with loads and thought, hang on, inspection and cleaning yearly is the sensible way.
That’s what I do now, but really it’s your choice.
The impeller you see in the pictures has lasted three years and a couple of hundred hours of running time; it is just starting to deteriorate.
My outboard motor impeller is now 10 years old and this year is starting to show signs of warping so it will be changed.
For suppliers, I tend to use www.parts4engines.com for my spares.
There are others such as ASAP and other non-OEM suppliers whose offerings are quite a lot cheaper and just as good.
How to service a marine engine cooling system
Is your boat's engine beginning to run hotter than normal? It may be time to service the cooling system, suggests…

Fixing and avoiding marine engine leaks
There is no need to put up with a leaky, smelly inboard engine. By dealing with small leaks as they…

How to service a marine diesel engine in 12 simple steps
It was time to service the marine diesel engine on our Maxi 84 cruiser. Knowing how to diagnose and fix…
No mess oil filter change for a boat engine
Simon Westmacott devises a way to keep his bilges clean when changing the engine's oil filter
Did you enjoy reading How to change a water pump impeller?

A subscription to Practical Boat Owner magazine costs around 40% less than the cover price.
Print and digital editions are available through Magazines Direct – where you can also find the latest deals.
PBO is packed with information to help you get the most from boat ownership – whether sail or power.
-
-
-
- Take your DIY skills to the next level with trusted advice on boat maintenance and repairs
- Impartial in-depth gear reviews
- Practical cruising tips for making the most of your time afloat
-
-
Follow us on Facebook, Instagram, TikTok and Twitter