With a previous home-made wind scoop now showing its age, Ann Berry fashions an efficient replacement for less than £10
We needed a cooling breeze, but not at the expense of Mediterranean wasps, mosquitos or other flying insects invading the boat through the open hatch when the wind scoop was in position, writes Ann Berry.
I’d made the existing wind scoop many years ago from a child’s garden play tent (which had nice, fine material) and a coat hanger, but this was
now well past its sell-by date.
I wanted a new wind scoop which would direct air down into the cabin and allow the mosquito net covering the hatch opening to remain in place at the same time.
To make this customised wind scoop I chose to use a dressmaker’s lining material.
It has a very firm weave with little movement when pulled either along or across the fabric, so it is quite tough – but sufficiently lightweight to catch the breezes.
The wind scoop is made of three panels, a rear section and two identical side pieces.
I measured the height from the forepeak roof to the halyard and the lengths of the sides of my hatch. I wanted to attach the scoop at the base by a bungee around the hatch coaming: this would allow me to have a wind scoop that fits tightly around the mosquito net without gaps, and
doesn’t require the scoop to go loosely into or over the hatch.
How to make a wind scoop: step-by-step
1. The rear section of the scoop is shaped. The base is the length of the hatch with the sides tapering to the width required at the top. The side pieces are almost simple triangles with one vertical side and the bottom the length of the hatch side. This makes the scoop lean forward into the wind when constructed.

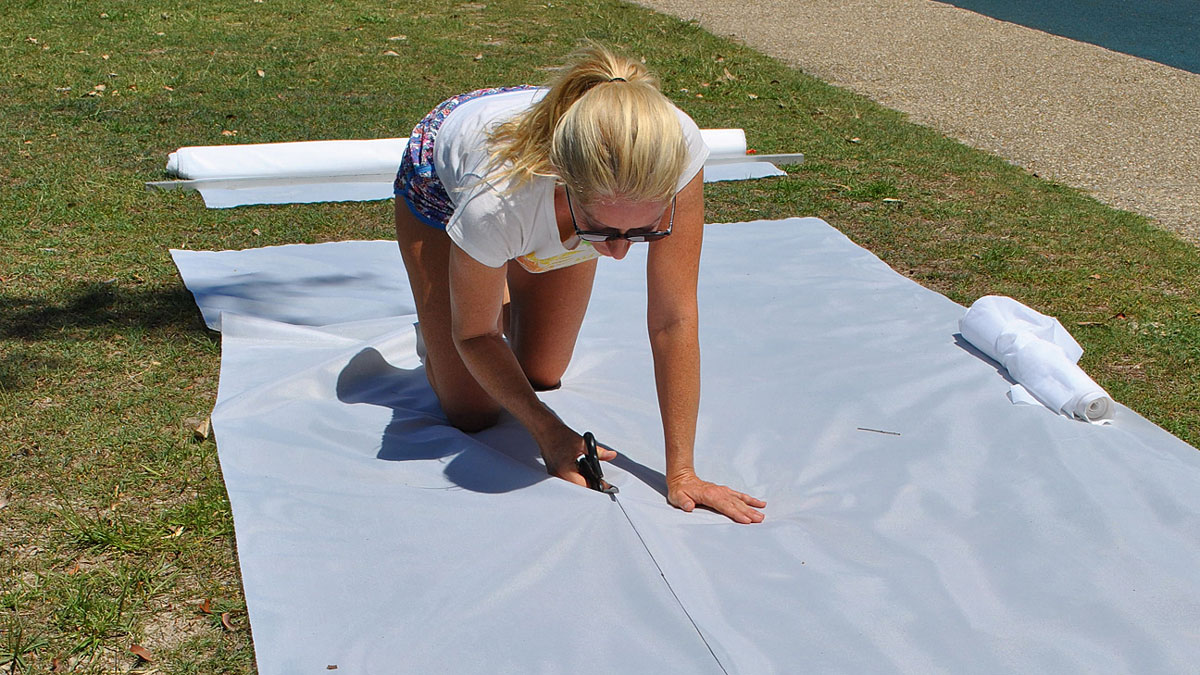
2. I used a steel ruler and tape to measure and draw the shapes, with a pencil, directly onto the fabric to create the three sections. I allowed two extra inches (5cm) around each measured section for seam allowance and making rolled pockets for the rod and bungee before cutting. The top of the scoop needs to be strengthened as the wind forces on the scoop can be considerable at times, and the seams should be flat-fell seams for strength. These are the seams you see in children’s clothes and jeans. They are very strong and robust compared to normal straight seams.

3. To create a flat-fell seam I first stitched a normal straight seam, then pressed the seam open and flat. Next, I cut one side of the seam back so it is narrower (below).


4. Then I rolled the longer uncut edge over to enclose the cut edge before pinning them together. You’ll see your original stitching line as you roll the two edges into one.

5. I tacked along the pin line by hand, removed the pins then finished with a straight machine stitch along the seam.

6. The finished flat-fell seam. This is also used to join each section to the next and the edges of the outer sides. The lower edge of the scoop is rolled into a small tube and sewn along the top edge so a bungee can be threaded through to attach to the coaming.

7. I reinforced the top of the scoop by cutting a 6in (15cm) strip and pinning and stitching it in place. I then folded the piece over to the inside of the scoop and stitched along the top edge.

8. I then folded the top piece back under itself to the inside to form the sheath in which a stainless steel rod frame will be held. I pinned it in place and over-sewed along the sewing line. I cut two notches out of the folded top, at the corner points, to attach a rope harness which will then attach to the halyard. I reinforced these holes with binding tape.

9. Here’s how the binding tape was used to reinforce the holes in the top of the scoop.

10. To create a top flap to deflect the wind downwards I cut a rectangular section slightly wider than the top opening. I pinned and stitched the edges then placed it into the top opening, stitching it onto the stitch line below the channel for the stainless rod frame.

11. Here’s the flap pinned and ready for sewing below the rod pocket. I used two lines of sewing for added strength, then attached it to the sides in the same way.

12. This shows the top flap attached to the back and sides of the scoop.

13. A stainless steel rod frame bent to shape is threaded through the top pocket, and a harness is tied on to attach the top of the scoop to the halyard.

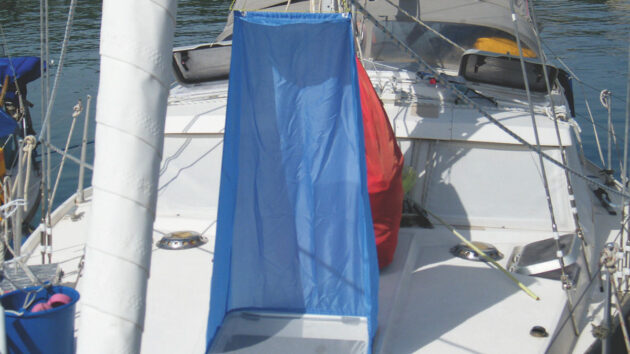
14. The wind scoop filled by the wind, doing its job with the mosquito net in place. This works really well, so much better than our older scoop: when at anchor the boat will always be pointing into the wind so we will get the breeze, and when we’re moored we simply move the base around the coaming until it catches the wind again.

Basic sewing skills for boat owners to protect sails from chafe
Chafe damage has always been a problem on yachts, and owners are generally advised to preserve their sails by adding…
How to make a spinnaker snuffer
John Connell keeps his spinnaker in check by devising and constructing a home-made spinnaker snuffer
How to repair a heavy-duty zip on a bow dodger
Tony Davies demonstrates how you can restore a broken heavy-duty zip to full working condition
How marine fabrics are changing
Marine fabrics are increasingly being made using natural fibres, less harmful chemicals and longer-lasting colours. Jake Kavanagh looks at the…
Want to read more practical articles?

A subscription to Practical Boat Owner magazine costs around 40% less than the cover price.
Print and digital editions are available through Magazines Direct – where you can also find the latest deals.
PBO is packed with information to help you get the most from boat ownership – whether sail or power.
-
-
-
- Take your DIY skills to the next level with trusted advice on boat maintenance and repairs
- Impartial in-depth gear reviews
- Practical cruising tips for making the most of your time afloat
-
-
Follow us on Facebook, Instagram, TikTok and Twitter


