
Tony Davies believes the DIY owner can tackle even quite serious damage with just a little care and the right materials

The boat featured here is a 15ft Fletcher speedboat, and it was in desperate need of GRP repair. It was purchased by a couple new to boating who were sadly sold a boat with such hull defects it almost sank on their first voyage. It’s easy to assume that the days of the rip-off merchant are over, unfortunately not.
I became involved while looking for a suitable boat on which to test a GRP repair and was therefore able to right the wrong perpetrated on these newcomers, thanks to the generosity of Wessex Resins who supplied not only the materials but also an expert who performed much of the work while I stood back and took the photographs!
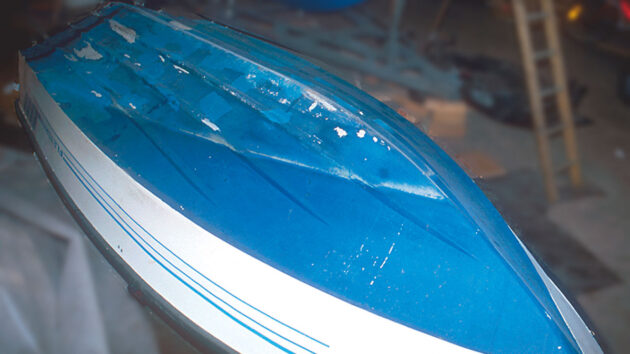
GRP repair: An upturned, raised hull was easier to work with
The main problem was there were no clear signs of where the boat was leaking.
The floor was bonded-in, making it impossible to examine the hull from the inside.
Below the waterline had been ineptly sloshed over with rough antifouling that hid the underlying defects.
This meant we didn’t know what we’d find until this layer was removed and we could inspect the gel coat.
It was therefore decided, once repairs were made, to sheath the hull with West System materials to cover every eventuality.
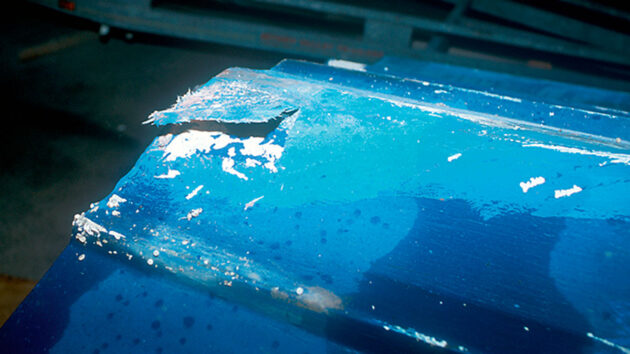
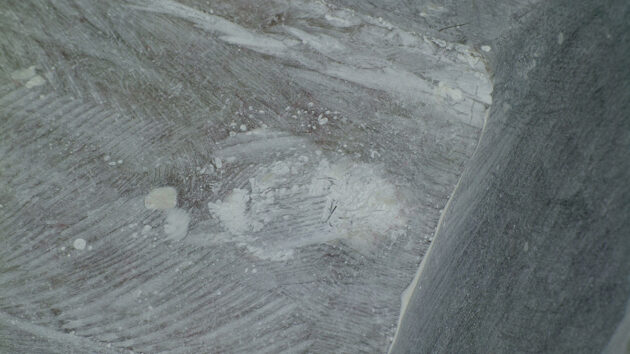
GRP repair: A rough patch of mat and resin peeled off easily but the hull seemed solid underneath
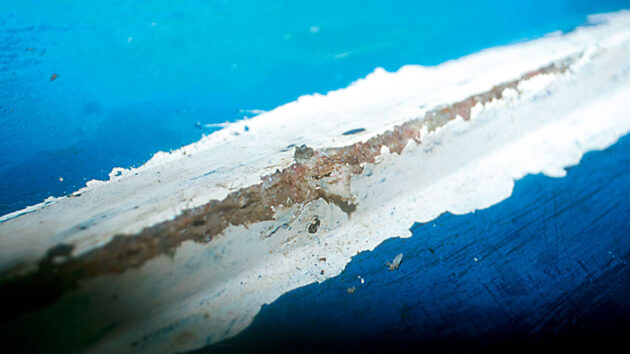
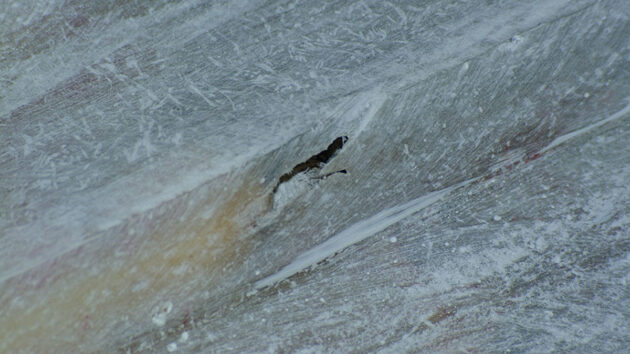
GRP repair: A flawed strake was a possible point of water entry
Scale of GRP repair
Being a smallish boat we turned her upside down on blocks of polystyrene which made the job vastly more pleasant.
For larger vessels, it is possible to careen them partly onto one side to provide easier access to the bottom.
I roughly marked the waterline by referring to the limescale stains on the antifouling and lightly scoring the gel coat to give us a line to grind down to.
The first problem to appear was a rough patch of mat and resin that had been applied without proper wetting-out or hull abrading and was easily peeled off.
However, there was little sign of real damage beneath this.
A more serious flaw was found on one of the strakes which had been scuffed deep into the lay up and was still wet.
This was a possible water-entry point and duly noted.
The damaged strake revealed
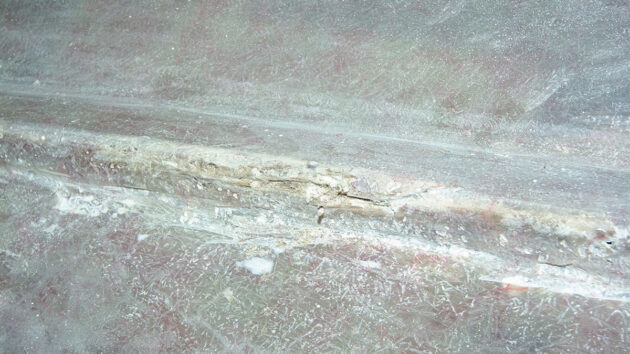
An old GRP repair was revealed beneath the gel coat but it had not penetrated the hull
Drying time
Following antifouling removal (step by step guide below), the damaged strake was revealed in all its glory and at this stage we left the hull to dry out for a couple of weeks.
Depending on the size of the vessel and the extent of the repair it may be necessary to leave the hull to dry for several months and to employ a surveyor to check the hull’s moisture content before beginning the repair process.
In this case, the boat had already spent nearly a year in the shed and was virtually ready once we’d removed the gel coat.
The ambient temperature needs to be above 10ºC for ease of working. As the temperature decreases the resin becomes thicker, is harder to mix, difficult to apply and cures far more slowly.
In borderline conditions, you can gently warm the resin and hardener using a hot air gun BEFORE mixing.
Better still, store the resin and hardener in a warm area.
This hole in the side of one of the strakes could have been one of the leak sources
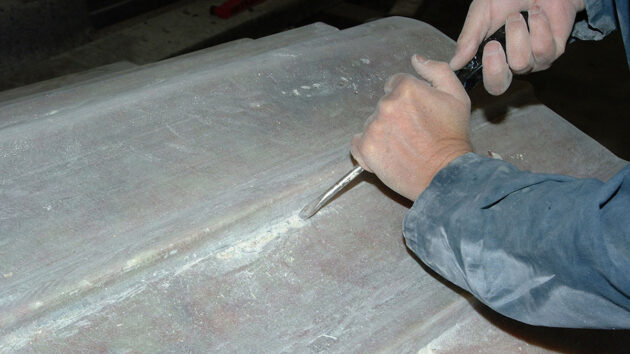
Various voids in the lay-up where the resin had not penetrated during building were scraped out using a special tool that looks remarkably like a big screwdriver!
Watertight hull
The process of GRP repair and application of the new antifouling coat (see below) were identical to that needed for osmosis repair.
Where there is no need for strengthening the hull additional sheathing with biaxial fabric can be omitted and, instead, six coats of West System epoxy applied.
Working on a smooth hull with no strakes or rails is far quicker and simpler than the example shown here.
People occasionally report sensitivity problems with epoxy materials, even when wearing gloves.
However, glove sensitivity is often the underlying problem and changing to a different glove material may be the solution.
West System epoxies are ready to overcoat when a finger pressed into the surface marks the surface but comes away dry.
The boat was subsequently relaunched and the hull was found to be now totally watertight.
Materials used for GRP repair
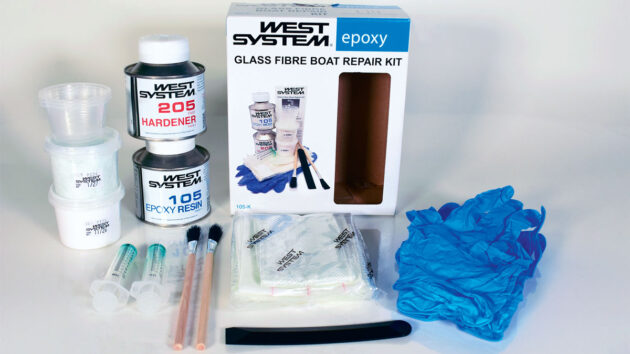
A West System glassfibre boat repair kit
- B105 West System resin 5kg and B205 West System hardener 1kg dual packs x 2 (£139.95 x 2) £279.90
- 1 x pump set (B pack) 5:1 ratio £20.47 n 2 x 450g/m² biaxial glass fabric 1270mm wide x 10m (£83.28 x 2) £166.56
- 1 x 450g/m² biaxial glass tape 125mm wide x 5m £48.85
- 2 x Low density filler 0.7kg (£59.80 x 2) £119.60
- 1 x 3in roller frame £3.95
- 1 x 3in roller covers (pk 12) £11.45
- 1 x 7in roller frame £5.74
- 1 x 7in roller covers (pk 5) £18.60
- 1 x stirrers (pk 5) £10.26
- 6 x 800ml mixing pots £8.34
- 1 x plastic squeegees (pk 2) £5.46
- 4 x roller trays (£3.64 x 4) £14.56
- 2 x Nitrile gloves (pk 5) (£9.95 x 2) £19.90
- Total cost = £733.64 with an estimated 20 work hours plus curing times (a week overall)
Best online prices correct at the time of going to press
Antifouling removal – Step by step

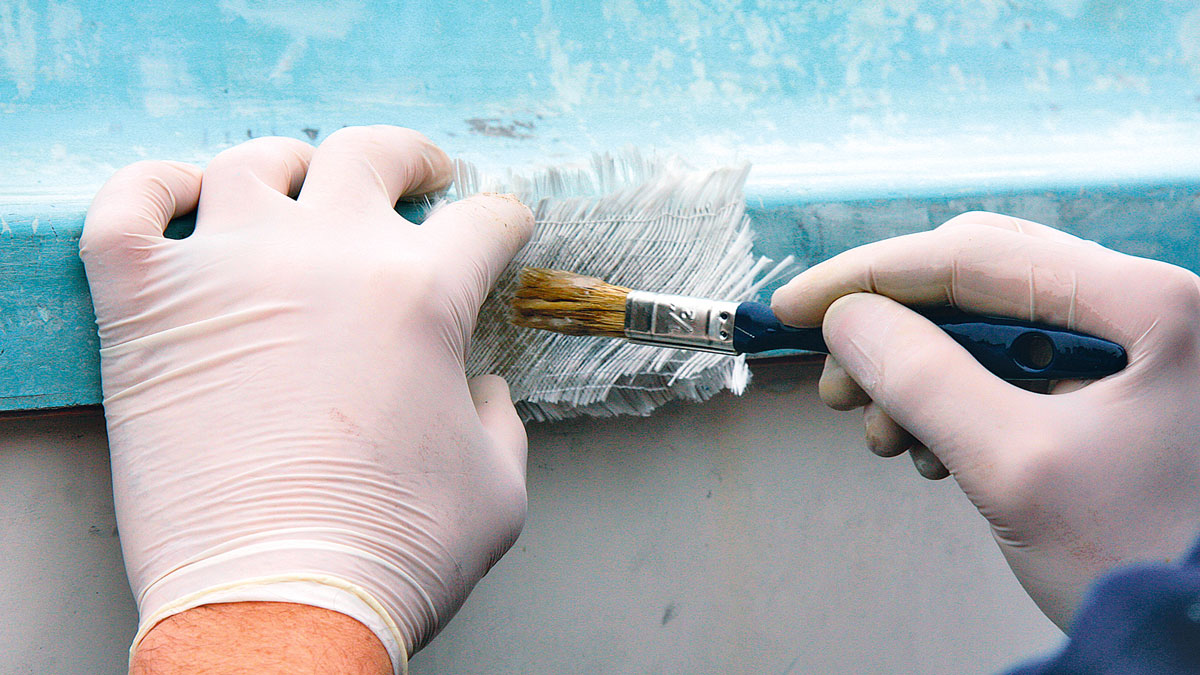
STEP 1) The safest way to do this job is to use an antifouling stripper such as Dilunette gel that removes many layers of antifouling in one go and does not affect the gel coat.
It’s vital to wear protective clothing, especially chemical-resistant gloves and safety goggles.
Read the instructions before use.
STEP 2) The gel is applied by stippling onto the surface in a thick layer using a synthetic bristle brush.
It can even be spread using a spatula where the antifouling layer is particularly thick.

STEP 3) The instructions say to leave the gel for between 15 minutes and two hours.
However, it can be left for longer on GRP where the antifouling is thick.
Cover with cling film to stop it drying out.
The results can be seen above in the bubbled and crusted antifouling.

STEP 4) A piece of sharpened timber makes an ideal scraper and avoids damaging the gel coat. Once the antifouling is softened, it scrapes off easily.
Once stripped, the hull should be thoroughly washed with clean water.
STEP 5) As no more problems were found, it was time to begin grinding off the gel coat using an angle grinder with a coarse sanding disk attached.
The amount of dust generated by this process makes it essential to wear full face protection and respirator.
I use a ‘Racal Dustmaster’ which provides a flow of filtered air over the face.

STEP 6) Before final sanding, the surface was again washed with fresh water to remove contaminants and prevent them from being ground into the surface.
For final sanding, use an orbital sander or dual action (DA) type as seen here – DA types are designed to more effectively follow curved contours rather than flatten them.
It is important to keep the lift and spray rails as sharp as possible to maintain the hull’s handling performance.

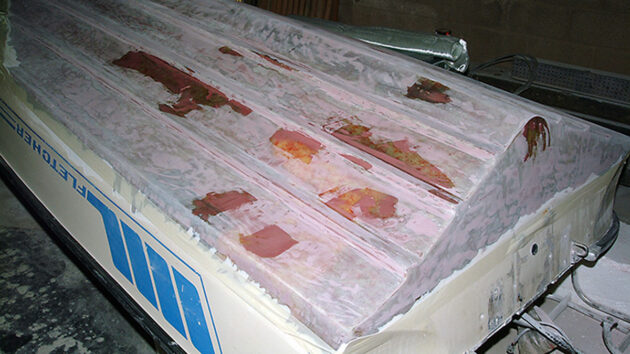
STEP 7) With the gel-coat removed, we had a rough line to work to and could also now examine the hull again.
GRP repair – Step by step

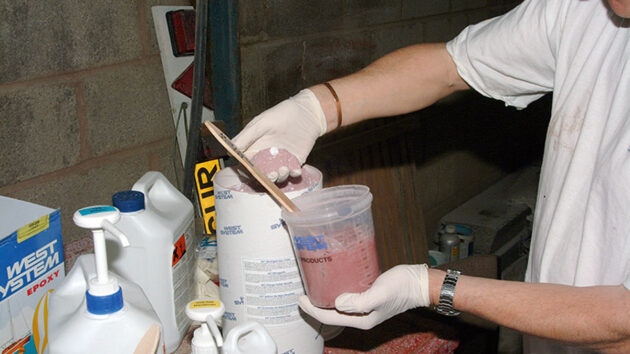
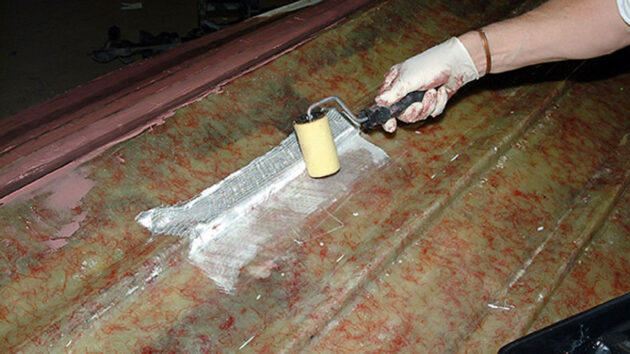
STEP 1) The repair began with the mixing of the West System Resin using the pump set provided.
One stroke of resin to one stroke of hardener is the correct proportion which makes the mixing process simple and accurate.
It’s then stirred until thoroughly mixed.

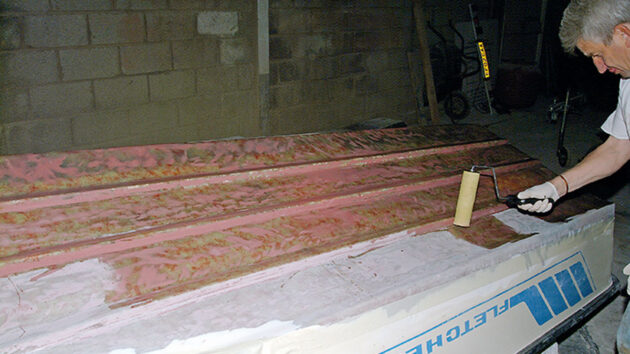
STEP 2) The mixture is placed in a roller tray and applied evenly over the entire bottom, taking care to work it well into the damaged areas.

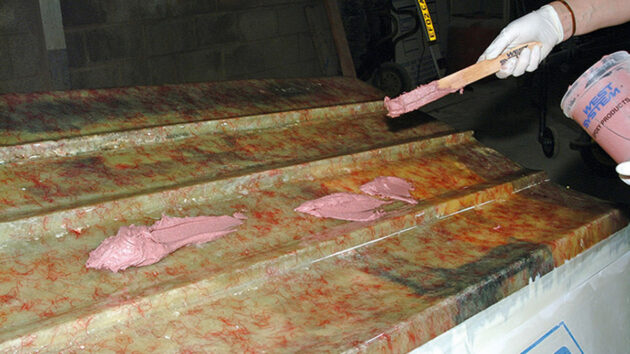
STEP 3) Once the resin has become tacky (after a couple of hours at 15°C) the surface is ready to be faired using the same resin/hardener mix but this time thickened with 407 low-density filler.
The resin and hardener are mixed in the normal manner after which handfuls of filler are added to the mix and stirred in until a peanut butter consistency is achieved.
It is then applied to the surface with a stirrer in preparation for spreading and fairing.
Using a plastic squeegee, the filler mix is worked into the voids and sanding marks until the surface is reasonably smooth.
The resin and hardener are mixed in the normal manner after which handfuls of filler are added to the mix and stirred in until a peanut butter consistency is achieved
It is then applied to the surface with a stirrer…
…in preparation for spreading and fairing
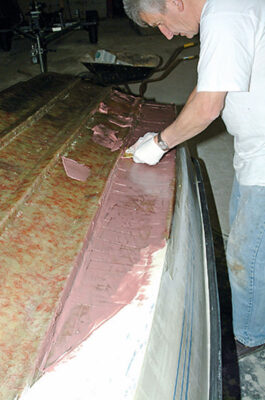
STEP 4) While filling the surface, the worst of the damaged areas and deepest voids on the strakes were also reinforced with strips of biaxial tape pressed onto the tacky surface.
Resin/hardener mix is then rolled into the fabric until it is thoroughly wetted.
While filling the surface, the worst of the damaged areas and deepest voids on the strakes were also reinforced with strips of biaxial tape pressed onto the tacky surface
Resin/hardener mix is then rolled into the fabric until it is thoroughly wetted
STEP 5) The rest of the fairing process can now be completed, including filling the drain plug hole in the bottom of the transom.
As this boat is to be moored afloat it was decided to discard the drain plug and fit a bilge pump instead.

STEP 6) The following day the entire bottom was again sanded using only the fine sander to give a fair surface.
Strakes were carefully profiled by hand to avoid taking off too much material with the sander.
The surface was examined and areas requiring additional filling were faired again. The surface was then coated with resin/hardener and allowed to tack off for a couple of hours.

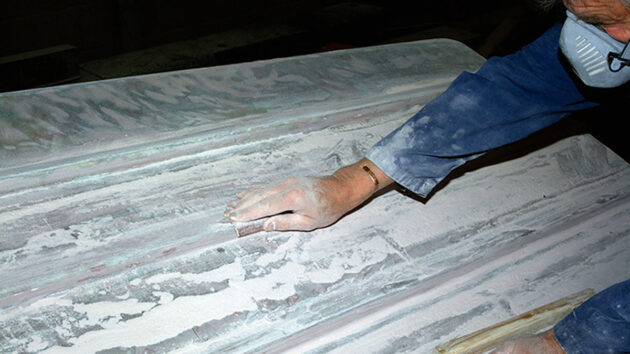
Strakes were carefully profiled by hand to avoid taking off too much material with the sander
The surface was examined and areas requiring additional filling were faired again
The surface was then coated with resin/hardener and allowed to tack off for a couple of hours
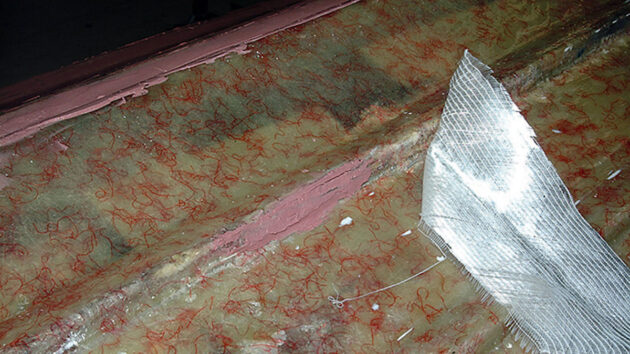
STEP 7) The overall sheathing of the hull could now begin.
The biaxial cloth used is made up of the same thread as standard woven roving.
The difference is, it is woven diagonally to allow it to drape easily over complex contours. The first piece of cloth was laid halfway across the width of the hull at the stern and rolled onto the tacky surface to hold it in position.
The awkward shape of the hull and strakes at the transom needed some cutting of the cloth to allow it to lay smoothly.


STEP 8) The cloth was then rolled with epoxy until it was thoroughly wetted out.
The same procedure was used to sheath the rest of the hull, overlapping each layer as we moved forward.
The edge of the mat was trimmed along the waterline using a sharp knife before the mix finally cured.
STEP 9) The bottom was filled, faired and sanded down again for the last time ready for application of the antifouling coat which in this case is a copper-infused resin.
This should ensure the boat needs no further bottom work for about 10 years other than a light abrading with a Scotch pad.


Applying the antifouling coat – Step by step
STEP 1) The first stage in applying the antifouling coat was to mark the waterline.
We could not be 100% sure where this would come so we made a straight line around the boat hoping it would correspond with the true waterline.
Block up a tube or timber across the bow perpendicular to the fore-and-aft line with the top edge level with the position of the waterline at the bow – this enables a string line to be taken from the waterline aft over the top of the timber to give the necessary straight line for marking the line onto the hull.


STEP 2) Unfortunately, you cannot simply draw the string up against the hull as it just rides up or down on the slope.
The technique is to draw the string along the timber towards the hull until it comes into contact a couple of inches from the transom.
Tape the string lightly into position at that point.
This process is repeated until the string is taped to the hull throughout its length and, although now following the curve of the hull, it is perfectly straight.
The beauty of this technique is that the boat does not have to be perfectly level or the right way up, as is the case with the water hose method.


STEP 3) The position of the line can now be marked and masking tape applied along the actual line.
On a hull shape like this with many strakes, the line appears to run in all directions to maintain a straight course but is correct when viewed from the side.
STEP 4) At last, it is time to apply the copper resin antifouling.
It comes in pre-measured packs consisting of resin and hardener in equal proportions, plus a bag of pure copper powder.
These are mixed in equal amounts following the instructions supplied.

STEP 5) The first stage is to apply two coats of epoxy at about two-hour intervals.
Once the second coat is touch dry, the first coat of copper resin is applied.
It needs to be applied thinly and spread well which means working quickly as it soon begins to thicken.
If it is applied too thickly, the weight of the powder causes the mix to slump into curtains.
When working beneath the boat, it is even more important to keep the coats thin.
Don’t worry if the finish is not perfect as this will not affect the antifouling properties.
STEP 6) One of the best parts of the job – pulling the masking tape off and seeing the finished straight line!

STEP 7) My final task, which was not an intrinsic part of the job, was to paint the topsides between the waterline and the forward spray rail while adding a wide boot-topping.
The original plan was to polish the topsides but unfortunately, the previous antifouling at the bow had penetrated the gel coat surface making it impossible to polish.
Although not ideal, it gives the boat some style and the waterline is straight even if it does not correspond with the true line.

Tony Davies’ only connection with West System and Wessex Resins is as a trade customer, liaising with them on this article.
Boat fibreglass repair: a beginner’s guide
No need to fear GRP repairs with these helpful tips from Andy Pag

Removing antifouling – the job I’ll never do again!
After a season on the water and two years in a boatyard, Maximus’s antifouling was old and flaky. We’d been…

Antifouling: Everything you need to know
Here’s PBO’s guide to preparing for, choosing and using antifouling paints

Gelcoat repair: How to make an invisible repair
Everything you need to know to make an invisible gelcoat repair, from preparation and filling to topcoat and polishing
Want to read more practical articles?

A subscription to Practical Boat Owner magazine costs around 40% less than the cover price.
Print and digital editions are available through Magazines Direct – where you can also find the latest deals.
PBO is packed with information to help you get the most from boat ownership – whether sail or power.
-
-
-
- Take your DIY skills to the next level with trusted advice on boat maintenance and repairs
- Impartial in-depth gear reviews
- Practical cruising tips for making the most of your time afloat
-
-
Follow us on Facebook, Instagram, TikTok and Twitter