
Lyndon March explains how to get the perfect mirror finish on your wooden or GRP hull
The allure of a mirror finish on a boat’s hull and topsides is undeniable—gleaming surfaces reflecting the sky and sea, turning heads in every marina and port.
Getting that flawless, glassy shine isn’t just about aesthetics. It’s also about protection and ease of maintenance.
A well-finished yacht resists the elements, ensuring that it looks as good in a decade as it does today, reduces prep for year-on-year re-coating and could even add value to your vessel.
Here’s a step-by-step guide for those thinking of refinishing a tired gelcoat with paint or simply achieving that mirror finish on their classic.
We also look at keeping it singing for seasons to come, all achieved with a brush.
Before diving into the nitty-gritty of how to achieve a mirror finish, it’s important to understand what exactly I mean by this.
Over time, the surface of the boat will degrade due to wear and tear, saltwater or UV rays. Credit: Graham Snook
A good paint job is a good paint job, but a mirror finish refers to a surface so smooth and reflective that it resembles a mirror.
This is achieved when the outermost layer of paint on the boat reflects light in a completely uniform way, with no visible imperfections, dull spots, or oxidation.
Your paint, or for some of us the old gelcoat, is the first line of defence against the harsh marine environment, and it’s also what reflects the yacht’s overall condition.
Over time, exposure to saltwater, UV rays, and general wear and tear can cause this layer to degrade.
The shine fades, and the surface becomes dull, chalky, or even rough to the touch.
A proper mirror finish restores the surface to its original glory, or in many cases, takes it to a level never previously achieved.
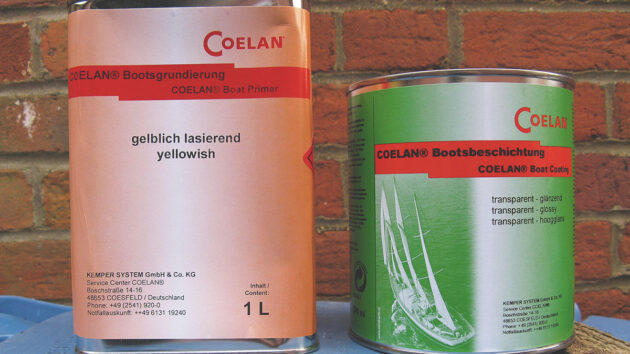
Before looking at the process to achieve a mirror finish, it is important to consider your choice of marine paint.
The paint you select not only affects the final appearance but also the durability and maintenance of the finish.
Marine paints are formulated to withstand the harsh conditions at sea, including UV exposure, saltwater, and varying temperatures.
However, there are a few variables the boat owner needs to consider such as hull material, environment and cost.
Which type of marine paint is best for a mirror finish?
A polyurethane-based system will not yellow over time when applied to a GRP hull. Credit: Richard Hare
There are many different types of marine paint available but single-component (single-pack) and two-component (two-pack) systems are the most commonly used for top-coating yachts.
The second gives the ultimate hard-wearing finish with lasting shine; the first provides something close in finish but generally doesn’t last as long. But which one to use?
My general rule is if your vessel doesn’t have a wooden hull choose a quality two-pack system.
Look at a polyurethane-based system as it doesn’t yellow like an epoxy-based paint. For wooden boat owners, I’d look at a single pack system.
A good yacht enamel is traditional and hard to beat but monourethane can weld some impressive results and many wooden superyachts have switched over to this.
Of course, single-pack is also something to consider if you don’t feel confident working with two-component paints and should generally be a little more budget-friendly.
Whatever system you buy, make sure you buy the whole system, from primer to topcoat and fillers if they make one, as this helps to ensure everything applied to the boat is working as one and cuts out the risk of reactions.
The process
Before you even touch the yacht with sandpaper or paint, proper preparation is king.
This stage is all about ensuring you have everything you need and that the work environment is going to allow you to achieve the best possible result.
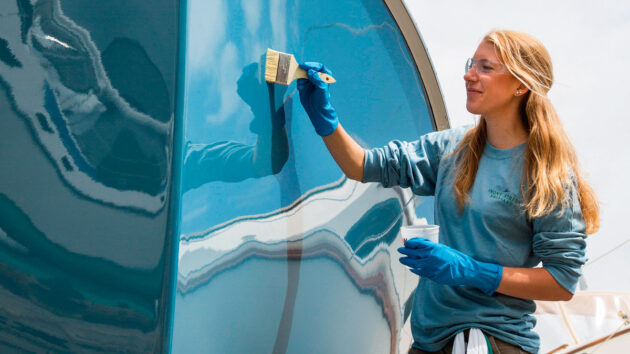
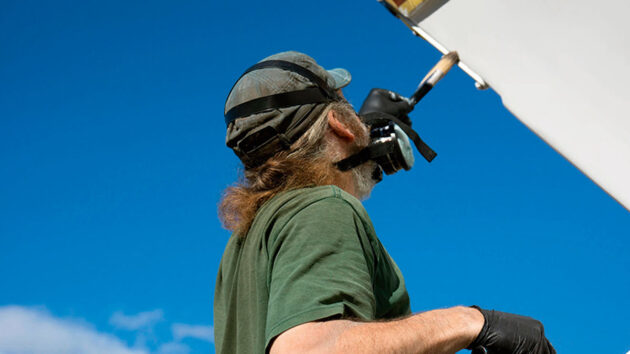
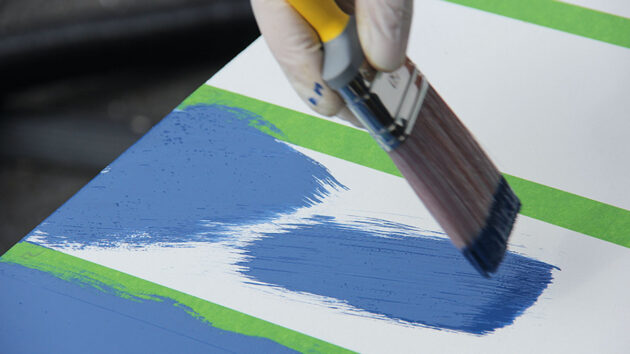
Make sure you use a wide brush
Always buy the best of what you can afford. Cheap sandpaper is a false economy, for example, and not having all the kit can get you in a real muddle.
- Cleaning supplies: marine-grade soap, decontamination solutions, buckets, sponges, and microfibre cloths.
- Masking tape: look for something low tack – it removes more easily.
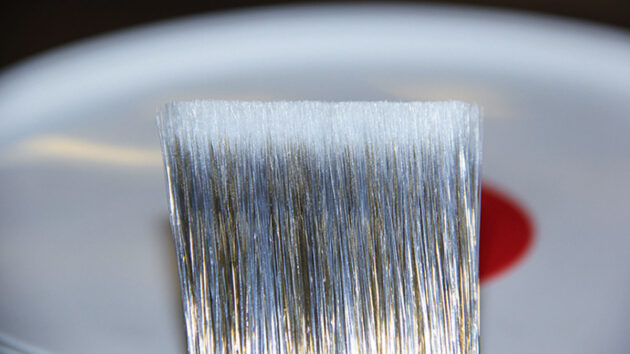
- Brushes and rollers: a nice wide brush that won’t shed bristles and roller heads that won’t dissolve in your paint. I like a foam roller.
- Sandpaper: various grits ranging from 800 to 3,000-grit, depending on the condition of the surface. Remember to invest in quality paper
- Filler: pick something appropriate that works with your type of craft and the paint system you’re using.
- Orbital sander: you don’t need the most flash sander, but you do need dust extraction. For a long time, I had a basic Screwfix sander attached to a Henry vacuum cleaner.
- Guide coat: there are lots of options to choose from. Personally, I prefer a dry coat I can shake and rub on but the spray ones available in a can are just as effective.
- Safety gear: gloves, safety glasses, and a respirator for working with chemicals and dust.
Environment
The environment in which you work can significantly impact the outcome.
Ideally, you should work in a controlled environment indoors or under a canopy where you can avoid direct sunlight, dust, and debris.
High humidity or extreme temperatures can affect how products cure or dry, so aim for mild, stable conditions.
It’s best to paint your boat indoors in a controlled environment as humidity and temperature will affect how the paint dries and cures. Credit: Graham Snook/Future
However, the ideal environment isn’t always available and this can all be done outside.
Make sure you pick nice, dry, cloudy days, in which the weather isn’t too extreme.
You can always create shade with a large tarp hanging over the vessel pegged out to the sides, or create wind barriers by creating a polythene tent to keep the wind out.
It’s also important to think about the working height of the boat. If you can, build a platform or staging to work on that allows you to walk easily and quickly around the hull.
If you can’t, a scaffolding tower on wheels or even a hop-up are great options but just add time to the process through constant repositioning.
Have a plan to achieve a perfect mirror finish
Rushing through the process is a recipe for disaster. Depending on the size of your boat and the condition of the surface, achieving a mirror finish can take anywhere from a couple of days to over a week.
Plan your time accordingly, ensuring you have enough daylight and good weather conditions to complete each stage without interruptions.
It’s okay to not get everything done on the same day or even the same weekend. Just make sure that any paint has always had a keying coat if you miss an overcoat window, and that the surface is protected from damage between work days.
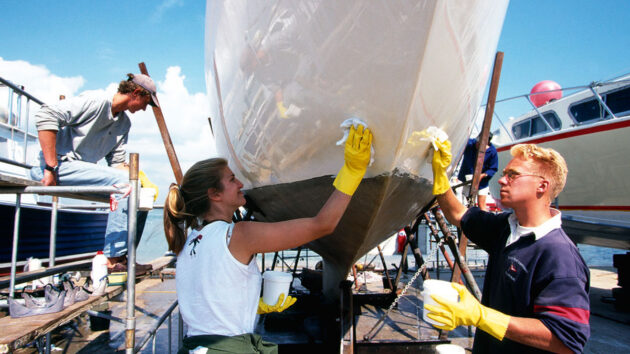
Thorough cleaning
The first step is to give your yacht a thorough clean. This might seem like a simple task, but it’s critical to remove every bit of dirt, grime, and residue from the surface.
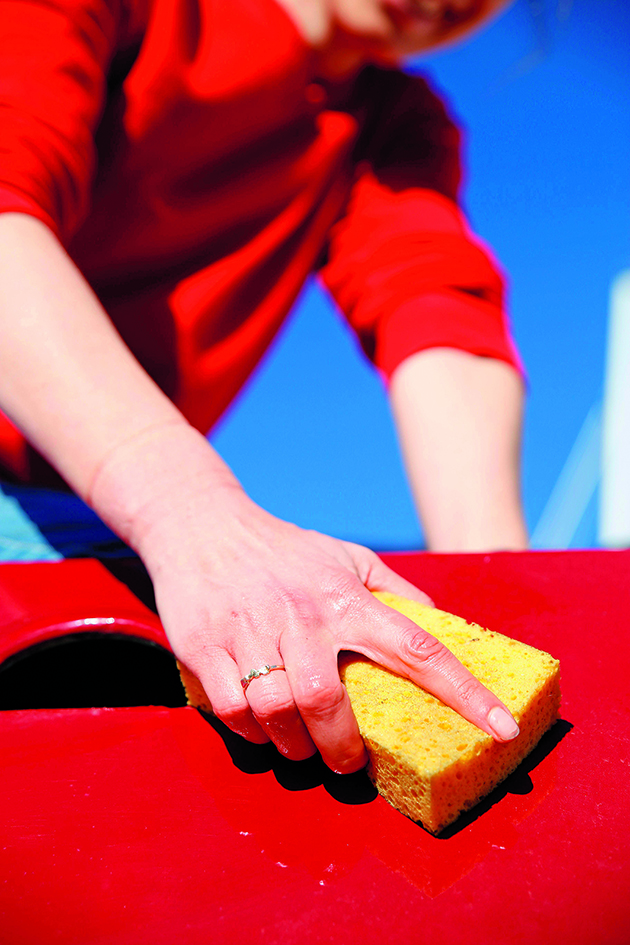
Make sure you thoroughly clean your boat before you start. Credit: Cor Laffra/Alamy
Any contaminants left on the surface can interfere with the sanding and in some cases affect the final finish.
Use marine-grade soap and water to wash the entire surface of the boat. Be thorough, making sure to reach all the nooks and crannies.
As an alternative, sugar soap also works well.
Inspect the surface
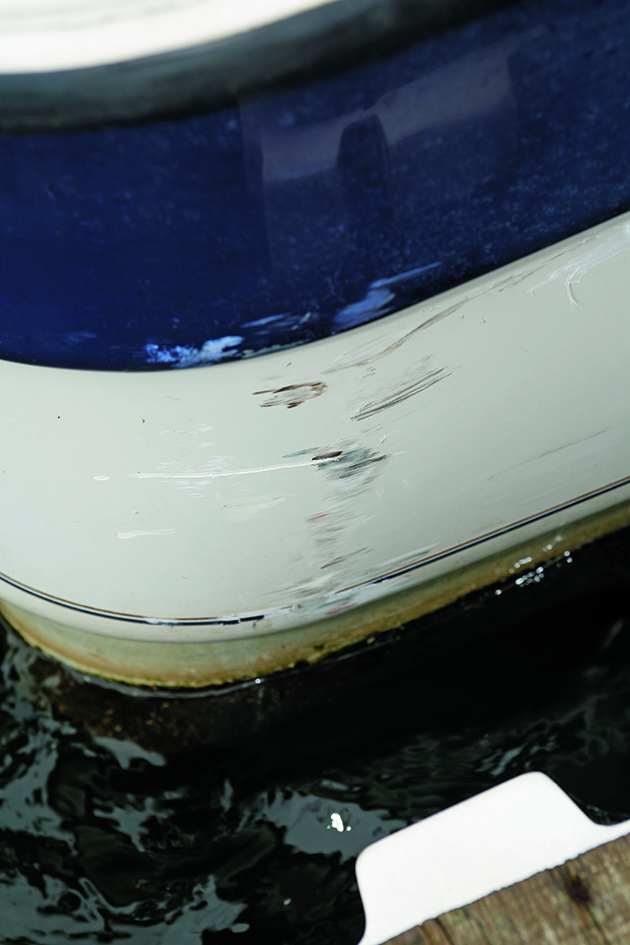
Once the yacht is clean, it’s time to inspect the surface for damage.
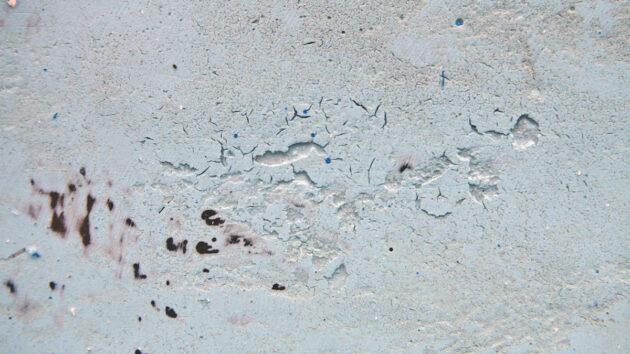
Check the surface of the gelcoat for cracks and chips and repair with a good quality filler. Credit: Ben Meakins
This step involves a detailed examination of the surface to identify any areas that need repair.
- Check for cracks and chips: carefully examine the surface for any cracks, chips, or blisters. These imperfections need to be addressed before moving on to the next steps. In most cases, a good quality filler should fix all concerns but if you are worried or the area requires major repairs consult a boat builder.
- Repair as needed: use a gelcoat repair kit or filler to fix any damage. After applying the repair material, sand it smooth with 320- to 400-grit sandpaper to blend it into the surrounding area. It’s important that as you run your hand over this area you can’t feel an edge between the repair and the hull.
Preparation: the foundation of a flawless finish
Before you even think about opening that can of two-pack paint, the surface preparation must be impeccable.
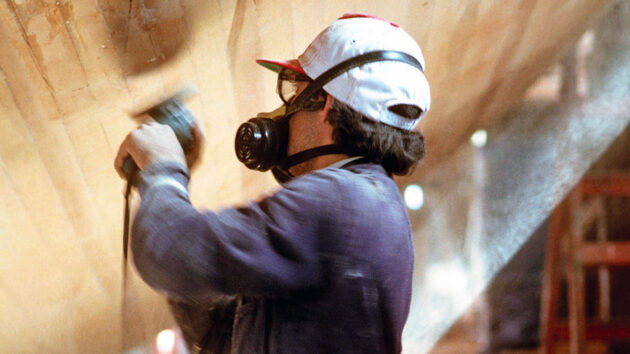
Begin sanding with coarser grit before gradually moving to a finer grit. Make sure you wear full PPE, including a mask and safety glasses. Credit: Kos Picture Source/Alamy
The success of your mirror finish relies heavily on this stage, so don’t rush it.
- Sand the surface: sanding is crucial for creating a smooth base. Start with a coarser grit, such as 120, to remove any old paint, oxidation, or surface imperfections. Gradually move to finer grits, finishing with 320- or 400-grit to create a perfectly smooth surface. Use a sanding block or a random orbit sander to maintain even pressure and avoid creating dips or waves in the surface. Make sure all your previous bigger repairs have been filled and cannot be felt by the human touch.
- Inspect and repair: once sanded, inspect the surface for any remaining imperfections, such as scratches, chips or dents. Fill these with a marine-grade filler or fairing compound. After the filler cures, sand it smooth, and repeat as necessary until the surface is flawless. This can really take some time – even a pin prick can show through at the end.
- Final cleaning: after sanding, thoroughly clean the surface again. Use a tack cloth or a lint-free rag dampened with a solvent (I like to use the top coat thinners for this, just to make sure there is no chemical contamination) to remove all sanding dust and contaminants. Ensure the surface is completely dry before moving on.
- Masking: mask up the hull so only the topsides can be painted, make sure you stretch the masking tape in a nice long line to achieve a sharp waterline.
Guide to achieving a mirror finish
With your preparations complete, you’re ready to begin the actual work.
The process is broken down into several key stages: cleaning, inspection, sanding, cleaning, painting, compounding, polishing, and waxing.
Use the roll and tip method to get the best finish possible. Credit: Michele Cornelius/Alamy
Each step builds on the previous one, so it’s important to follow them in order.
1. Priming: setting the stage for the paint
A quality primer is essential for adhesion and building up the surface to achieve that mirror finish.
The primer also helps to fill in any minor imperfections and provides a uniform base for the paint.
Make sure the masking tape is stretched and also changed regularly throughout the process
As suggested previously this should be a primer from the same paint system as your topcoat.
- Choose the right primer: opt for primer compatible with your topcoat. This will provide excellent adhesion and durability.
- Mix and apply the primer: mix the primer according to the manufacturer’s instructions. Apply with a roller, nice thin coats. I often apply three coats and then check to see if any areas require filling and work before continuing. If I’m not using an undercoat as part of a system
I apply four to five coats of primer. - Guide coat: before I block sand I apply a guide coat to my hull, this allows me to see the imperfections and also helps me to make sure I’ve covered all areas when sanding.
- Block sanding the primer: once the primer is fully cured, it’s time to sand again. This step is where you really start to shape the surface. Use a long sanding block and wet sand with 400- to 600-grit paper. This will help to level out the primer, ensuring a perfectly smooth base for the topcoat. Don’t skip this step—it’s what separates an average finish from a professional one. If your paint system only requires the surface to be prepared with a 320- or other grit sandpaper you can now run back over the hull in the same movement with the correct grade to create the appropriate surface key.
- Final wipe down: after sanding, wipe down the surface with a tack cloth and a degreaser to remove any dust or residue. The surface should now be flawless, with no visible imperfections.
2. Undercoat: if required (not for every system)
Not all systems require undercoat but if they do follow the manufacturer’s instructions.
Apply the coats as evenly as you can and then sand them back in the same manner as the primer.
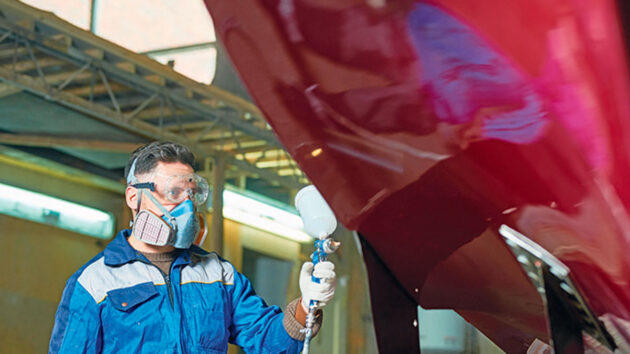
3. Painting: applying topcoat
This is where the magic happens. Topcoat is the key to achieving that deep, reflective finish.
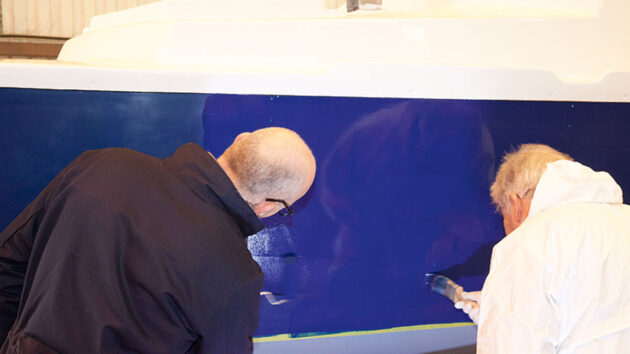
On large areas, the best method is for one person to roll the paint on with a gloss paint roller, and the other to follow with a brush for tipping off. Credit: David Harding/Future
Here’s how to do it right.
- Fresh tape: change the masking tape; it sounds daft but your masking tape has just witnessed primer, undercoat and sanding dust, so it’s time to change it and remove all that dust and grime.
- Mixing paint: follow the manufacturer’s instructions precisely when mixing. Two-pack ratios must be exact to ensure proper curing and maximum durability. Once mixed, let the paint sit for a few minutes to allow any air bubbles to rise to the surface. Your thinners ratio wants to be spot on for the maximum allowance of thinners for the product; you may have to adjust this based on the ambient temperature.
- Strain the paint: strain the paint into a fresh cup to remove any impurities or particles that could mar the finish. This step is crucial for achieving a smooth, glass-like finish.
- Apply paint: apply the paint using the tip and roll technique. To tip and roll paint, first use a roller to apply the paint evenly, then use a brush to lightly ‘tip’ over the wet paint, smoothing out roller marks for a smooth finish. Depending on the surface, I like to go vertically with both and run onto the masking tape edges. When tipping and rolling paint, overlap each stroke by about 50% to ensure even coverage and blend the edges seamlessly.
- Inspect between coats: after each coat, inspect the surface for any imperfections such as runs, sags, or dust nibs. If necessary, lightly wet sand with 1,000 to 1,500-grit paper to correct these issues before applying the next coat. Wipe down the surface after sanding and never sand wet paint.
- Final coat: I normally aim to do three coats in entirety, but the final coat is the most important. It should be applied with precision and care. This coat is where the depth and clarity of the finish will truly shine through. Make sure the environment is as clean as possible to avoid any contaminants from settling on the wet paint.
4. Curing: letting the paint set
Make sure you check for runs, sags or dust nibs between each coat of paint. Credit: SeventyFourImages/Alamy
Paint requires proper curing time to reach its full hardness and gloss. Patience is key here – don’t rush this process.
- Tape: get the masking tape off as soon as you can; this allows any trapped paint to dry and the tape to come off easily.
- Initial drying: allow the final coat to dry in a dust-free environment. This can take anywhere from a few hours to overnight, depending on temperature, humidity, and product.
- Full cure: full curing typically takes 7-10 days. During this time, avoid touching or placing anything on the painted surface. This curing period allows the paint to fully harden, which is crucial for the next step – polishing.
5. Extra Mirror: clear coats and polishing
You can add several coats of clear coat if you have a spray gun. Make sure you wear protective gear. Credit: SeventyFourImages/Alamy
If you have a spray gun you can use it to give a real shine.
Before the paint has fully cured, the surface will likely have a high gloss; a spray gun can be used to add one or two coats of clear coat.
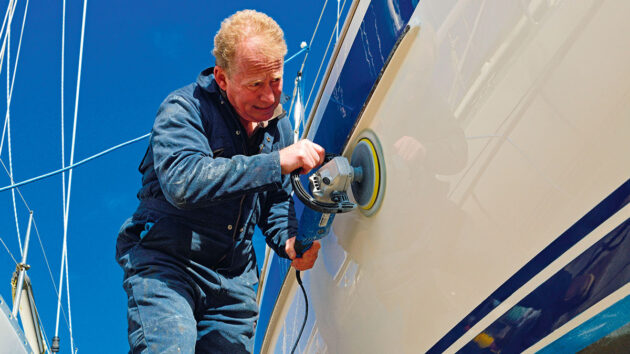
Start polishing at a low speed to work in the compound. Credit: Gary Blake/Alamy
This will help you achieve that perfect mirror finish and give you a surface to care for beyond the paint. It will also need to be polished.
- Clear coat: add one or two clear coats to the hull, following the manufacturer’s instructions.
- Wet sanding: start with 1,500-grit sandpaper to remove any orange peel, dust nibs, or minor imperfections from the surface. Progressively move to finer grits, such as 2,000 and then 3,000, until the surface is uniformly smooth. Use a sanding block to maintain an even surface and avoid creating dips, and use plenty of water. Check the clear coat tin for instructions on what grit to use.
- Buffing: after sanding the surface will look dull, but that’s about to change. Using a variable-speed polisher with
a foam or wool pad apply a cutting compound. Start at a low speed, gradually increasing as you work the compound into the surface. The goal is to remove the sanding marks and bring out the gloss. - Final polishing: once the cutting compound has done its job, switch to a finer polishing compound. This will refine the gloss and remove any swirl marks left by the buffing process. Finish with a swirl remover or glaze to achieve that deep, wet-look shine.
- Cleaning up: after polishing, clean the surface with a microfibre cloth to remove any residue. Inspect the finish in natural light to ensure there are no missed spots or imperfections. The surface should now be flawless, reflecting like a mirror.
- Apply a wax or sealant: once the polish is complete, apply a high-quality marine wax or sealant to protect the paint from UV rays, salt, and environmental contaminants. Use a soft applicator pad and apply in small sections, then buff to a high shine with a microfibre cloth.
6. Sealing and Protecting: ensuring longevity
Make sure you reapply wax or sealant every few months or as necessary to maintain the hull finish. Credit: Patrick Eden/Alamy
After all that hard work, you want to protect your finish to keep it looking pristine for as long as possible.
- Regular maintenance: clean the yacht regularly with mild, pH-balanced soap and water. Avoid harsh chemicals or abrasive cleaners that could dull the finish. Reapply wax or sealant every few months, depending on usage and exposure to the elements.
- Waterline: keep the waterline clean so you don’t damage the paint layers.
- Repair: for any places where the paint chaffs or gets knocked, spend the time to repair that area.

Painting and varnishing a boat: how to get the perfect finish
Kit boat builder Polly Robinson shares her tips for painting and varnishing a plywood-epoxy boat

Surface preparation for polishing or varnishing a boat
Mirka’s Andy Mierau shares trade tips on how to prepare surfaces for polishing or varnishing
Best boat varnish: 7 top options for gleaming woodwork
Few things are as quintessential to the archetypal sailboat as gleaming, iridescent woodwork that is indicative of a recent coat…

Boat wood: a complete guide for yacht owners
Boatbuilder and finisher Lyndon March explains which types of wood work best for different repairs and modifications on board
Want to read more practical articles?

A subscription to Practical Boat Owner magazine costs around 40% less than the cover price.
Print and digital editions are available through Magazines Direct – where you can also find the latest deals.
PBO is packed with information to help you get the most from boat ownership – whether sail or power.
-
-
-
- Take your DIY skills to the next level with trusted advice on boat maintenance and repairs
- Impartial in-depth gear reviews
- Practical cruising tips for making the most of your time afloat
-
-
Follow us on Facebook, Instagram, TikTok and Twitter