
John Connell keeps his spinnaker in check by devising and constructing a home-made spinnaker snuffer
For those of us who didn’t grow up racing dinghies, the spinnaker can be a scary bit of gear, writes John Connell.
My first attempts at using a big triradial on a 10m (33ft) trimaran were a clear case of the tail wagging the dog.
Therefore, bring on the spinnaker snuffer: a great idea, and not difficult to make.
I have a Sailrite sewing machine from the US, which is really overkill for a task like this as cloth thicknesses could probably be handled by a domestic machine.
I originally looked at the spinnaker snuffer design on the Sailrite website – a very informative site, I might add, with reliable products and service – but I decided that it could be done more simply.

John’s finished spinnaker snuffer. Credit: John Connell
For comparison, I had the spinnaker snuffer that came with my old trimaran.
I’ve made a few changes since the first one, and am happy with what follows for function and ease of construction.
The mouth is held open by a 6mm stainless steel ring. (Any thicker won’t go underneath the foot of my sewing machine.)
The diameter will vary depending on the size of the spinnaker, but there’s room for a little flexibility here.
A 300mm-diameter ring works well for a snuffer 10-12m long.
To make the spinnaker snuffer I used some poly 2-bar knit which I bought a while ago from Bainbridge International.

The top metre or so should be tapered to 250mm wide. Credit: John Connell
It’s a light mesh fabric that bunches well at the masthead and allows moisture to dissipate.
The width required will be equal to the circumference of the ring plus seam allowance – borrow your mum’s cloth tape measure if you can’t work it out.
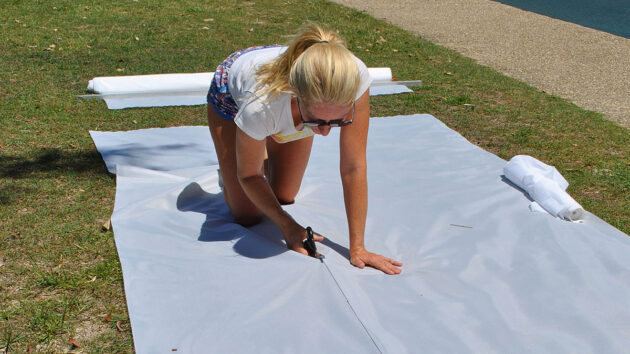
Find a vacant marina arm free of bird droppings to lay out, mark and cut the fabric: a brickie’s chalkline can be useful here.

This is the 500mm-long base piece for attaching control lines. Credit: John Connell
Fold the cut fabric in half lengthwise and mark corresponding points on the edges for alignment later.
It’s surprising how much light fabrics can creep over 10m, even with a walking foot machine.
I made up a 500mm-long base piece for attaching control lines (the blue piece in the photos).
I used Oxford fabric for this, the stuff sailbags are made from. It’s light, bunches better than acrylic canvas and is adequately UV-stable considering how much exposure it will get in a year.

Plastic guide rings are sewn into the main seam with the snuffer inside out. Credit: John Connell
This was a good time to sew two small squares of Dacron on the inside for the uphaul grommets: I located them a little aft of centre.
This Oxford piece was then attached with a semi flat-felled seam to the body of the spinnaker snuffer.
I gave it about 100mm of overlap then triple-stitched this with zigzag.
Why? I like the look.
Some fabrics have one side smoother than the other: I prefer to keep the smooth side facing in to minimise friction when sliding it over the sail.

Grommets are punched into Dacron reinforcing at the top of the snuffer. Credit: John Connell
Next, I sewed the main seam with the snuffer inside out. I started sewing at the point where the blue base piece attaches to ensure it lined up correctly.
During this step you’ll need to sew in the plastic rings through which the control lines will run.
Light webbing looped through the rings is simply included in the seam: four rings are plenty.
I tapered the top metre or so to a width of 250mm before sewing up the top of the seam.
This narrow top piece was made stiff with two pieces of Dacron sailcloth: cut them to 250mm x 100mm then fold them in half and sew them over the two top ends.

he top with hardware ready to fit. Credit: John Connell
The seam can then carry on right to the top, including the Dacron pieces.
The spinnaker snuffer was now turned right side out and the main seam sewn a second time about 5mm in from the edge.
This runs right up from the bottom of the blue base piece and includes the Dacron pieces at the top.
Sewing in the stainless ring is the hardest part of the project unless you have three arms.
However, before doing this you’ll need to sew two webbing loops onto the ring for the downhaul.

Sewing in the stainless steel ring. Credit: John Connell
Double-sided tape makes this simple and a box-X stitch pattern gives a strong finish.
Fold the bottom edge of the blue fabric up 40mm to enclose the ring, but before doing so, reinforce this with an 80mm-wide piece of the same material.
This is probably unnecessary, but I used offcuts for this purpose and it only took a minute.
I used black thread and a zigzag stitch here as this did a great job of hiding my uneven sewing.
Smack some No7 grommets into the Dacron pieces at the head.

Looking up the snuffer throat before bridle attachment. Credit: John Connell
Attached through this will be a wide-D shackle with a short strop of wire or Spectra to attach the head of the sail and a small block to run the uphaul/downhaul line.
The control line feeds from a short bridle off the two black webbing loops (downhaul) up through the guide rings, over the block and back down through the guide rings to attach to another short bridle (uphaul) at the base.
This second bridle is simply knotted through two grommets in the blue base piece as in the photo.
The length of the control line should be twice the length of the snuffer plus about 8m to allow for tying off.

The snuffer mouth with bridles attached ready for control line. Credit: John Connell
I like to put a stitch of whipping twine through all knots in the control line to stop anything from coming undone at an inconvenient moment.
To fit, lay the spinnaker out on the grass, reach down through the top of the snuffer, grasp the head of the sail and pull it back into the snuffer.
Attach the head of the spinnaker to the strop and you’re ready to go.

How to rig a spinnaker on a small yacht – what you need and where to fit it
If you want a spinnaker, but don’t have the necessary fittings or equipment on your boat, where do you start?…

Sail trim: Sailing downwind without a spinnaker
Sailing efficiently when the wind comes astern doesn’t mean you have to fly a spinnaker or cruising chute. David Harding…

Cruising chute or spinnaker? We compare both sails on the same boat on different points of sail
Many cruising sailors favour a cruising chute over a spinnaker – but how do the two sails compare on different…

Spinnaker repair: how to do it yourself
Andy Pag saves thousands of pounds on a replacement by mending his shredded sail himself using a domestic sewing machine
Want to read more practical articles like How to make a spinnaker snuffer?

A subscription to Practical Boat Owner magazine costs around 40% less than the cover price.
Print and digital editions are available through Magazines Direct – where you can also find the latest deals.
PBO is packed with information to help you get the most from boat ownership – whether sail or power.
-
-
-
- Take your DIY skills to the next level with trusted advice on boat maintenance and repairs
- Impartial in-depth gear reviews
- Practical cruising tips for making the most of your time afloat
-
-
Follow us on Facebook, Instagram, TikTok and Twitter