
Galvanic corrosion is often something mainly associated with metal fittings on larger craft: however, David Parker has a cautionary tale about double-checking fixings on small boats too

The most obvious warning that something was wrong was the water sloshing around in the stern buoyancy tank of my tender, writes David Parker.
This dinghy is my little GRP workhorse which sits on the river all year round and ferries me back and forth to my river mooring.
I had first noticed this water as a bit of seepage: it was sitting in the small well of the aft part of the keel moulding.
The only way I could think water would be getting in was through one of the fixing holes for the keel bands underneath.
However, the leak was initially small, and I still needed to keep the boat on the water to get various jobs done on the larger craft.
But it gradually got worse, until one day I opened the hatch and various bits of kit were floating about in there.
It was time to get the boat out of the water and investigate this properly.
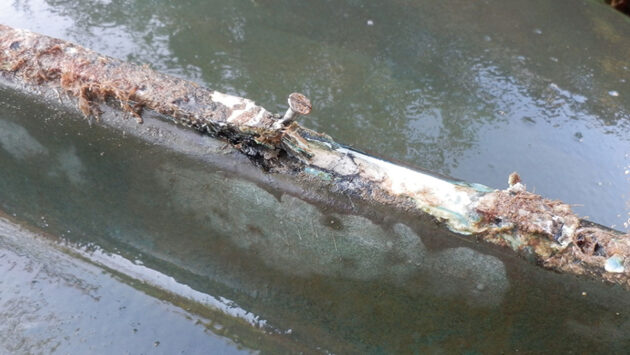
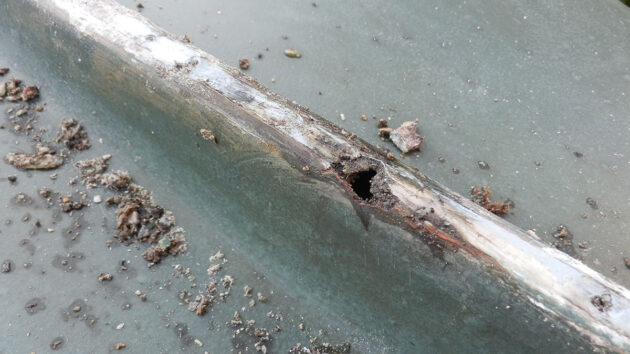
Keel band corrosion: the source of the problem
What I saw surprised me. A section of one of the keel bands had actually ripped off, leaving a hole underneath.
All along the keel bands there seemed to be pitting and corrosion: in fact, where the damage was I could break the aluminium strip in half with my hands.
It was particularly bad around the damaged area.
I had fitted these aluminium strips when I first bought the tender.
Previously there had been a mix-and-match with the keel bands: parts were aluminium, and other bits were brass.
However, parts of the brass strips had broken off and were quite thin.
They had also been fitted with brass screws, something you should not use below the waterline because brass is particularly vulnerable in seawater.
It is an alloy of copper and zinc and is therefore prone to dezincification: this is due to galvanic corrosion.
The original aluminium strips had been fitted a bit haphazardly, but overall seemed to have fared better.
Initially, I wanted to replace them all with bronze D-section, but they were proving tricky to source locally at a reasonable price: a full set from specialist suppliers would have cost nearly as much as I paid for the dinghy.
In the end, I contacted a local metal supplier and obtained a 3m 12mm x 2.5mm powdered aluminium strip for £10 which was ideal.
I didn’t think I would have a problem with aluminium – as I have mentioned, the previous ones had seemed ok, albeit a bit battered.
Also, aluminium craft are very durable and often the choice for the military when they want speed and lightness.
Aluminium does not rust or corrode like iron or steel because it naturally forms a layer of aluminium oxide which protects it.
Now, however, every keel band looked in a sorry state, and some bits even powdered in my hands.
What caused it?
As is always the way with boats, I now had a bigger job than I had bargained for – this wasn’t going to be an ‘in-out repair over the weekend’ affair.
Every keel band would have to be replaced, the damaged section repaired and the fixing holes made good.
I would also need to work out what to replace the strips with, but my first concern was why they were like this in the first place.
The answer seemed obvious – some sort of galvanic corrosion – but how could that have occurred?
I wondered if it could be the Coppercoat, although I was aware when I applied it that the makers state it cannot cause galvanic corrosion.
This is because each copper particle is in a resin coating which insulates it so the final coating is inert and non- conductive.
A current cannot pass through Coppercoat, and the specifications state this coating does not cause or promote electrolysis or cathodic decay.
I rang the company and they confirmed this. However, Coppercoat did have another theory: perhaps the decay was caused by ‘crevice corrosion’ when there are flaws in an aluminium coating.
This permits moisture ingress which produces a small concentration of aluminium hydroxide, a potent corrosive material.
As the corrosion persists a stronger and ever-increasing solution of aluminium hydroxide is produced, which apparently looks very much like electrolytic action.
The corrosion on the keel bands, however, was so extensive I still wondered about it and spoke to Chris Harris of MG Duff, which specialises in cathodic protection systems.
I explained the problem and what I had learnt so far. Chris then asked what I had used to fix the keel bands.
I had used stainless steel screws; and almost immediately the penny dropped. Chris felt these were more likely to have caused the problem because while stainless steel is near the top of the galvanic scale, aluminium is way down at the bottom.
Basically, the aluminium was going to get ‘eaten’ in a situation like this.
While I use Duralac anti-corrosive jointing compound on aluminium masts when adding stainless fittings, here I had just inadvertently replaced the old fixings in brass with stainless steel screws, which I regularly use around boats.
Ironically, cheaper galvanised fixings or even zinc-plated screws would have caused the keel bands less trouble.
Carrying out the repairs to each keel band
It is usually far harder to remove an old fixing from a boat than put one on, and if removal is done carelessly you can cause more damage than you started with.
If screw heads have been corroded, then when you try to remove them it is very easy to ruin any grip on the heads and even break them off.
For this reason, each section of the keel band required a bit of a surgical operation to remove them so as not to create any more damage – or areas of fractured gelcoat in the hull.
When the repairs were complete I wondered about fitting new keel bands of stainless steel or even going for the more expensive bronze.
However, I thought just reinforcing the areas with glass woven tape would be a better solution.
I did this because another smaller GRP dinghy I have has no keel bands at all.
While there are a few scratches in the gelcoat from beaching it, it has done better by having no keel bands and consequent fixings through the hull.
I, therefore, decided that tape with several coats of resin on top would be a more durable and easier finish to repair if required – and I wouldn’t have to drill any more holes in the boat hull.
Repair a keel band: step-by-step
Credit: David Parker
1. A brief clean-up and close inspection shows where a section had ripped away, leaving a protruding screw. The keel band had clearly been weakened by corrosion.
Credit: David Parker
2. Some of the screwheads had been burred over when the tender had been beached at various times.
Credit: David Parker
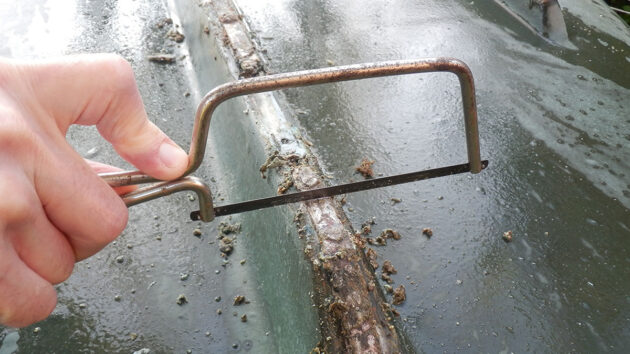
3. After cuts were made with a hacksaw either side of a fixing, a small section could then be lifted out.
Credit: David Parker
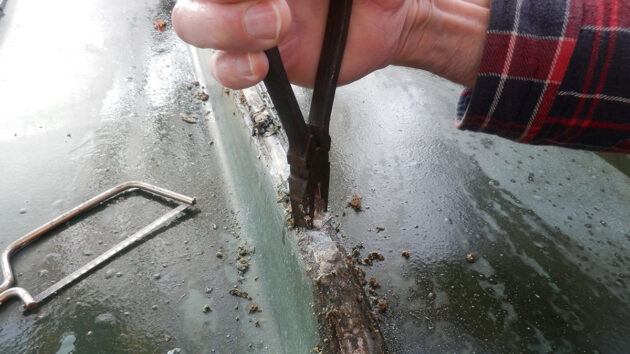
4. The remaining piece with the fixing could then be removed by rotating it with pliers.

Credit: David Parker
5 The screws came out more easily on the side bands, which could then be prised off the bedding compound.

Credit: David Parker
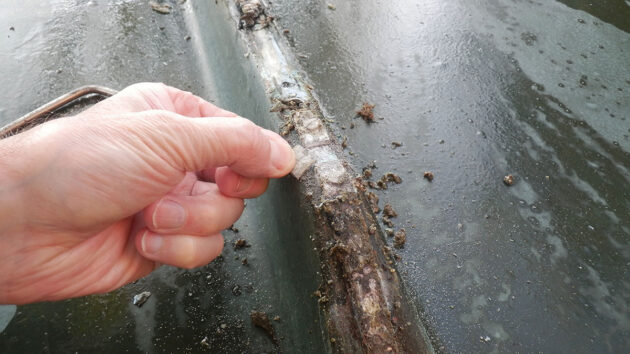
6. Some pieces of keel band came away as large bits, but where the corrosion was worse they just broke up.
Credit: David Parker
7. With the keel band strips removed, the damage caused in the aft section of the keel could be seen clearly.
Credit: David Parker
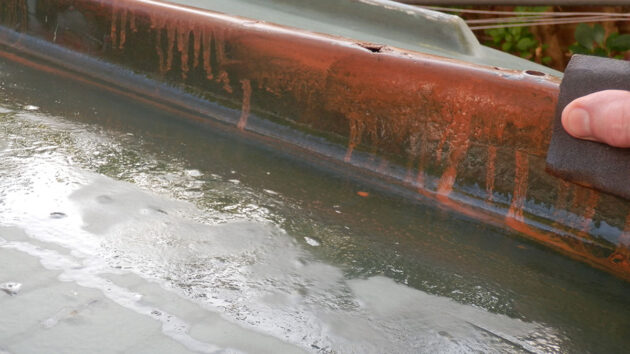
8. With each keel band removed, the hull was thoroughly cleaned. The sections were abraded when wet and then the hull was left to dry out for a week.
A week later…
Credit: David Parker
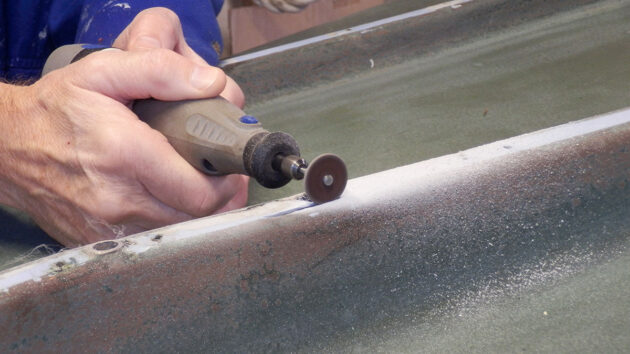
1. A Dremel was used to cut away the damaged area. First, a longitudinal cut was made.
Credit: David Parker
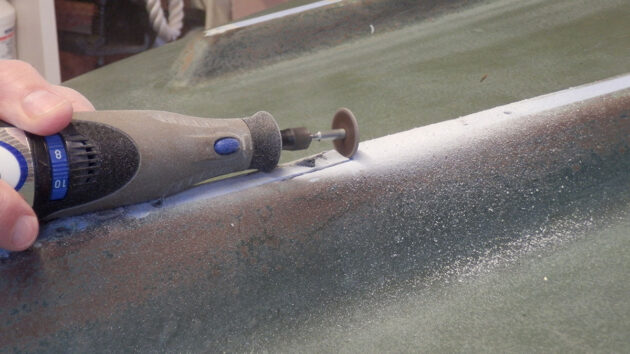
2. With the small abrasive disc a cut could then be made across the keel.
Credit: David Parker
3. The damaged section could then be lifted clear.
Credit: David Parker
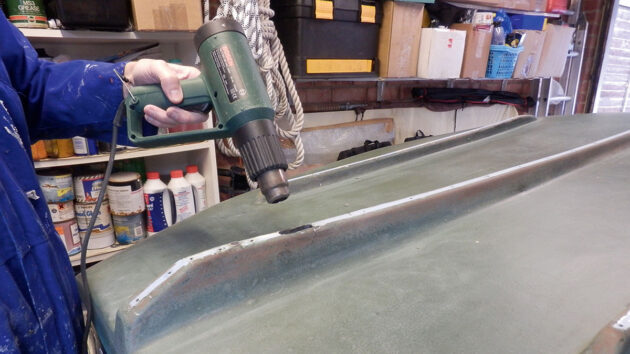
4. The area was left to dry for a few more days, and a hot air gun was periodically used on the repair area to speed things up.
Credit: David Parker
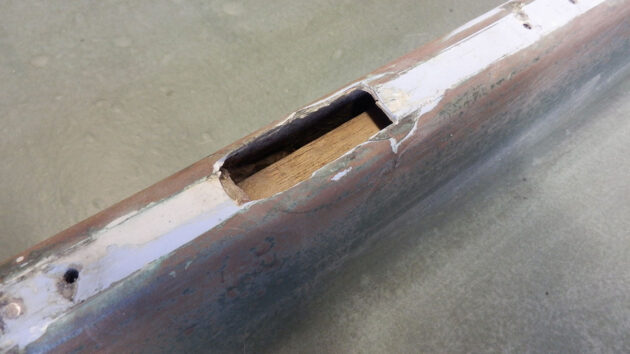
5. Under the cutaway, the wooden former used on the original moulding can be seen.
Credit: David Parker
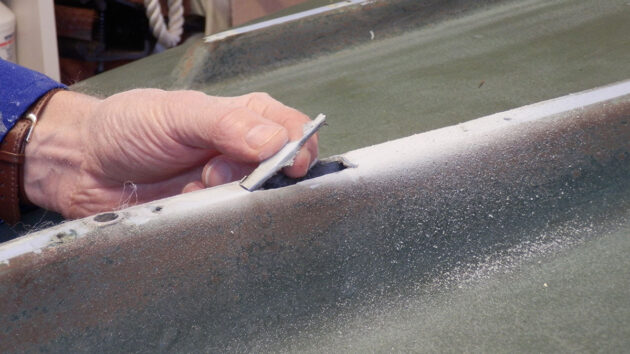
6. A packing piece made of teak was then made to fit the hole.
Credit: David Parker
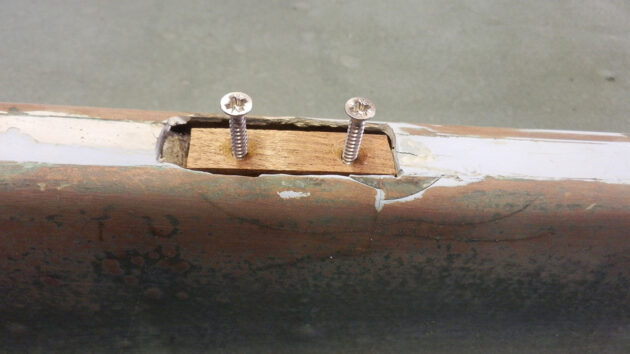
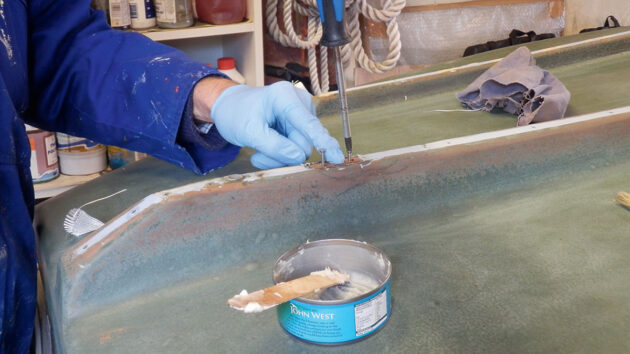
7. Before screwing into the former below, the packing piece was bedded down on an epoxy paste made by mixing microfibres and colloidal silica with resin.
Credit: David Parker
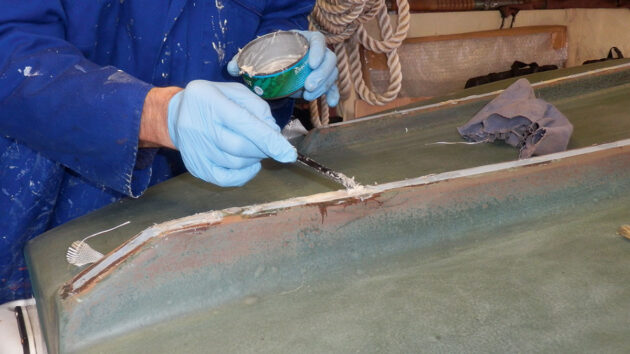
8. The rest of the screwholes from the old fixings were then filled with this mix.
Credit: David Parker
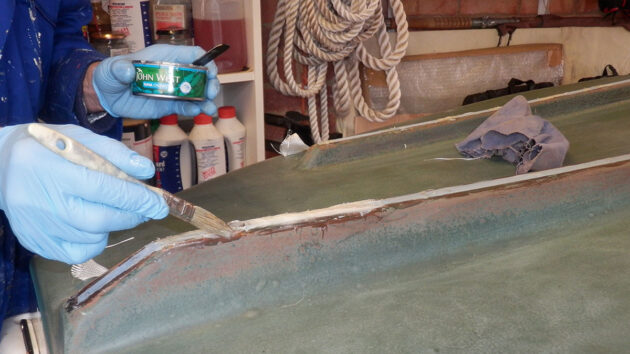
9. The tops and sides of the mouldings were then primed with epoxy resin.
Credit: David Parker
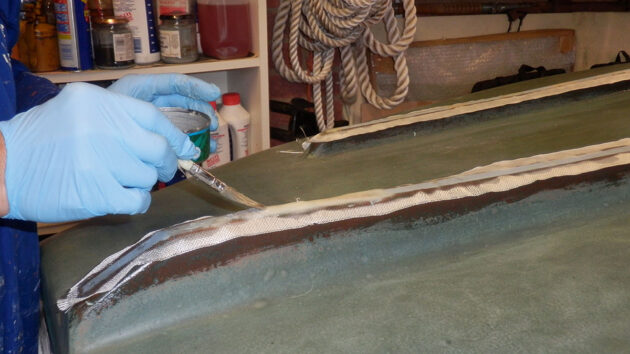
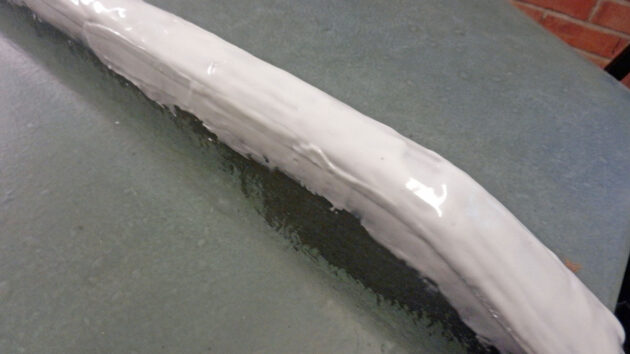
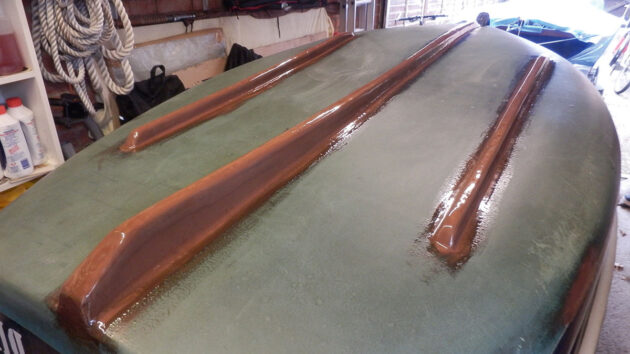
10. Woven glass tape, 50mm wide, was then laid along each side of the moulding and more resin was applied.
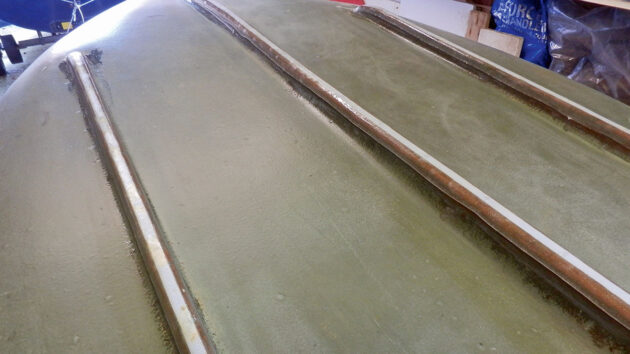
Credit: David Parker
11. When the resin was tacky, a fairing compound of resin and glass bubbles was then applied over the tape.
Credit: David Parker
12. When it was cured, the fairing compound over the tape was sanded smooth.
Stiffening the gunwales
Being afloat all the time on a pontoon with bigger craft carrying spear-like outboard motors means my small tender does have a bit of a hard life.
As well as the keel bands, the gunwales had also received some damage which was also repaired with woven glass tape.
However, while the boat was ashore I also took the opportunity to stiffen the gunwale mouldings internally and add a bit more buoyancy, as shown here.
With the leftover foam, I also added more buoyancy under the seats of another tender.
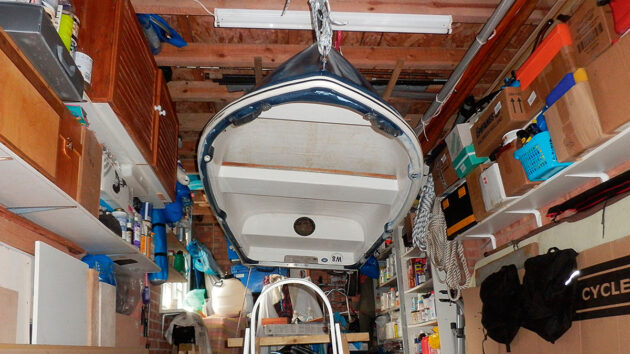
Credit: David Parker
1. Using a series of mainsheet blocks I rotated the boat upside down in rope slings in the garage and hoisted it up to the roof.
Credit: David Parker
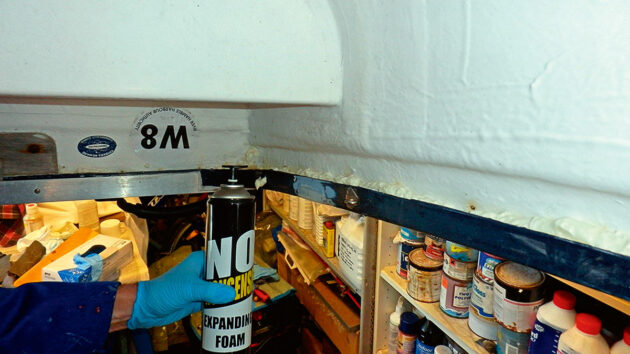
2. With the tender at head height I then had good access to the underneath of the gunwale mouldings and was able to fill them with expanding foam.
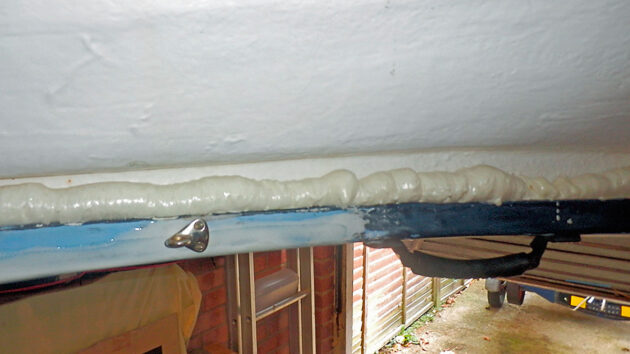
Credit: David Parker
3. As the foam dries it doubles in size, but I wanted to make sure all the nooks and crannies were filled.
Credit: David Parker
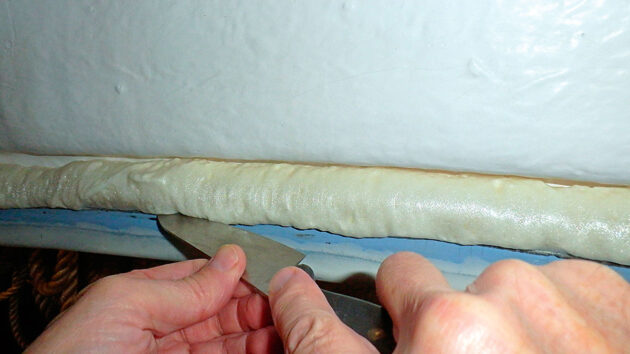
4. I then trimmed the excess foam away with a knife.
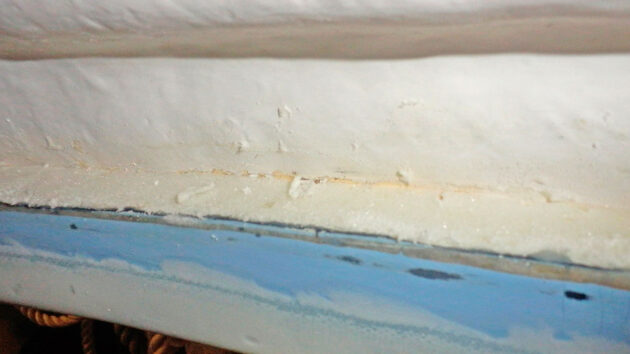
Credit: David Parker
5. The trimmed foam should now hopefully add a bit more strength to the internal moulding of the gunwales.
Credit: David Parker
Fresh Coppercoat was then applied to the repaired areas

Keel types and how they affect performance
Peter Poland looks at the history of keel design and how the different types affect performance

The things I learned when the keel fell off
Photo: Enya being lifted out to inspect the swing keel Sailing is full of compromises and boats with swing keels are…

How to check keel bolts
Colin Brown describes a series of checks you can carry out to assess the structural integrity of the bolts which…

Going astern in a long keel sailboat
Long-keelers are known for having a mind of their own when going astern, so how do you let them know…
Want to read more practical articles like How to repair keel band corrosion on small boats?
A subscription to Practical Boat Owner magazine costs around 40% less than the cover price.
Print and digital editions are available through Magazines Direct – where you can also find the latest deals.
PBO is packed with information to help you get the most from boat ownership – whether sail or power.
-
-
-
- Take your DIY skills to the next level with trusted advice on boat maintenance and repairs
- Impartial in-depth gear reviews
- Practical cruising tips for making the most of your time afloat
-
-
Follow us on Facebook, Instagram, TikTok and Twitter