Is your boat's engine beginning to run hotter than normal? It may be time to service the cooling system, suggests Tony Davies
How to service a marine engine cooling system
Marine engine cooling systems vary in their complexity, beginning with the cheap and nasty direct or raw water cooling systems where sea or river water passes directly through the engine block for cooling purposes.
There is only one advantage to a marine engine cooling system, and that is cheapness.
It is seldom seen on modern marine diesel engines, although the Americans still seem to like it on their big V8s.
Raw water cooling shortens the engine’s life and also significantly reduces engine efficiency as the engine always runs well below its designed running temperature of 80-85°C.
Raw water-cooled engines

For raw water-cooled engines, the normal recommended running temperature is about 52°C as this cuts down the amount of salts and sediment deposits that cling to the cooling system walls while running.
Over a long period, the cooling system gradually becomes clogged and engine temperature rises, causing hot spots in the areas where the water can pass through least effectively.
Having said all this, thousands of engines are still running well despite being under-cooled throughout their lives!
There is very little that can be done to prevent silting of the engine block.
It is possible to occasionally backflush the engine by removing the hoses and running clean water through the system as this will remove loose debris, and if done regularly from new it does make a difference to the engine cooling passages.
Fresh water cooling system

The far more efficient indirect or fresh water cooling systems allow engines to run at their correct temperature of around 85°C, and by allowing the introduction of coolant inhibitors and antifreeze into the cooling system, provide for long and efficient engine life.
Unfortunately, it is not all good news as a regular service regime is required to keep the cooling systems of fresh-water-cooled engines working correctly.
This mainly involves cleaning the small tubes in the tube stacks located within the heat exchanger, the engine and gearbox oil coolers – and also, on more powerful engines, the intercooler that cools the turbo and supercharger charge air before it enters the cylinders.
In this latter case, it is not only engine temperature but also engine performance that suffers when the tubes become blocked.
Heat exchangers, oil coolers and intercoolers come in many designs, so the method of dismantling before cleaning the stacks will vary slightly between engines.
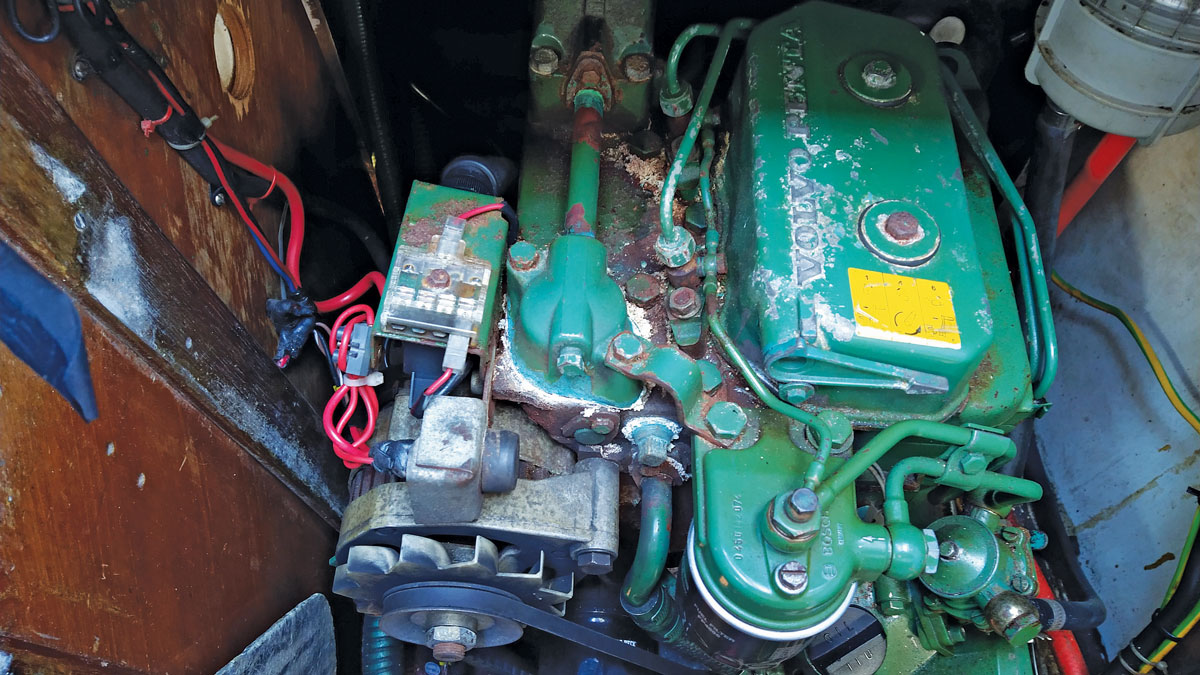
The engine featured is a home-marinised BMC 1.5 diesel (one of the best little diesels of its time) with less than 500 hours of running.
How to service a marine engine cooling system: Clean the heat exchanger

1. The Bowman heat exchanger is combined with the exhaust manifold and includes the header tank.
It is an easy job to remove the tube stack for cleaning, so there is no excuse for not doing it every couple of years.
Undo the hose clips on the covers at each end of the header tank to free the tube stack, which is secured inside the covers by the smaller clips.

2. Slide the tube stack out of the header tank.
It can be removed from either end, whichever is easiest.

3. This tube stack was filled with a gel-like substance, which reminded me to flush the engine block through with clean water.

4. An unwound wire coat hanger is an ideal tool for running through the tubes as the spiral section provides a smooth scraping action.

It is important to clean each tube individually, and well worth the effort to keep the system flowing freely.

5. Flush the tubes through with clean water and also flush the heat exchanger body to remove any residue from the heat exchanger.
Refit the tube stack into the header tank, ensuring that the ends of the stack are located in the small sections of the end covers and that the hose clips are gripping it securely
How to service a marine engine cooling system: Clean the oil cooler

1. The oil coolers are next, and this gearbox oil cooler will need a couple of new hose clips once it has been cleaned!

2. The inlet end of the cooler is the first point of entry after the water strainer, and some weed has clearly bypassed the strainer and is beginning to block the tubes.
A few minutes with the wire coat hanger and they will be perfectly clean again. hose clips

The raw water pump is on the left
3. On this engine the oil cooler is hidden behind the raw water pump, which has to be removed to allow the tubes to be cleaned.

4. As the raw water pump cannot be serviced without being removed it has to come off anyway, and the easiest method of removal is to take off the mounting bracket and pump as one unit.

5. This now gives easy access to the engine oil cooler for cleaning
How to service a marine engine cooling system: Cleaning the water pump

1. Once the pump is separated from its bracket it is ready for servicing, which begins with removal of the cover plate.
With the screws removed, a light tap will usually suffice to free off the cover plate.

2. With the cover off, the amount of wear on the inside of the cover face can be checked.
Where there is excessive wear these covers can often be fitted inside out.

3. Removing the impeller is generally an easy job if you use a proper puller.
This is a Jabsco Compact puller.
If you use screwdriver blades to wrench out the impeller you will definitely damage the impeller and probably also the edges of the pump body, which may prevent the cover from sealing properly when reassembled.

4. In normal circumstances, once the impeller is removed it is checked for damage and wear and then either refitted or replaced.
Splits like this indicate an impeller close to failure.

5. Due to the layout of the engine and the impossibility of servicing the pump while in place I carry a complete spare pump on board ready for a quick changeover.
In this case, it will replace the old pump, which will become the spare once serviced.

6. Once the pipework and pulley are removed from the old pump the new one can be assembled in a few minutes, starting by installing the hose tails into the pump using plumbers’ PTFE tape to seal the threads.

7. The pulley is fitted next. This must be lined up with the engine crankshaft pulley once the pump is in position, so it is left loosely fitted at this stage.

8. The pump is refitted and the hoses are connected. The pulley is lined up with the crankshaft pulley and the securing Allen screw is tightened.
The drive belts can then be renewed.
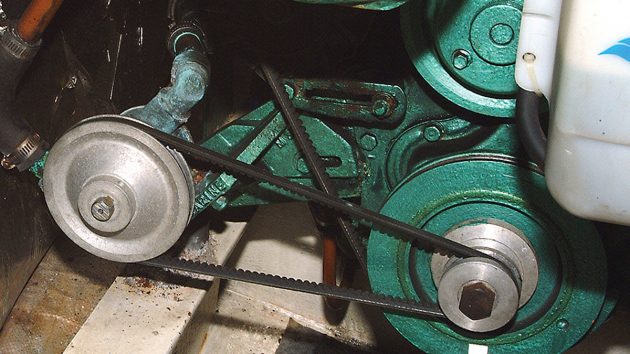
When fitting a new belt, it is sometimes a little on the short side, and the trick to getting it onto the pulleys is to place it round the crankshaft pulley and then push it as far onto the alternator (or pump) pulley as possible.
Then, while holding the belt in position, turn the engine over with a spanner on the crankshaft pulley nut and the belt will roll into place. It can then be tensioned in the normal manner.
Top Tip: It is not good practice to use right-angled elbows on water systems as they restrict the free flow of water. Sweeping bends give the best flow, but if there is no alternative in a tight installation then they will do the job – and in this case, they have not caused any overheating problems!
The quick-change standby

When using a spare pump as the quick-change standby, it is important to be able to remove the hoses quickly and easily.
Marine reinforced hose, which is used to avoid collapse under pump suction, hardens over time – and often, the only way to disconnect it is to cut it off and renew it.
This is clearly of no use where the pump needs to be changed quickly.
On this installation, vehicle hoses are used for the final short connections to the pump as they never harden and are always easy to remove.
The main pipe runs are all domestic copper tubes which are cheaper than reinforced hose, and there is no problem with pipework collapse.
Where it is essential to use convoluted hose, it is possible to make up an end connection using a copper tube stub 4 or 5in long, depending on the diameter of the hose, in the appropriate size to fit inside the hose.
The end of the convoluted hose is warmed slightly in hot water to soften it and the copper tube is secured halfway into the tube with two hose clips for a permanent fix.
Then, use a 4in length of vehicle hose on the exposed end of the copper, again secured with two hose clips.
This hose is used to make the final connection onto the pump with a single hose clip and ensures it can be fitted and removed very easily while still providing a reliable seal every time.
Check the thermostat

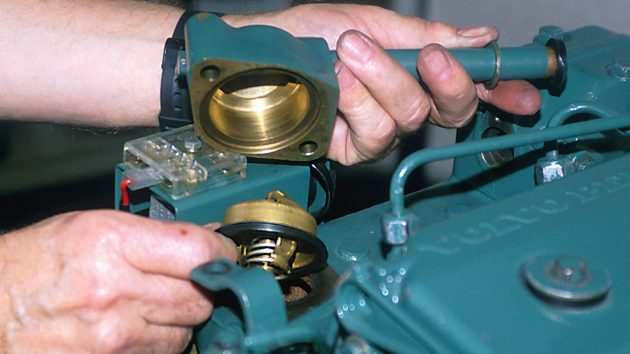
Thermostats can be mounted in various ways, but generally speaking, they are easy to get at and can be removed and replaced by removing the housing, lifting the old one out and fitting the new one. Fit a new gasket to ensure the housing doesn’t leak after replacement
Thermostats are often forgotten but they can eventually go wrong, and usually in the closed position – which means the engine overheats quite quickly.
Less serious is when they fail in the open position, as in this case the engine simply never reaches its correct operating temperature.
The quickest cure for a closed thermostat when away from home is to simply remove it and fit a replacement at the next convenient port of call.
For an open thermostat, simply keep a careful eye on the engine temperature to ensure that it doesn’t decide to close.
Again, replace it at the next convenient point.
Continues below…
How to service a marine diesel engine in 12 simple steps
It was time to service the marine diesel engine on our Maxi 84 cruiser. Knowing how to diagnose and fix…
Fixing and avoiding marine engine leaks
There is no need to put up with a leaky, smelly inboard engine. By dealing with small leaks as they…
How to fix a leak in the marine engine cooling system
Stu Davies advises PBO reader Richard Jales how to solve a leak in his boat's marine engine cooling system
Fixing boat engine cooling system problems
Stu Davies solves niggly Volvo Penta 2030 engine cooling problems
Test the thermostat by placing it in a pan of hot water and watching to see when it opens.
As long as it opens before the water boils, you can assume it is OK.
For a more accurate test, place a thermometer in the water and check the temperature when the thermostat opens.
Thermostats usually have the operating temperature stamped on the case.
The raw water strainers need to be checked

1. The raw water strainers need to be checked on a regular basis, especially if cruising in shallow waters.
A quick flush-out with clean water is all they need.

2. Make sure the pipework to the strainer is not partially blocked by rodding it through after cleaning the strainer basket.

3. Check the cover seal is in good condition and give it a light greasing to help it seal when the cover is refitted, otherwise the system may not prime.
…And finally

The final engine service item, once everything has been reconnected, is to refill the heat exchanger system with a 50-50 mixture of good quality antifreeze and water and recheck the level after the engine has run up to temperature and cooled again.
You have now serviced your marine engine cooling system!
Enjoy reading How to service a marine engine cooling system?

A subscription to Practical Boat Owner magazine costs around 40% less than the cover price.
Print and digital editions are available through Magazines Direct – where you can also find the latest deals.
PBO is packed with information to help you get the most from boat ownership – whether sail or power.
-
-
-
- Take your DIY skills to the next level with trusted advice on boat maintenance and repairs
- Impartial in-depth gear reviews
- Practical cruising tips for making the most of your time afloat
-
-
Follow us on Facebook, Instagram, TikTok and Twitter


