
Trevor Martin shows how he replaced the pumps and modified the installation of his vacuum heads for easier servicing in the future
Aboard my boat I have two heads, identical Blakes Lavac Zenith vacuum-type toilets. Yet, like many twins, they have entirely different characteristics.
Initially, the main difference was that the forward heads didn’t work and the aft cabin one did.
I eventually trained my crew not to pump the aft toilet if a second crew desperately needed it as you cannot open the lid for five minutes after creating the necessary vacuum!
Finally, I bit the bullet and investigated the forward heads.
These loos are reliable as they are simple and have a good reputation, with the marketing promise that: ‘the efficient membrane pump is easy to maintain without tools through the large screw-off inspection port.’
Service kit fit
The forward heads job involved the easy removal of the wet-locker false floor behind the pan and spinning off the pump inspection hatch; the whole pump was then removed to refit a full-service kit.

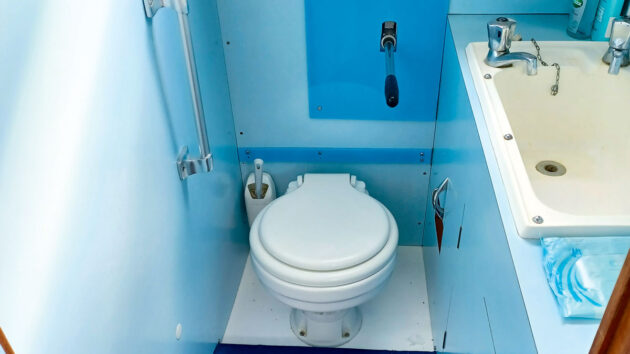
The original installation. Marking out the new opening. Credit: All photos Trevor Martin
That is when I saw the pump body casing was cracked. I bought a new heads pump.
Faced with re-drilling holes and replacing pipe lengths, I instead brazed two 90° central heating brass fittings which now connect the pan output end to the pump input port, and the pump output port to the discharge soil pipe.
This meant that I could now fit the housing back using the pre-existing fixings holes.
It was now time to fit a full-service kit to the aft heads.

The pump could then be attached to the bars and screwed in place
Access was not as easy for this one as the back of the pump was behind a lovely flush wall fascia.
There are two versions of this same pump: one for through-bulkhead operation where the handle enters the underside of the housing; the other being the bulkhead-mounted version where the handle enters the side of the housing.
The obvious choice for a master mariner is the bulkhead-mounted pump complete with hoses on show.
But, it doesn’t look so good and in a tight heads compartment, it does encroach on the user.
So the popular choice for bespoke outfitting on my luxury yacht was the more discrete through-bulkhead pump, with just the operating handle on show.
A tight fit
When my heads pump was originally installed the fitter had sawn the fascia in half to gain access before covering up the holes with an ugly trim.
I removed the panel, unavoidably damaging it in the process and discovered the pump was just inches from the hull and facing away from me.
This meant I could not open, inspect, clear or replace the expendables. So, I cut off the hose ends due to the usual age-hardening grip and removed the pump.

To access the pump,undo the four pump mounting screws and the bar screws from one side…
After a very aromatic cleaning session and just as I was fitting the new valves, I noticed a hairline crack on the housing near a screw fixing.
I consigned it to the bin and bought a new heads pump; I also took the opportunity to make future access to the pump easier, negating the need to remove any of the yacht’s bodywork and ensuring the pump faces outward when I need to work on it.
A check online and with fellow boat owners showed that many had come across similar access problems.
I replaced the two fascia panel halves, cutting out a square hole the size of the pump.
I then realised it needed to be bigger to accommodate the jubilee clips above and below the housing, fixings and finger space.
I added two steel bars across the space and secured them to the fascia with machine screws and –essential for removal next time – wing nuts!

… with the bars swung down and hose clips loosened, the pump body can be turned through 180°
I then drilled the bars to match the location holes in the pump housing.
The housing was then bolted to the bars (reasoning will follow).
The pipes were attached with a liberal wipe of waterproof grease and new jubilee clips.
At this point, it felt like performing open-heart surgery.
The process for accessing the heads pump in future is now:
- Release the wing nuts on both bars on one side only, and on the pump housing. The bars will swing down leaving the pump attached by the two pipes.
- Loosen the hose clips top and bottom. Then you can rotate the entire pump housing (as it has been greased) so that the inspection cover will face towards you. Bingo. It works!
- You can now clear or service your heads pump.
While initially testing the pump access, I gleefully spun off the inspection cover and got soaked with the water from the pump housing. Thankfully, it was just ‘unadulterated’ seawater.
Remembering the unsavoury content earlier and not wishing to contaminate the bilges under the cabin bunk, I took it all apart again and fitted a catch-tray, made from an old plastic Tupperware box.

A threaded through-gland was fitted so a catch-tray could be adjusted to the correct height
A threaded through-gland was sourced from Toolstation and a hose clip was used to ensure the catch-tray’s correct height could be set after installation.
After installation, I added a liberal smear of my favourite sealant, Geocell’s The Works and reassembled everything again.
The temporary plywood cover panel was later remodelled with blue acrylic sheet and a matching trim over the fascia joint.

A temporary plywood cover panel was later replaced with a smarter acrylic sheet
It was a shame there had to be a join, but I inherited that.
Finally, I had a hidden, space-saving pump, with easy access for servicing and unblocking – should the need arise.
Heads pump choices
When sourcing the new pumps, Lavac wanted to supply the branded Lavac pump. To me, however, this looked similar to the old Henderson Mk5 general-purpose pump.
I discovered that early Lavac loos were fitted with the Henderson model before Lavac began supplying their own.
So, was I to fit the recommended pump or the Henderson?
I did research but, in the end, decided to go with the Henderson pump, as it is a ‘Proven bilge pump with robust housing of white plastic especially suited for the installation in the sanitary areas’.
There are also plenty of cheap copies available on eBay, but I would recommend doing your own research before making a decision on which to buy.

Sea toilet restoration: How I refurbished the heads on the PBO Project Boat
With seacocks previously installed in the Maxi 84, it was time to connect the hoses. The first thing to decide…

Best portable toilet: From compostable to flushable units
We’ve all been there; middle of the night, you need a pee. The marina toilet or camping block is just…

Choosing a marine toilet for the PBO Project Boat
Choosing a marine toilet isn’t as straightforward as you think – and after looking at the options it may be…

Boat toilet troubleshooting: How to service a Jabsco toilet pump
Most modern mass produced yachts are fitted with Jabsco hand pumped boat toilets. They are cheap, simple and robust and…
Want to read more practical articles?

A subscription to Practical Boat Owner magazine costs around 40% less than the cover price.
Print and digital editions are available through Magazines Direct – where you can also find the latest deals.
PBO is packed with information to help you get the most from boat ownership – whether sail or power.
-
-
-
- Take your DIY skills to the next level with trusted advice on boat maintenance and repairs
- Impartial in-depth gear reviews
- Practical cruising tips for making the most of your time afloat
-
-
Follow us on Facebook, Instagram, TikTok and Twitter