
After struggling with a heavy lifting keel, Brian Johnson builds a simple tackle to make light of the problem
I was asked by a friend to make some fittings for his new boat, a Parker Super Seal, to make it easier to lift the lifting keel.
The existing arrangement was a single sheave, mounted in the top of a box which fitted over the keel slot.
A rope tied to the top of the keel passed over this sheave and was led aft to the halyard winch.
Another Super Seal-owning club member had improved on the standard system by fitting a box sheave in the keel.
An anchor plate fitted on the port side of the keel slot raised the lifting tope about 100mm above the deck.
A similarly raised block on the starboard side allowed the rope to be led from the anchor point through the keel block and the starboard block to a deck organiser, then aft to a winch, thus giving a 2:1 advantage and halving the effort needed to lift the keel.
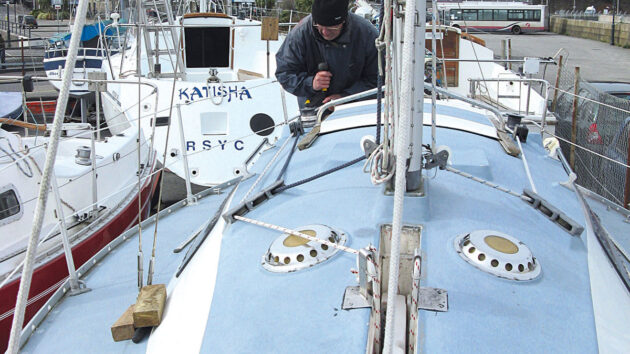
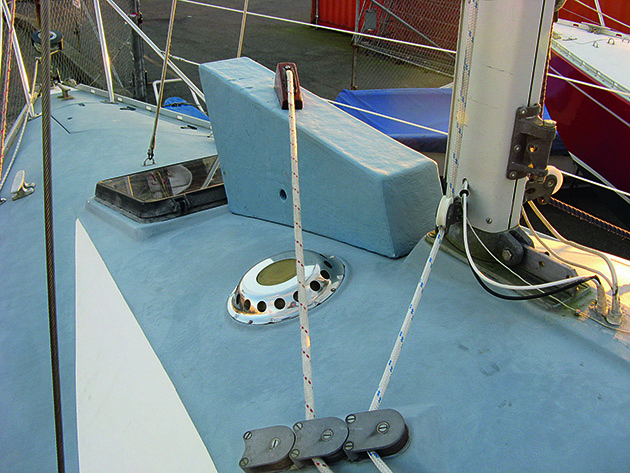
The fully raised lifting keel showing the lifting sheaves and locking pin
It was necessary to raise the anchor point and starboard block because the keel projects from the keel slot when fully raised.
It also helped to lift the rope clear of a deck vent.
We decided instead to fit two sheaves in the keel and blocks on both sides of the keel slot, one of which would incorporate a strong point to fasten the end of the lifting line.
This would give a 4:1 advantage, or a quarter of the effort needed to lift the keel.
Sheaves and boxes
We first removed the lifting keel from the boat, measured its thickness at the point where the sheaves were to be fitted, and machined them from nylon such that the diameter at the bottom of the groove was 5mm greater than the keel thickness,
This ensures that the lifting line will not chafe on the edges of the slots in the keel or on the sheave boxes.
The sheaves will accept 10mm diameter rope, and the centres are drilled to take a 10mm pin.
We also made two slightly smaller sheaves for the deck fittings.
I used thin card to make a template of the keel sheave boxes, the sides of which were designed to be slightly narrower than the lifting keel.
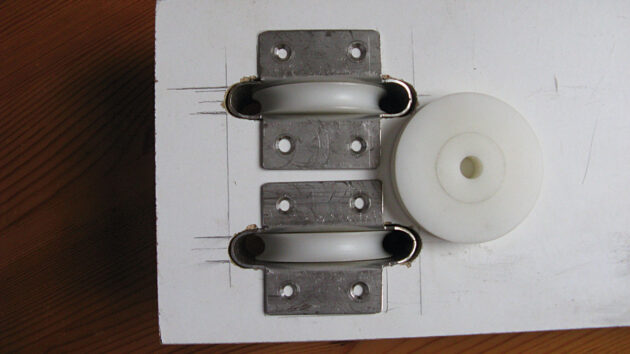
Keel sheaves in jig with a loose sheave to give the slot spacing
Once I was happy with the shape and size of the mock-up, I cut two pieces – one for each sheave -from 1.5mm stainless steel using an angle grinder.
I filed the edges smooth, then bent the pieces to shape around a suitable diameter bar, the join meeting in the centre of one end.
I bent the flanges over with the pieces held in a vice, using a hardwood spacer to prevent the box from being squashed.
When satisfied with the bending and sure that the sheave would fit, I marked and drilled the boxes for the sheave axle pins and for the screws to secure them into the keel – the latter holes being countersunk for the screws.
I cut the axle pins from 10mm diameter stainless steel rod, approximately 4mm longer than the overall thickness of the sheacces.
I faced and drilled the ends with an 8mm drill to a depth of about 2mm – this left a rim of only 1mm, which was easier to rivet over when the sheave and box were put together.
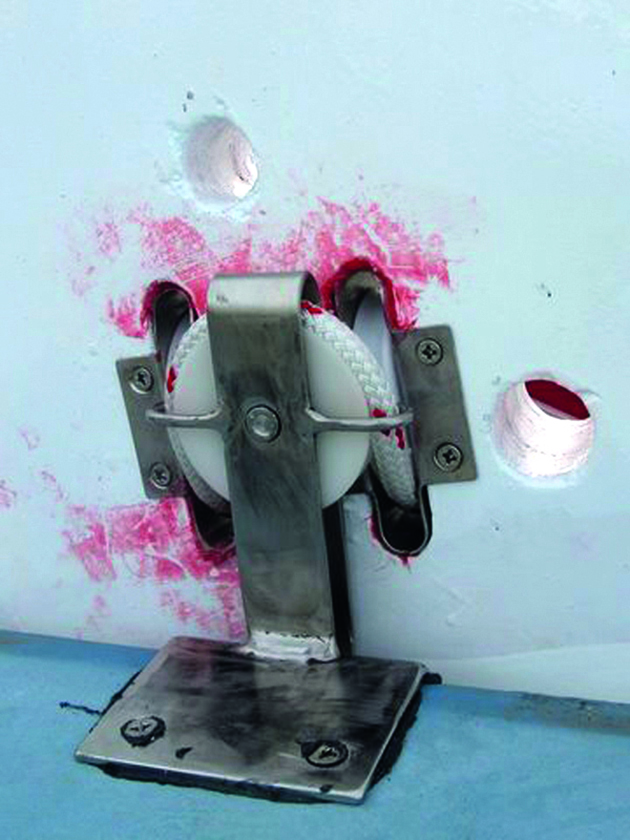
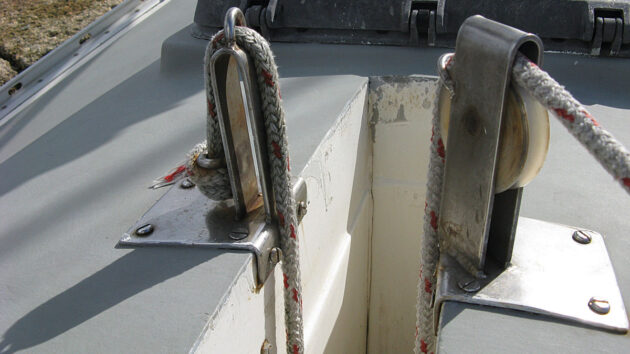
The port side in-line raise sheave
Drilling the end of the pins in this way also helps to avoid riveting too tightly, which could jam the sheave.
When it came to the two fixed blocks that sit over the edges of the keel slot, the port side block was fairly straightforward, with the support bracket set in line with the keel slot and the sheave offset slightly to overhang the slot.
The keel itself is quite a bit thinner than the slot – nylon guide blocks keep it centred – which means there is plenty of clearance for the sheave and lifting line.
The starboard fitting was more complex, however, the sheave needing to both overhang the slot and be angled to lead the lifting line to the turning block.
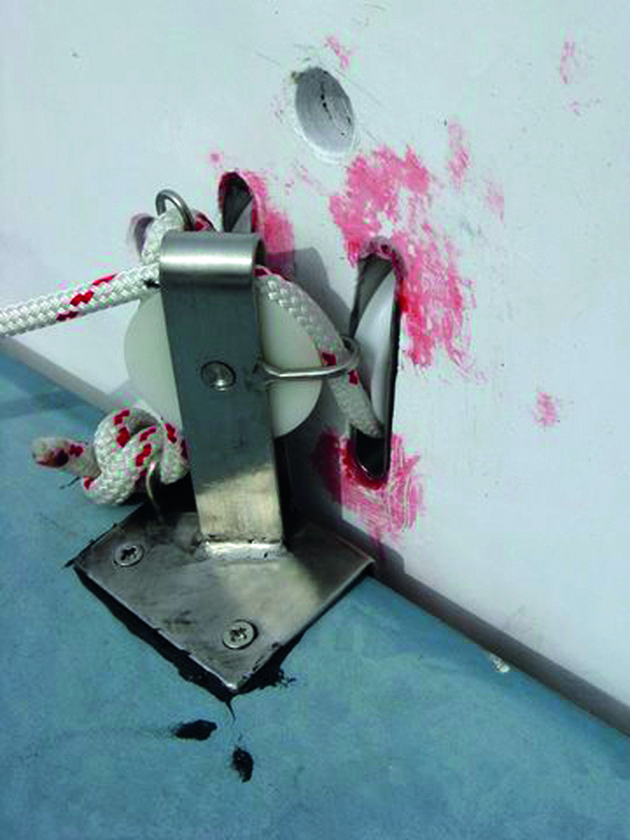
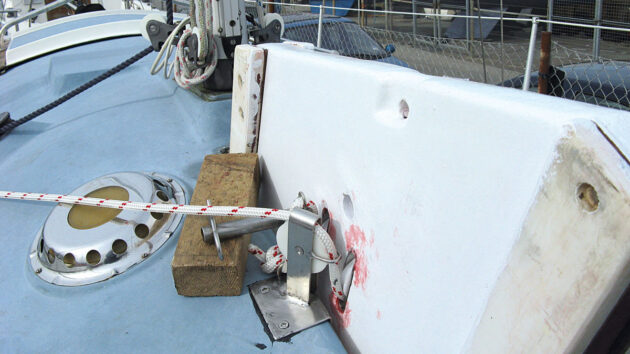
The raised starboard sheave with knot around the anchor point
It also needed a strong point to anchor the rope, positioned so that both ends of the lifting line would run parallel to and from the sheaves in the keel.
The spacing between the sheaves in the keel was set by the size of the sheave in the port block.
I made more templates to get the correct angle for the base plates and to work out the lead angle from the starboard block to the organiser, forward of the winch.
I also used cardboard to refine the shape of the various parts before fabricating them from stainless steel.
For ease of access, most holes were drilled and, where necessary, countersunk before I welded all the pieces together.
Once all of the main parts were made and welded, I added a U-shaped anchor point and guides.
The guides are there to ensure the rope stays on the sheaves and also offers some protection against knocks.
Drilling the lifting keel
The next task was to make a drilling jib to enable accurate positioning of the slots in the keel for the two sheave boxes, square to the sides of the keel and parallel to each other.
I marked the positions central to the width of the keel and around 30cm from the top to ensure the keel could be fully lifted and to allow the insertion of a locking pin.
I was apprehensive about drilling as I had been told that the keel had a steel or iron core, but fortunately, the area where the slots were to go proved to be a laminate consisting of an 8mm outer skin of GRP, the layers of plywood and filler.
A 17mm HSS drill bit coped easily, so I drilled the hole at each end of the slot and then removed the rest with a long-bladed jigsaw and a coarse file.
The next step was to liberally coat inside the slot with two-part epoxy paint to stop water from getting in to the keel laminates, and once it was dry the keel blocks were inserted, secured with stainless steel screws and any gaps filled with marine filler.
We returned the keel to the boat and hoisted it aboard using a jib halyard and lots of helpers.
I’d decided that, even though I had worked out where the fitting were to be located at the top of the slot, it was best to have the keel in place first to be sure everything would line up as expected.
It was fortunate I did because, in my reckonings, I had not taken sufficient account of the angle of the keel.
Because the keel tilts aft and does not therefore rise vertically, both of the blocks needed to be about 8mm further forward than I had calculated.
Once I was happy with the positions of the fittings, I marked the deck and drilled it to take 14-gauge self-tapping screws,
With the fittings bedded on marine sealant and screwed down, I threaded the lifting rope through the sheaves to test the system.
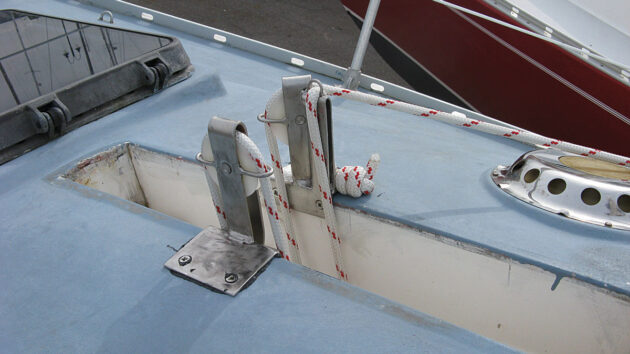
Keel lift in use
From its anchor point on the starboard fitting, the rope is led down through the aft sheave in the keel, up and over the raised block on the port side of the keel slot, back down to the forward sheave in the keel and finally up and over the starboard block and aft through the organiser to the winch.
With this system, the keel can be lifted quite easily even without the use of the winch, the weight being comfortably held by a halyard clutch and then a locking pin when in its mooring.
Three stages in the evolution of a Super Seal lifting keel mechanism
1. The original keel cover box with one sheave and no mechanical advantage
The system designed by Super Seal club member Mike Haise gives a 2:1 advantage
My modification looks similar, but actually gives a 4:1 advantage

The pneumatic keel
Ben Lowings talks to Bjorn Haraldsson about his simple air-regulated keel

How to repair keel band corrosion on small boats
Galvanic corrosion is often something mainly associated with metal fittings on larger craft: however, David Parker has a cautionary tale…

Keel types and how they affect performance
Peter Poland looks at the history of keel design and how the different types affect performance

Prepping the rusty keel of the PBO Project boat
In our Maxi 84 boat survey, Ben Sutcliffe-Davies concluded that the antifouling needed to come off and whilst the keel…
Want to read more practical articles?

A subscription to Practical Boat Owner magazine costs around 40% less than the cover price.
Print and digital editions are available through Magazines Direct – where you can also find the latest deals.
PBO is packed with information to help you get the most from boat ownership – whether sail or power.
-
-
-
- Take your DIY skills to the next level with trusted advice on boat maintenance and repairs
- Impartial in-depth gear reviews
- Practical cruising tips for making the most of your time afloat
-
-
Follow us on Facebook, Instagram, TikTok and Twitter