Outboard engine gearbox oil seals are vulnerable to damage and can be difficult to remove. Rupert Holmes explains how to change a typical set
Problems with gearbox oil seals often go unnoticed until the oil is changed during a routine service.
If the liquid drained out is a milky off-white emulsion, this is the classic sign of water mixed with the oil.
Occasionally the problem is even worse, and in the case of my 5hp Mariner 2-stroke outboard from the late 1980s (a re-badged Yamaha unit), when I opened the drain plug there was no oil to come out!
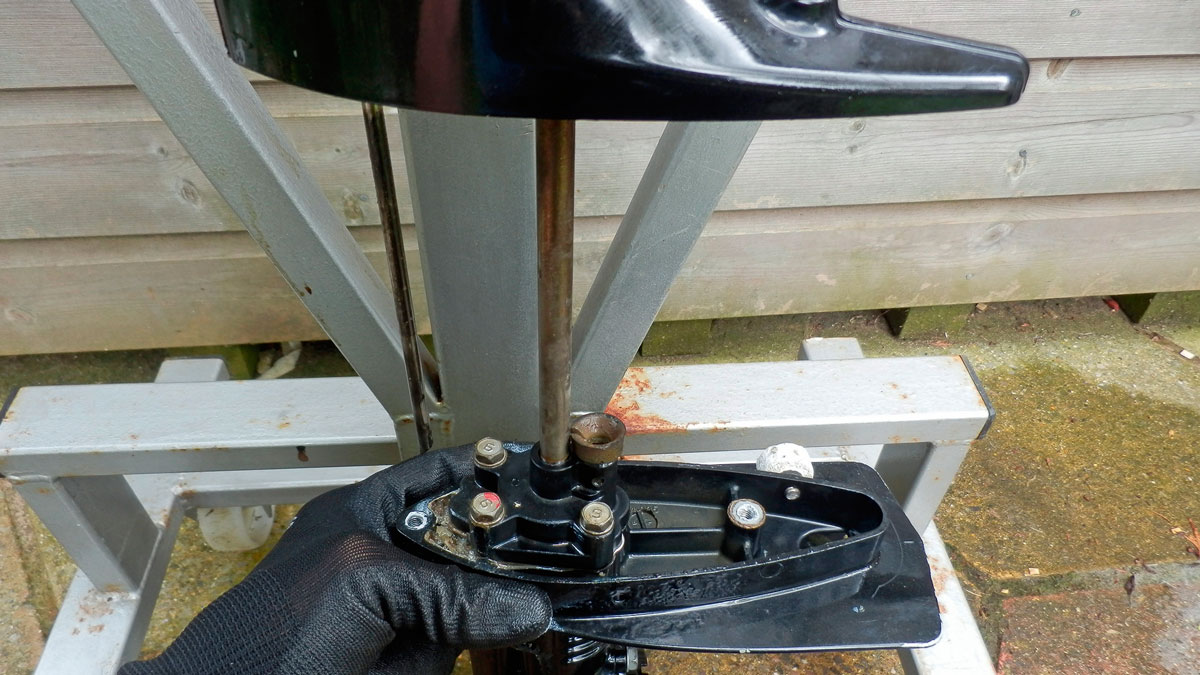
Most outboard gearboxes have two pairs of seals: one pair on top of the unit, where the drive shaft exits into the leg of the motor, and the other at the rear, to seal around the prop shaft.
This is the one that’s most likely to cause problems as it’s vulnerable to damage from debris in the water.
Fishing line is the biggest culprit, as this can wrap around the shaft and then abrade or tear at the rubber parts of the seal.
Getting at the gearbox oil seals
The prop shaft seals are typically located in the housing for the bearing that supports the aft end of the shaft.
Start by draining the gearbox oil. You’ll normally need to open two of the screwed bungs in the gearbox casing – the lower one to let the oil out and a higher one to allow air in to break the vacuum so the oil will flow easily.
The seals on these only cost a few pence and should always be replaced to eliminate the possibility of future leaks here.
Next remove the propeller, after removing the spark plug as a precaution against the engine accidentally starting while you’re working on it.
You’re now ready to start dismantling the gearbox.
Begin by unscrewing the bolts that hold the bearing housing in place.
On my engine, there are recesses on each side of this housing that facilitate progressively levering it away from the main gearbox housing with a screwdriver.
It may be possible to slide the bearing housing away from the gearbox without removing the prop shaft: if so, this may save time later.
However, if the shaft comes away with the bearing housing, make sure you note the position of the components – taking a photo is a good idea here.
To access the oil seals, the bearing must first be removed from the housing. If you are lucky the bearing may drop out easily.
But a tight fit or slight corrosion might make it trickier to shift (see tips below).
Once the bearing is out the old seals can now be easily seen.
Before removing them, make a note of their orientation: they must be replaced in the same direction.
This engine has stainless steel rings within the rubber outers.
Again, they were a tight fit and it took a while to lever them out, but heat can help here as well: it doesn’t matter if they are damaged getting them out – they’re going to be replaced anyway.
Reassembly
With the seals in place, the bearing can be replaced. The unit is then ready to be refitted to the gearbox.
First, fit a new O-ring and then assemble all the components in the correct order.
Lightly oil the prop shaft so the seals will slide over easily without damage.
Cooling the bearing and housing will help to refit the assembly into the gearbox with a minimum of hassle.
With the bearing housing in place, the bolts can be screwed in and tightened. If they’re not easy to fit, ensure everything is properly aligned and that the threads are clean.
Don’t be tempted to force the bolts tight or you’ll strip the threads in the soft aluminium gearbox housing.
Equally, the housing casting could crack if it’s subjected to a large uneven force.
Once they are hand-tight, therefore, the bolts should be tightened in turn, with each one getting no more than half a turn at a time, until they are all tensioned with an even pressure.
Next, refill the gearbox with oil. This is done by inserting the tube from the oil bottle into the bung at the bottom of the leg, and filling until oil emerges from the top bunghole.
Then screw the top one closed, withdraw the oil filler pipe and close the lower bung. This procedure – filling the casing from the bottom upwards – ensures no air bubbles form as the gearbox is filled with oil.
Finally, check there are no leaks and refit the prop, with a new shear pin (if applicable) and a new split pin.
The second pair of seals are for the driveshaft at the top of the gearbox.
As this is protected within the leg of the engine it’s much less likely to fail.
The procedure is similar for replacing these, except that the gearbox must first be removed from the bottom of the leg
Top tips for removing bearings
On my engine, the bearing was a tight fit and not easy to shift without fear of damaging it.
I found heating the housing in a mild gas flame expanded the housing just enough for the bearing to drop out easily.
Before you do this, make sure you remove the O-ring from the outside of the housing.
… and refitting them
When replacing the bearing in the housing you can’t use excess heat to expand the metal, as this may damage the rubber parts of the new seals.
I put the bearing in the freezer and the housing in a pot of hot water – that created enough temperature differential, shrinking the bearing and expanding the housing, so they popped back together without fuss.
Replacing gearbox oil seals: Step-by-step

Credit: Rupert Holmes
1. After draining the gearbox oil, remove the propeller

Credit: Rupert Holmes
2. Unbolt the bearing housing and remove it from the casting.

Credit: Rupert Holmes
3. Remove the bearing from its housing.

Credit: Rupert Holmes
4. If they happen to come out with the bearing, make a note of the position of the components associated with the prop shaft – a photo may be helpful for future reference.

Credit: Rupert Holmes
5. Seals are fitted as a pair. One stops oil from escaping from the gearbox, the other prevents water from entering it.

Credit: Rupert Holmes
6. Press the new seals into place.

Credit: Rupert Holmes
7. Replace the bearing in the housing.

Credit: Rupert Holmes
8. Fit a new O-ring around the bearing housing. The housing, complete with new seals, is now ready to be refitted. Once in position, replace and tighten the bolts and refill with oil.
Rebuilding an outboard motor gearbox: step-by-step
Small outboard motors can often be a low priority when it comes to maintenance. David Parker found out the hard…
Buying a new or used outboard motor? Professionals share their tips to make sure you avoid the pitfalls
From horsepower to shaft length and tilt-angle to 2- or 4-stroke, Ali Wood highlights the different features you should consider…
Why is my outboard so unreliable?
Colin Staple's unreliable outboard is spoiling his sailing. Stu Davies suggests how to improve its performance
How to troubleshoot an outboard engine – video guide
This is our guide to basic outboard troubleshooting for a small petrol four-stroke outboard engine. If you’ve got a problem…
Want to read more practical articles?

A subscription to Practical Boat Owner magazine costs around 40% less than the cover price.
Print and digital editions are available through Magazines Direct – where you can also find the latest deals.
PBO is packed with information to help you get the most from boat ownership – whether sail or power.
-
-
-
- Take your DIY skills to the next level with trusted advice on boat maintenance and repairs
- Impartial in-depth gear reviews
- Practical cruising tips for making the most of your time afloat
-
-
Follow us on Facebook, Instagram, TikTok and Twitter


