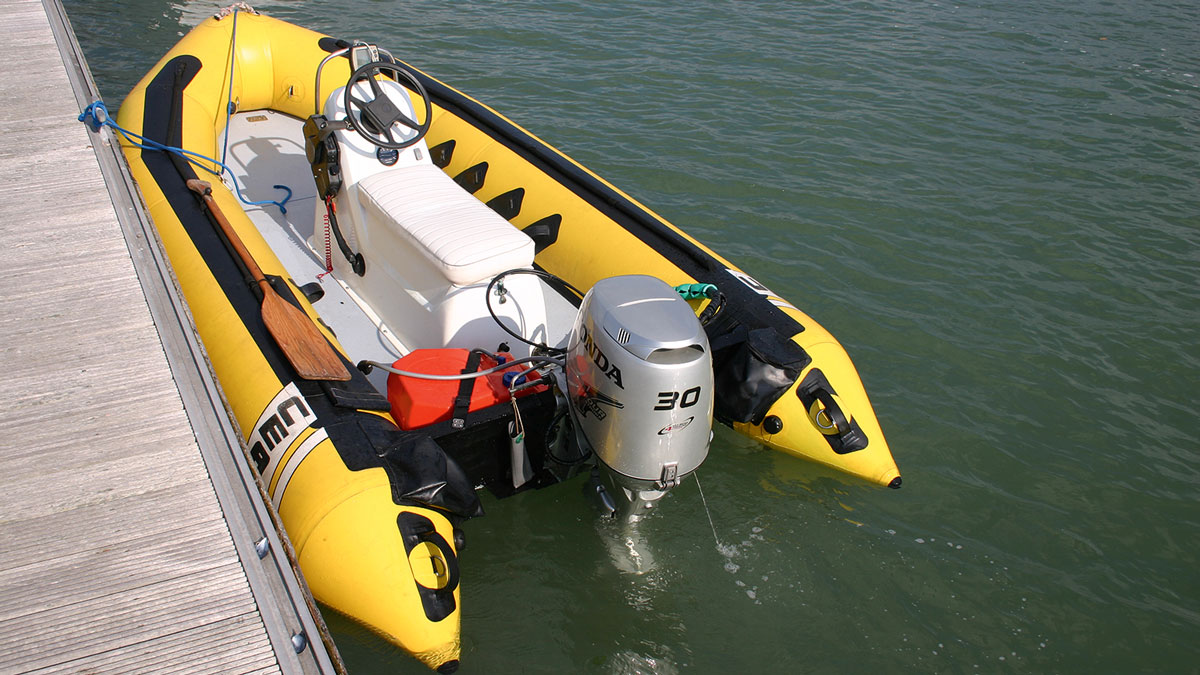
For a low-tech, high-reliability solution to getting a large amount of water out of a small, fast-moving motorboat, there’s nothing quite as efficient as sock (or trunk) bailers. Jake Frith decided to set about making his own
Electric bilge pumps are great, until the battery powering them gets swamped with seawater. Manual bilge pumps can be effective, but
what if you are on your own and steering the boat is taking all your hands and concentration?
It’s with these factors in mind that just about every serious seagoing RIB will have on its stern a trunk bailer or two – or ‘sock’, as they are alternatively known.
They are ludicrously simple, require little maintenance, need no power supply and just do what they are supposed to, when you need them.
They consist of a solid tube through the transom, onto which (outboard, aft) is fitted a long, watertight fabric tube, open at the far end.
At speed, the fact that the bow is always slightly higher than the stern ensures that when these bailers are opened, any water will exit the boat very rapidly as a result of gravity.
The sock usually has an eyelet and lifting line to keep the open end up out of the water when it is not needed.
At standstill, if you have forgotten to tie up the sock the fabric tube partially closes up like a valve to the water pressure, keeping a lot of the
water out – so forgetting to tie it up is not a catastrophe.
My latest acquisition, a Ceasar Surfcat soft inflatable boat (or SIB), has been extensively modified and repaired, so now the water usually stays on the outside.
However, all seagoing boats require a way of getting shipped water out again, preferably quickly, so here’s an elegant solution I came upon for a trunk bailer.
In terms of materials, I used lengths of old anodised aluminium windsurfing mast for the tubes and PVC for the socks, as I had PVC inflatable two-part repair glue that I knew would bond this stuff very well.
Other watertight marine inflatable fabrics, such as Hypalon, would work just as well if glued with the correct adhesive, and stitching would
be fine too.
Perhaps you could even find a flat fabric fire hose of the right diameter, and then you would have a ready-made sock.
In my case, the whole job took about a day.
How to make a sock bailer: step-by-step
Credit: Jake Frith
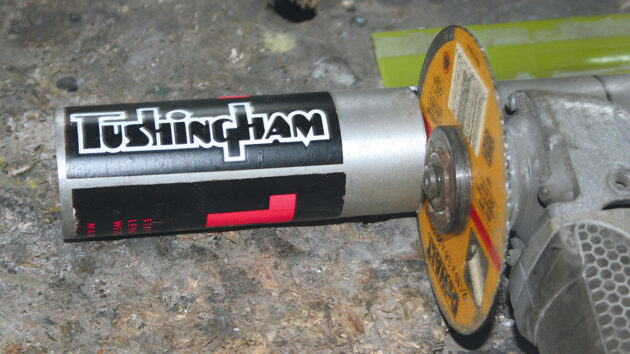
1. I first selected a piece of tubing that would form the tubes through the transom. This windsurf mast offcut would be strong and well-anodised, but any nonrusting tube around 50mm would work.
Credit: Jake Frith
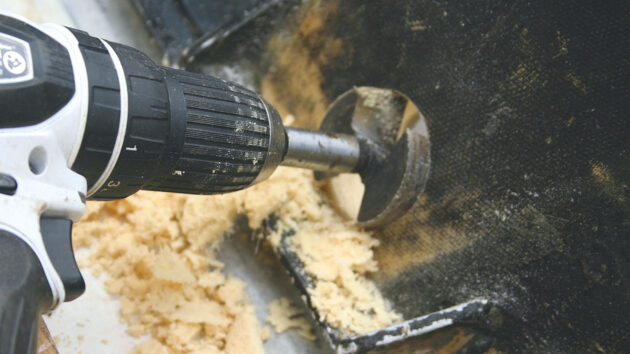
2. Once I knew the size I could drill the transom slightly larger. I put a pilot hole through first then drilled the fibreglass on both sides. This transom has a light foam core: a plywood core would be more common.
Credit: Jake Frith
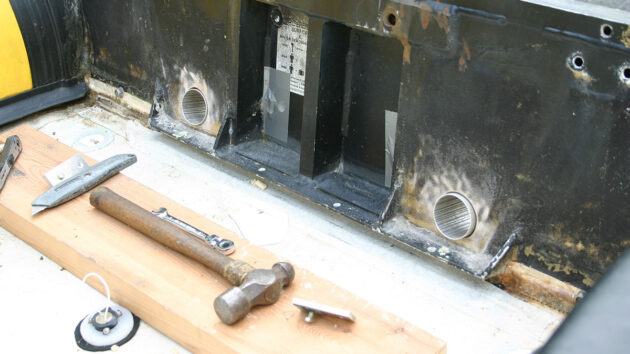
3. I keyed the transom around the tubes with medium-grit sandpaper. The tubes will overshoot the edge of the hole about ¼in inside the boat. This will make the inside epoxy fillets stronger than if they ended flush.
Credit: Jake Frith
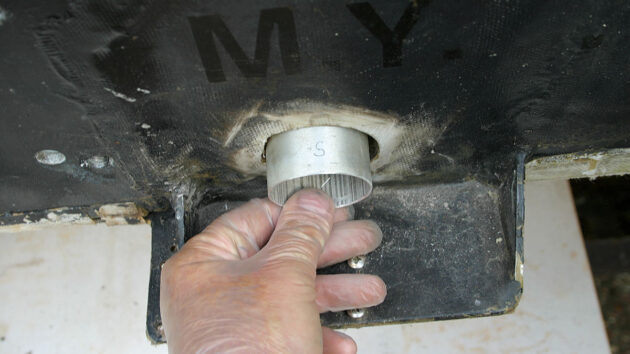
4. On the outside, the tubes will finish with about an inch of tube sticking out, to which the sock will be clamped. Note that I chose to locate my bailers above a pair of fixed transom tabs to help protect them from damage from below.
Credit: Jake Frith
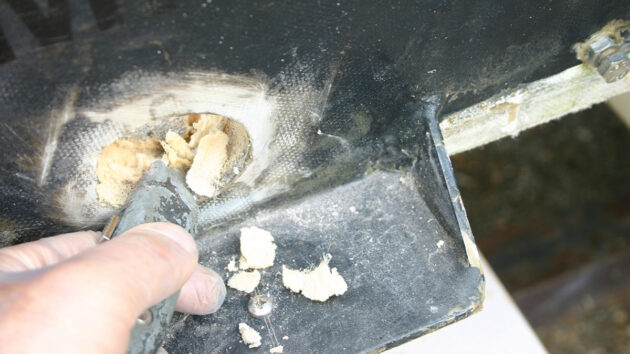
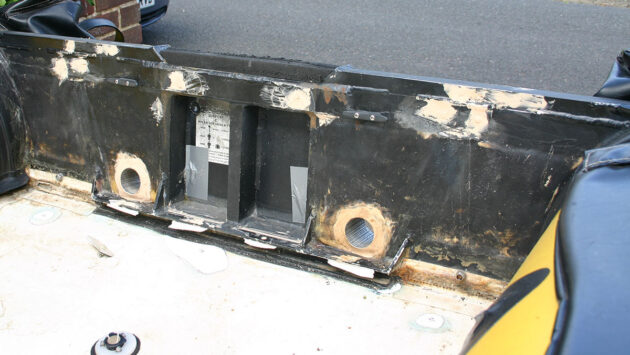
5. I dug out about half an inch of foam from the insides of the holes using a craft knife. This would mean that my cured epoxy would form a bobbin shape around the tubes, making them nearly impossible to knock out of the transom.
Credit: Jake Frith
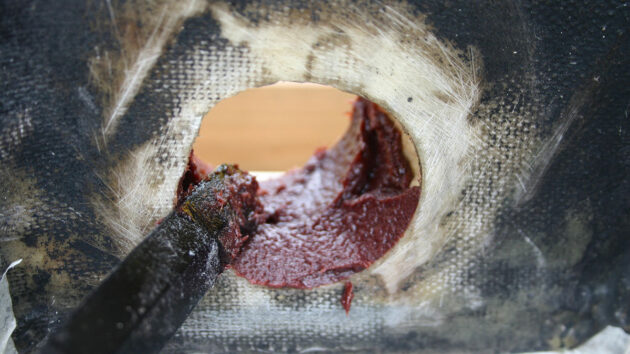
6. I then mixed the epoxy and hardener with microfibres to thicken it and add strength, and trowelled it into the voids in the foam I had dug out. Epoxy aficionados will note from the colour that my hardener was badly out of date: it cured fine.
Credit: Jake Frith
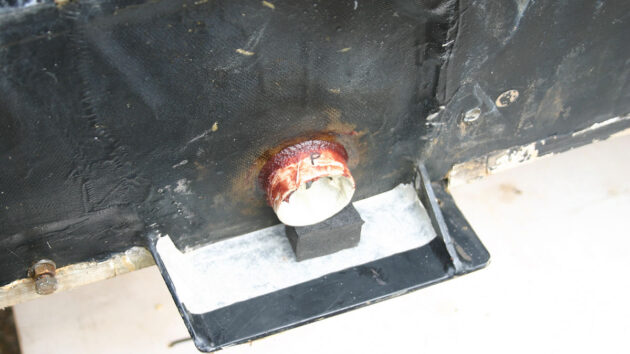
7. I masked the end of the tube that would have the sock on it so that I wouldn’t have to do much sanding, as sanding epoxy thickened with microfibers is a chore. I finished the visible join with a neat and strong lollystick-radiused fillet. The foam block holds it in place while it cures.
Credit: Jake Frith
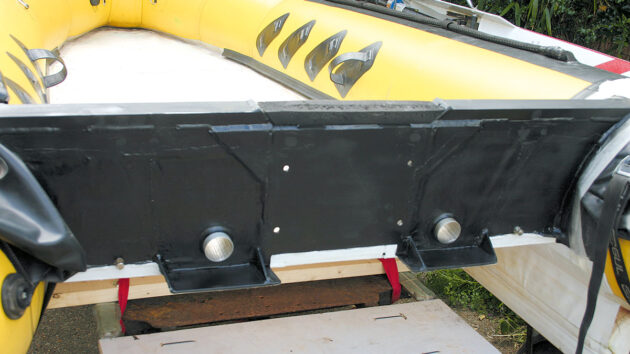
8. On the inside, I used much more easily sanded microlight filler (and in-date hardener this time). I took the opportunity to tidy up a few other unneeded holes in the transom while I had the filler mixed up.
Credit: Jake Frith
9. Once the epoxy had fully hardened, I sanded the transom inside and out to a reasonable finish, masked the sock ends of the bailer tubes and gave the whole transom a couple of coats of satin black inside and out to neaten everything up.
Credit: Jake Frith
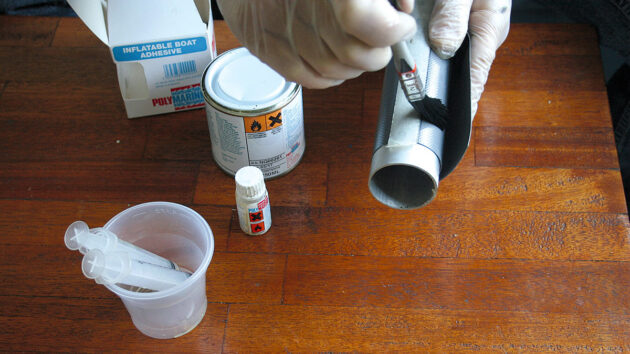
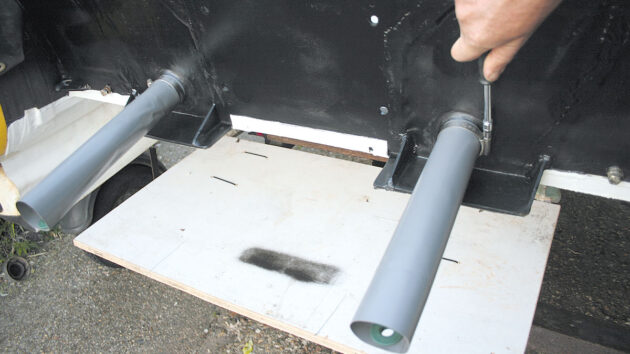
10. I made up the socks taped around tubing of the same gauge as my drain tubes, and glued them with about an inch of overlap using the correct two-part PVC inflatable repair glue – taking care not to use too much and glue the sock to the tube.
Credit: Jake Frith
11. I used cheap plastic tarpaulin eyelets for the lifting lines to prevent corrosion. A small amount of marine silicone and a stainless Jubilee clip hold the socks onto the tubes. The length of the socks is dictated by the height of the boat’s transom.
Credit: Jake Frith
12. When the socks are not required they are tied up using a pair of small cleats I installed on the inside of the transom, in line with them. This keeps the open ends out of the water.
Testing and conclusions
Getting the boat nicely full of water, intentionally, proved to be quite difficult.
You aren’t really supposed to leave the bailer floating free and unlashed at a standstill; but when you do, they pretty much do what they are supposed to – act as a valve and shut off almost completely to the outside water pressure.
A little bit weeps in, but not so that you’d notice.
Fortunately (in this case – but not any other), my boat has a very low transom, so anything much above tick over in reverse causes Niagara Falls to pour in over the back.
Ten seconds of reversing into a small chop and I had half a boatful.
When accelerating away forwards, some of it piled straight back out over the top: maybe a low transom is a double-edged sword after all.
The rest drained out of my new trunk bailer in 22 seconds.
This simple technology is particularly pleasing to watch.
The acceleration causes all the water in the boat to shunt backwards anyway: this weight transfer allows the bow to lift greatly, so it’s downhill all the way for the water through the bailers.
Best of all, they emit a satisfied belch as the last bit gurgles rapidly out.
I also leave them open when the boat is in storage so my new plywood floor does not become inundated with rainwater.
Fitting these was a day well spent.
Transom repair for a hard tender: step-by-step
Jake Frith explains how to carry out a transom repair for many more years of trouble free service
Backflushing an outboard motor: step-by-step
You’ve replaced your impeller, but the engine’s still not pumping cooling water as it should. Jake Frith recommends chemical backflushing…
Managing E5 and E10 petrol problems
E5 and especially E10 petrol requires much more ‘fuel husbandry’ than older, ethanol-free petrol blends, as Jake Frith has discovered
Inflatable boat valve replacement: step by step
A failed inner valve could spell the end of an inflatable tender – but Jake Frith has a fix
Want to read more practical articles like Sock bailer for a RIB: how to make your own?

A subscription to Practical Boat Owner magazine costs around 40% less than the cover price.
Print and digital editions are available through Magazines Direct – where you can also find the latest deals.
PBO is packed with information to help you get the most from boat ownership – whether sail or power.
-
-
-
- Take your DIY skills to the next level with trusted advice on boat maintenance and repairs
- Impartial in-depth gear reviews
- Practical cruising tips for making the most of your time afloat
-
-
Follow us on Facebook, Instagram, TikTok and Twitter


