Jake Frith explains how to carry out a transom repair for many more years of trouble free service
Transom repair for a hard tender: step-by-step
For small, open boats used principally under outboard motor power, the transom is likely the most important part of its structure.
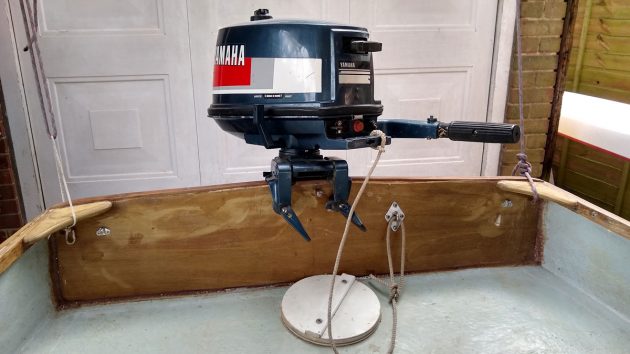
The weight of the engine, and its crowbar-like twisting effects while being raised, lowered, turned and powered in forward and reverse soon reveal any weaknesses in structural integrity, and watching an outboard still clamped to a small, wrenched off section of transom head for the seabed faster than a homesick halibut must be one of boating’s more depressing spectacles.
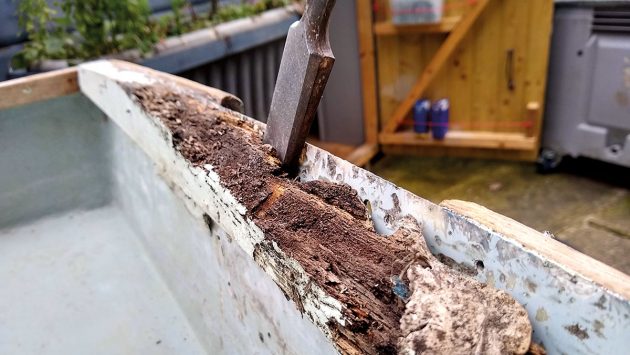
Having said that, on this tender there was no surprise rot revelation required; the boat had spent two years inverted on my shed roof and, on getting it down for recommissioning, the transom woodwork turned to powder in our hands.
Transom repair: Plywood or hardwood?
If I was writing this 15 years ago, there wouldn’t be any evidence of plywood in this article.
There will, perhaps, be folk reading this that will pooh pooh its use here.
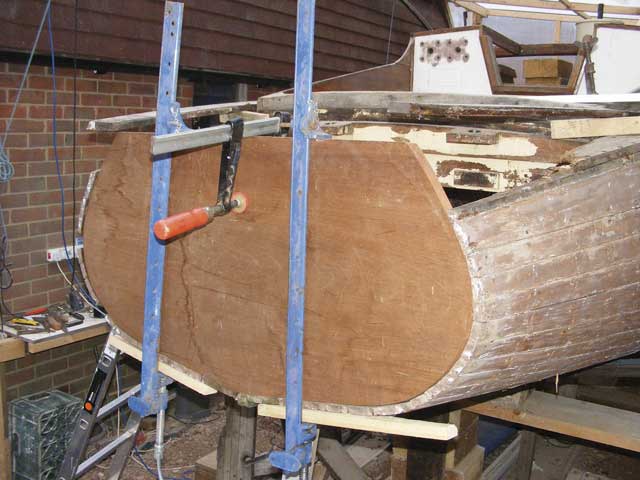
Back in the day, it would have been all solid mahogany, teak, or at a pinch iroko, and very nice it would have looked too.

A mahogany transom fixed in place
Environmental and cost implications (this tender was given to me for nothing and it can’t look too nice or it’ll get pinched from the boat park), mean that increasingly hard to source and expensive hardwoods need to be saved for the few scenarios in which they are non-negotiably necessary, and this isn’t one of those.
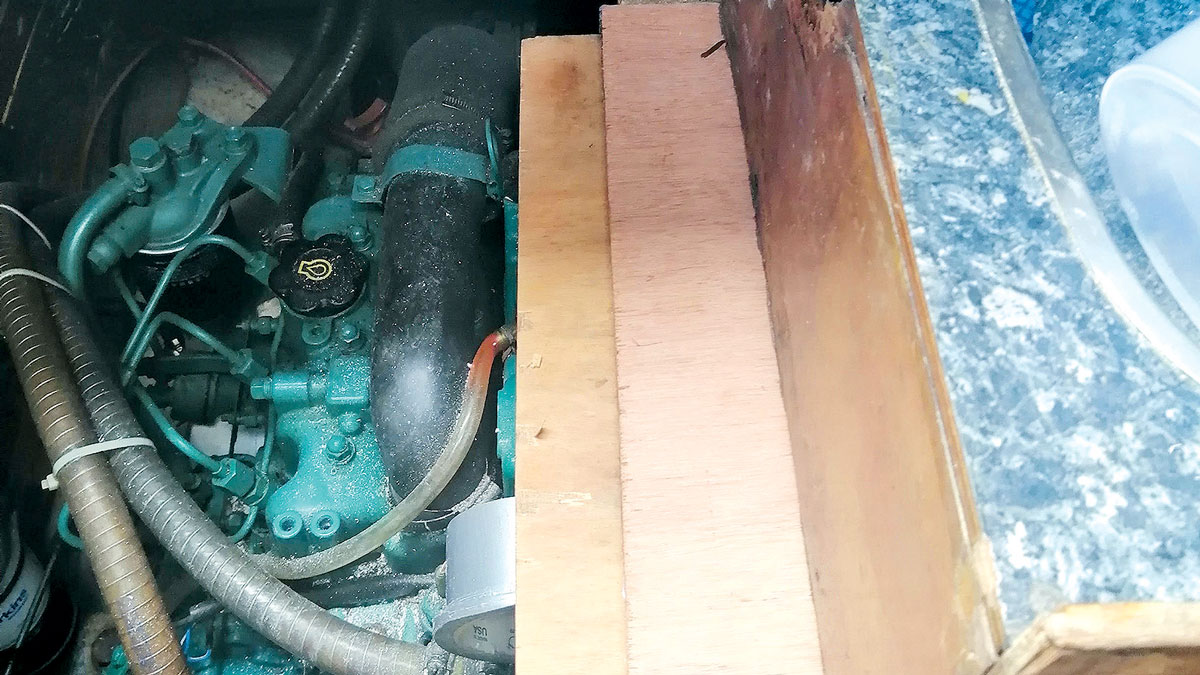
The caveat is you must use top quality plywood such as marine or elite ply, and must cover any end grains that might be susceptible to water ingress – especially rain water.
Note that I used a small plank of 8mm mahogany to cover the end grain of the plywood along the top as I had a spare offcut and it’s an elegant solution, although multiple coats of epoxy followed by varnish would equally do the job.
Why repair with epoxy
Almost all older fibreglass tenders, like this one, will have originally been laid up in polyester resin as it is amply strong for constructing a boat and a third of the price of epoxy.
So why use expensive epoxy resin to modify or fix it? When a polyester resin and glassfibre boat is laid up at the factory it’s done so ‘green on green’.
This means that layers, such as the first gelcoat layer into the mould (that creates the shiny, coloured outer layer), and subsequent layers of further reinforcement, such as chopped strand mat and any inner flowcoats, are laid on top of the last layer while the last layer is still in a slightly tacky state.
Continues below…
Best inflatable boat: 9 compact tenders put to the test
Inflatables are everywhere: paddleboards, canoes, kayaks, tents, kites and wings – and inflatable boat technology has long been a practical…
Make your own transom shower fitting covers
Put spice pot lids to a new use with this budget tip to make transom shower fitting covers
Replacing a rotten companionway step
James Wood gets to grips with epoxy when repairing a rotten step support on Maximus's companionway
Replacing a broken screw in wood
Shipwright Alan Campbell passes on a useful tip to help deal with a broken screw
That means that the next layer, providing it is applied within the correct time window for the resin system and temperature, creates a chemical bond with the previous layer – not just a mechanical bond.
This makes for a good strong hull, quickly laid up, at a reasonable cost.
When repairing existing boats, you no longer have the opportunity to make chemical bonds – once the boat leaves the factory, it’s mechanical bonding only.
Marine epoxy has good adhesive qualities to cured substrates, particularly if surfaces to be bonded are roughly abraded.
Polyester resins, in comparison, have very little in the way of adhesive qualities.
With this in mind, it’s easy to see how epoxy is the better choice for repairing and modifying any existing, fully cured GRP hulls.
For a small refurbishment like this one, using epoxy over polyester probably costs a tenner more in total – but that’s cheaper than having to re-do it all a few months later.
Transom repair: Step-by-Step

All photos in step by step credited to Jake Frith
1. I started by removing all remains of the old transom furniture and rotten inner rubbing strake. Not a hard job – it mostly came off in my hands.

2. A rotary sanding disc made short work of removing loose coatings and abrading the hull. The old outer hardwood rubbing strake was deemed reusable.

3. After hoovering the sanded hull, I also gave all surfaces a wipe with a rag soaked in thinners. You wont be able to bond anything to a layer of dust.

4. I took a moment to marvel at just how flexible the upper edge of a GRP hull is without the support of its woodwork at the transom.

5. Emboldened by a diet of pizzas, bran flakes and laminator pouches, I progressed with cardboard templating a plywood inner transom.

6. I had a nice offcut of 15mm marine plywood perfect for a full width inner transom. Here, I’m pre coating what will be the inside of this in epoxy resin. Note the infrared heater to help the epoxy cure a little faster.

7. Both inner and outer plywood parts were pre-coated in epoxy, cured, then abraded, buttered up with this filleting filler-thickened epoxy then placed into position.

8. The woodwork was only lightly clamped in place so as not to squeeze out all the epoxy. I also screwed through the outer rubbing strake into the new inner ply.

9. Next, I planed the top surface level with the rubbing strake before liberally coating the end grains in unthickened epoxy to permanently seal out moisture.

10. I added a couple of cheeky layers of 25mm carbon tape into the laminate here as I had it spare. It’s an insurance policy in case I want to put a bigger engine on it in the future.

11. I then bonded on some oversized 8mm mahogany with colloidal silica-thickened epoxy, screwing it down with some countersunk stainless screws to further hold it in place.

12. I then trimmed this down to size and sanded it back to the shape of the inner ply and outer rubbing strakes, filling any corner gaps to ensure moisture would be kept out.

13. The remains of the pizza box came out again to create templates for some plywood shoulders. These greatly strengthen a transom without adding much weight.

14. The pair of 15mm plywood shoulders were glued and clamped into place, and once cured were screwed as well with stainless steel screws from the outsides.

15. Following painting with three coats of varnish, I through-bolted this stainless pad eye for a lanyard to secure the motor. I’ve not yet lost an outboard overboard, but I once met a man drowning his sorrows in a sailing club bar who had!
Enjoyed reading Transom repair for a hard tender: step-by-step? 
A subscription to Practical Boat Owner magazine costs around 40% less than the cover price.
Print and digital editions are available through Magazines Direct – where you can also find the latest deals.
PBO is packed with information to help you get the most from boat ownership – whether sail or power.
-
-
-
- Take your DIY skills to the next level with trusted advice on boat maintenance and repairs
- Impartial in-depth gear reviews
- Practical cruising tips for making the most of your time afloat
-
-


