
Due to popular demand, Tim Owen shares his stitch-and-glue design ideas for a rigid 8ft plywood rowing dinghy. He built his 50 years ago in 24 hours – it’s still going strong and turning heads to this day

Nearly 50 years ago I designed and built a little ply stitch-and-glue dinghy, writes Tim Owen.
I’ve used it on and off ever since but recently getting to and from an East Coast mooring, I twice got stopped by other boaters who asked if they could buy it from me as they couldn’t find anything comparable on the market.
This led me to wonder if PBO readers would like to have a go at making an 8ft rigid boat on similar lines.
I don’t have my original plans from half a century ago, but I have drawn up the approximate dimensions by making a cardboard model, which I then checked via a computer-aided design (CAD) program.
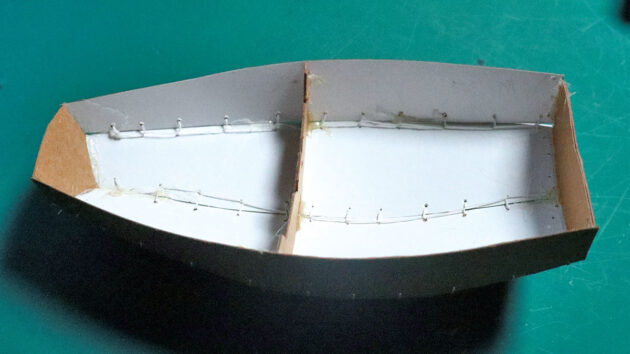
Tim’s cardboard model. Credit: All images Tim Owen
My original creation – built around the time of the Mirror dinghy – involved the stitch-and-glue method.
After sketching drawings, I made cardboard cutouts of the hull panels and bulkheads at 1/10th scale and stitched them together with needle and cotton until I got a pleasing design (sticking the bulkheads in with paper glue).
Then I undid the model, scaled the measurements and cut them out of ply.
This worked well and I was able to put the dinghy together with just 24 hours work from the design stage.
Requirements for the stitch-and-glue dinghy
I needed a tender because, in the early 1970s, I purchased a bare glass reinforced plastic (GRP) hull taken from a beautiful Broads class of 19ft strip mahogany racing sailboat – a Reedling.
An optimistic boatbuilder had thought to make a cheaper GRP version, but the class association decided otherwise and his efforts ended up in the Wroxham boat auction and passed into my possession.
I used the bare hull moulding as the basis for Gwaihir, a sweet little 19ft sailing cruiser, a very popular size at that time.
I trailer-sailed her on the East Coast and on the West Coast of Scotland for several years, then moved her to a mooring at Pin Mill, which I needed a dinghy to access.
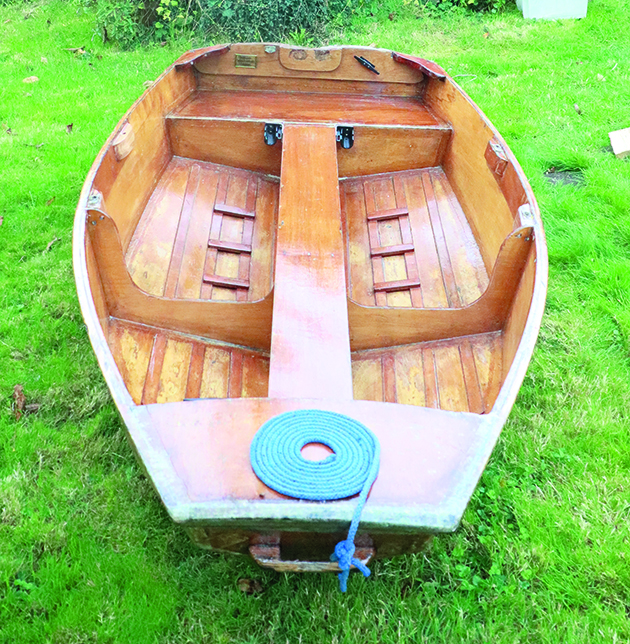
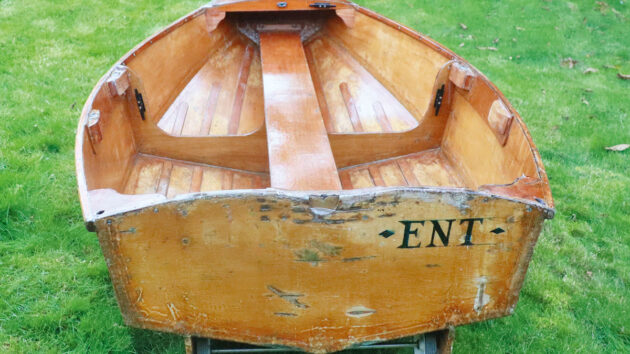
Bow view of Tim Owen’s home-built stitch-and-glue dinghy
The tender needed to be light enough for me to lift onto a car roof rack; easily wheeled down a slipway laden with kit; to trim properly when rowed with one to three people on board; be operable with an outboard; and cheap and quick to build.
As luck would have it I came across a bankrupt timber merchant just before the bailiffs arrived, who was offering his stock at any price in cash.
This gave me a supply of basic waterproof ⅛in (3mm), ¼in and ⅜in (9mm) ply in 8x4ft sheets along with some strip mahogany.
You might think that ⅛in ply is too thin to make a dinghy from, but I figured that it would get pretty rigid if given sufficient curvature and some judicious reinforcement.
Plus, a light weight effectively reduces hull stresses in handling and use and my extreme weight limit ruled out anything thicker.
This was the beginning of the ‘stitch-and-glue’ construction era so that was the obvious and quickest construction technique.
To get the versatility in crew numbers and the required overall stiffness I’d need to put the ‘thwart’ along the boat instead of across – so that, plus the length limit of my 8ft sheets, became my target specification.
The design has stood the test of time. Recently I used Ent – named after the tree-like creatures in Lord of the Rings – at North Fambridge, and twice people asked if I wanted to sell her as they’d been unable to find such a handy rigid dinghy.
Design method
When making the model shapes for the panels and bulkheads at 1/10th scale, don’t use corrugated cardboard – it doesn’t work as well as ‘solid’ card.
You will soon get a feel for the relationship between the panel shape and the final hull shape, and a couple of iterations should get you a workable design.
Take the card apart and carefully measure it. You could make a 1/5th scale model from your measurements but I didn’t bother.
Once you have your basic dimensions you can mark them onto the plywood and fair them with a batten to get a smooth curve – eye the curve from several different directions until you’re sure it is fair.
A couple of old pallets make a good working platform and enable you to put wire nails through to help with the batten positioning and later building.
Ensure that both sides are identical or the boat will be asymmetrical.
The final construction job is to turn the boat over and fix the keelsons
Measure the panel widths at the transoms and bulkhead to check it will all fit together.
Adjust the transom and bulkheads to suit the panels, not the other way round.
The stitch-and-glue joints are fairly forgiving – in fact, for the panel joints you don’t want a very close-fitting joint as it needs to get a good fillet.
The stitch-and-glue process
Once the panels are cut out the fun starts – putting the bottom panels together, if necessary smooth the edges with a low angle plane, and drill holes 6mm from the keel edge and the chine edge and sew the keel edges together with copper wire.
Now you’ll need to devise a way of supporting the bottom panels at the right angles while you drill and stitch the sides in place – the pallets will help here – if possible, get someone to assist.
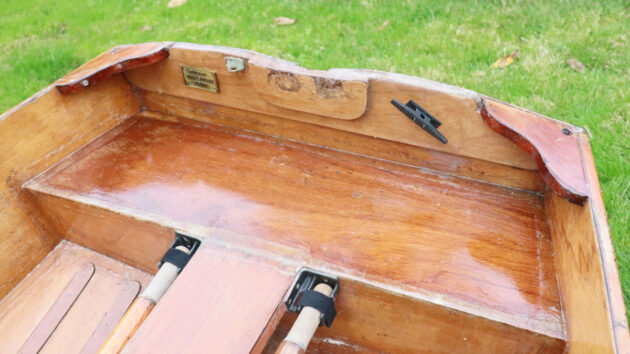
The stern seat of the stitch-and-glue dinghy
By now it is beginning to look like a boat!
Check the transom for fit, trim its edges, glue and tack it in place with brass tacks. Ditto the bulkhead and the bow transom, which will probably need a bit more chamfering and fiddling to get a good fit.
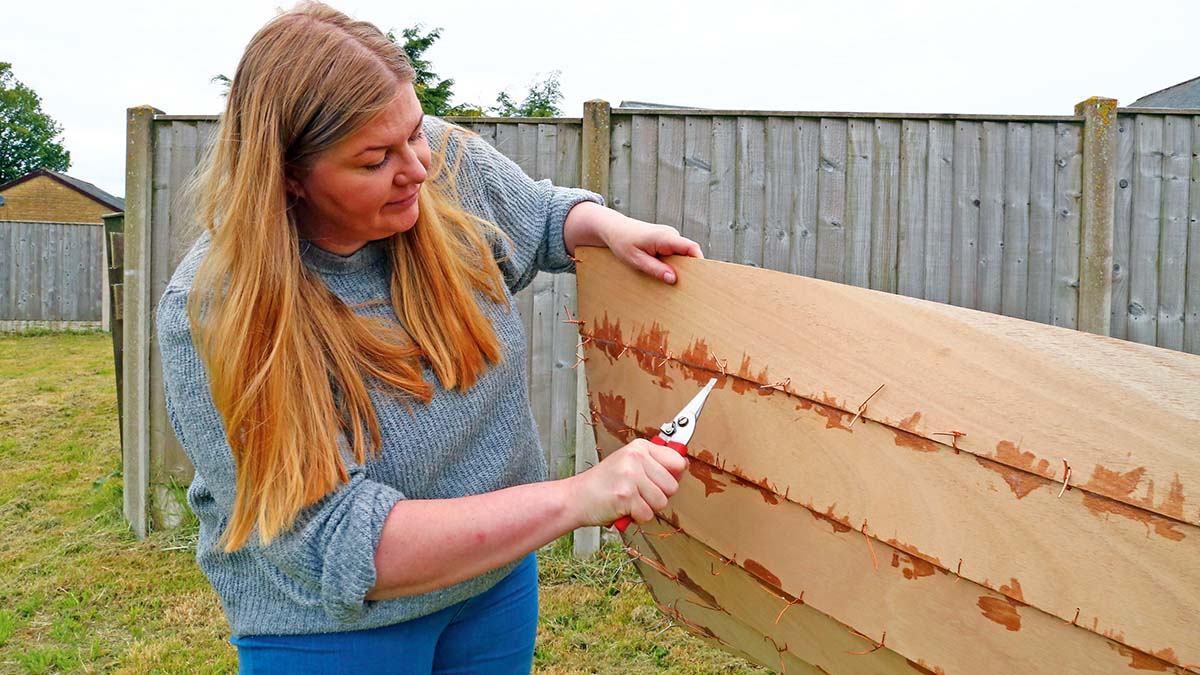
At this stage it’s a good time to go over all the joints, cutting off excess copper wire and pressing the twisted tails down into the joints, then put a generous fillet of thickened resin over and into the joints on the inside of the boat, particularly in areas that might later be covered within buoyancy compartments.
Once the resin has hardened go over the joints with unthickened resin and 50mm wide glass tape.
Before you do any glueing or resin bonding ensure your floor is protected from drips and the hull is perfectly level and has no twist – you won’t be able to correct it afterwards.
Now it is time to glue on the outside gunwale strip of 25x20mm hardwood, holding it in position with brass screws from the inside, or clamps if you have enough – you may need to clamp temporary strips of wood inside to keep the ply in contact with the outer gunwale.
Added buoyancy
Make the stern buoyancy compartment/aft seat and the longitudinal thwart, securing them in place using 20x20mm timber to support joints and 20x40mm battens under the edges of the longitudinal thwart for strength.
The thwart is structural so it needs to be firmly attached to both the bow transom and the aft seat to take compression loads.
Then fit the 20x25mm internal gunwale forward of the bulkhead, recessing it to let the foredeck fit flush inside the ply at the front.
Fit a strip of 9mm ply about 100mm wide inside at the gunwale aft of the bulkhead to take the two sets of blocks for rowlocks to give two rowing positions.
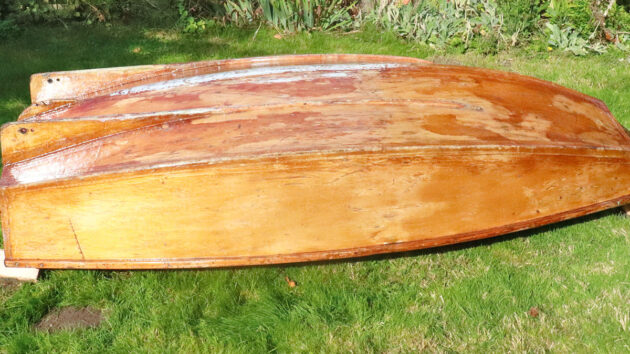
Well used, but the stitch-and-glue dinghy is still in great nick after 50 years
Glue them and add screws through from the outside as there is a lot of strain on rowlocks – two blocks on my dinghy fell off – its only major structural fault in all these years.
Now fit the foredeck with a bearer at the aft end.
The inside of the hull needs fore and aft strips of thin ply 30mm wide glued to the bottom panel 120mm apart to provide additional strength and grip, with blocks glued across on top for foot rests while rowing.
Finish off the interior with a couple of brackets reinforcing the gunwales-to-transom joint, with holes for attaching ropes – you can’t have too many points to attach ropes while coming alongside a boarding ladder.
Fix and through-bolt a stout handhold horizontally near the bottom of the bow transom to wheel and tow the dinghy.
Finishing touches to the stitch-and-glue dinghy
The final construction job is to turn the boat over and fix the keelsons that add directional stability to the aft end, and provide support for an axle for wheels – two layers of 9mm ply should be fine for the deeper aft part, then a cap of shaped 18 x 18mm running forward to the bulkhead position at least – brass tacks from inside.
File off any drips that came through the seams, fill the outside joints with thickened resin and then tape them.
Then, put several layers of tape on the keelsons and along the middle of the keel where it will wear.
Plastic 5in wheels are fine – they need 10mm stainless rod for axles and a piece of tube to keep the wheels apart.
Drill the ends of the axles and put washers and split pins through to hold it in place.
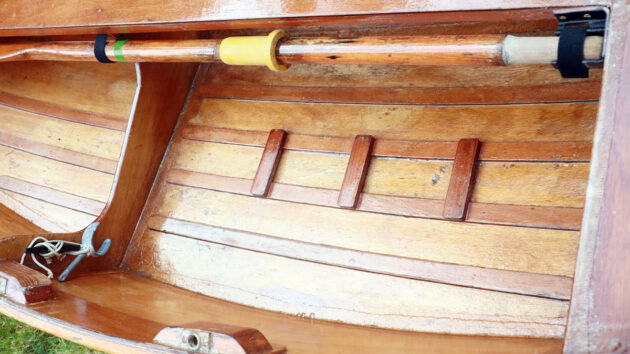
Floor footholds to aid rowing the 8ft stitch-and-glue dinghy
Position the axles slightly forward of the stern so when the bow is lifted above waist height, the wheels lift off the ground and you can tip the boat up without it running away from you – I initially had them too far back and standing the boat on end to put it in a dinghy rack was a pain – so I moved them forward a little.
At this point, go over any joints that require more tape and resin, sanding or filing off any messy high spots to give a smooth finish.
Very lightly hand sand the boat – the ply is quite thin and you don’t want to thin it further.
Finish the whole boat with something that will increase the surface strength and be scratch-resistant; epoxy resin is fine, although remember it’s not UV resistant and will need overpainting.
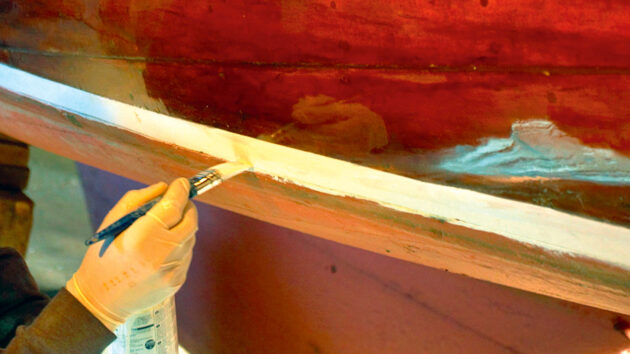
Finish with two-part varnish
Two-part polyurethane varnish is pretty good – with ply this thin it’s advisable to use a clear finish so you can see the condition of the wood underneath to catch incipient problems.
Ent has proved to be a very handy dinghy and apart from the occasional rub down and re-coat to cover knocks, and the rowlock problem, she remains seaworthy with one or two adults and gear on board – three adults can get wet in choppy water.
And yes, I could once easily lift her onto the Land Rover.
I’m not sure I still could – but my excuse is that’s because extra coats of resin and varnish over the years have increased the weight!
Additional parts
- Longitudinal thwart: 3.6mm or 6.4mm ply with 40x20mm battens underneath. Or 6.5mm ply for this and aft thwart. Fix ends securely.
- Aft seat: box of 3.6mm or 6.4mm ply with 20x20mm battens to join, optionally filled with foam. Fore and aft length is 280mm. Cut to fit using cardboard templates. If using 3.6mm for top, put battens under to strengthen or use two layers.
- Gunwales: outer approx 25x20mm hardwood, inner similar forward of bulkhead, 9mm ply aft of bulkhead for rowlock blocks.
- Foredeck: curved 3.6mm ply let into inner gunwale with support at aft end – fore and aft length 280mm. Use a cardboard template.
- Rowlock blocks: 36x60x200mm hardwood drilled for rowlocks. First rowlocks just aft of bulkhead, aft blocks 600mm behind those.
- Keelsons: two layers of 9mm ply at the stern with 20x20mm strips extending forward past the bulkhead. Cover with tape and resin on worn surfaces.
- Plastic wheels: 120-150mm dia with axle to suit. Position the axle so that when the dinghy front is lifted more than 45º the wheels are off the ground.
- Front handle: very strong hardwood handle through-bolted to ply: this will take a lot of stress!
- Floor reinforcement: 36mm-wide strips of 3.6mm ply glued to the floor at 120mm spacing. Bars of hardwood glued across strips as row footholds.
- Stitching wire: use copper wire, tinned or plain 18 or 20SWG or wire stripped from 1.5mm2 electrical installation wire. Wire is not part of the final strength so can be cut off after epoxy. In the 1970s, I used polyester resin for filleting and reinforcing and the joints are still perfect.
- Adhesive: epoxy or polyester resin for stitched seams with low-density filler and 50mm glassfibre tape. Reinforce the keel strip with several layers. Use epoxy or weatherproof glue for non-seam joining.
- Varnish: three coats of two-part polyurethane varnish inside and out.
Ply stitch-and-glue 8ft dinghy plans
The following dimensions will give you a design taken from the lines of my dinghy.
I have made a model to these dimensions and smoothed them carefully in a computer-aided design (CAD) program so they should be broadly right, but I recommend that you follow the model-building approach, and engage with the design process rather than just slavishly following my dimensions.
Perhaps this design could be turned into a sailing dinghy with a carbon-fibre mast through the thwart forward of the bulkhead, and either lee boards or a daggerboard case, again through the thwart, and a rudder – something for an enthusiastic PBO reader to think about!
Bottom and side panels: Two of each 3.6mm ply or as available. Dimensions in mm. All curves to be faired with batten, dash means use faired curve. Draw right angles along long edge of ply at the station positions and mark offsets, then fair with a batten and mark and cut to fair line. Plane with low angle plane if needed. Requires two sheets of 1,220x 2,440mm ply. Cut one sheet in half for two bottoms.
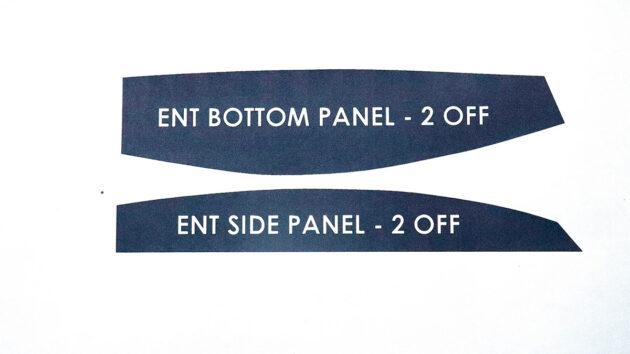
Hull bottom and side panel shapes
Transom: dimensions from lowest centre point: 9mm ply, double for the top section above stern thwart. Fit reinforcing corners in 25mm timber and an additional centre 9mm pad for the outboard clamp. Check panel sizes before cutting or cut oversize and adjust to fit.
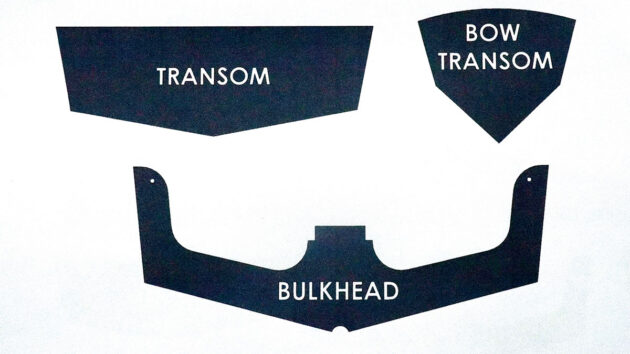
Transom and bulkhead shapes
Bulkhead: dimensions from the lowest centre point: 9mm ply, bottom section cut 120mm wide, side section 100mm wide, radii 120mm on the bottom, 100mm on a side, 25mm diameter limber hole on the keel. Thwart support notched to fit stringers. Check panel sizes before cutting and if necessary adjust to fit.
Bow transom: trim to size as needed: 9mm ply, cut about 6mm oversize all round and trim/chamfer to fit as required.
Licensed under creative commons CC-BY-NC 2023 (non-commercial and must be attributed to Tim Owen 2023
How to build a boat: Essential guide to building your first kit boat
You don’t have to be a boatbuilder to learn how to build a boat, argue Roger Nadin and Polly Robinson.…

Build a boat from a kit
There’s a great way to own a new boat on a budget – build it yourself. We followed five builders…

Home-built boats – the readers building Western Skiffs from free PBO plans
It’s nearly two years since the first Western Skiff Mk2 was launched on the River Dart. The boat was based…

How to become a boat builder in 40 weeks
Inspired by a stunning homebuilt yacht, Ali Wood visits the Boat Building Academy to learn how any of us can…
Want to read more practical articles?

A subscription to Practical Boat Owner magazine costs around 40% less than the cover price.
Print and digital editions are available through Magazines Direct – where you can also find the latest deals.
PBO is packed with information to help you get the most from boat ownership – whether sail or power.
-
-
-
- Take your DIY skills to the next level with trusted advice on boat maintenance and repairs
- Impartial in-depth gear reviews
- Practical cruising tips for making the most of your time afloat
-
-
Follow us on Facebook, Instagram, TikTok and Twitter