Roger Hughes digs out his tools and repairs the leaking portlight on his boat
One of the nice things about the Down East 45 is the row of opening portlights on each side, which in addition to the deck hatches allow for superb ventilation at anchor or at sea, writes Roger Hughes.
They are all mounted in the coachroof side, not the hull, so they can be opened when the boat is heeled without fear of water sloshing in.
The portlights on Britannia are the Beckson Marine ‘Newport’ style, with their unique cam-latches.
These latches are fully adjustable to clamp the ports waterproof, and once set they can be opened and closed very easily and quickly without having to screw and unscrew hold-down knobs, like on many old-style portlights.
They also come with bug screens and self-draining rain gutters, and when properly adjusted they simply don’t leak even when bombarded with solid water.
Britannia had 11 Beckson ports that a previous owner must have fitted because only one of the original old styles remained with the five screw-down knobs.

Britannia has a total of 12 opening portlights which offer excellent ventilation
This port never leaked either, because I’d become used to knowing just how much to screw the knobs down to seal the rubber gasket.
One day, however, the port did start leaking during a rain storm and I discovered that one of the plastic bosses of one of the hinged pivots had broken – the thumbscrew knob had been wound down too tight.
This meant one side of the window could not be tightened down and water was dribbling in past the gasket.
There was no way the broken boss could be re-attached to the body of the portlight because even epoxy glue would never have resisted the screw being tightened.
A new portlight was the only option, and since it was the odd man out I decided to buy a new Beckson port to match all the others.

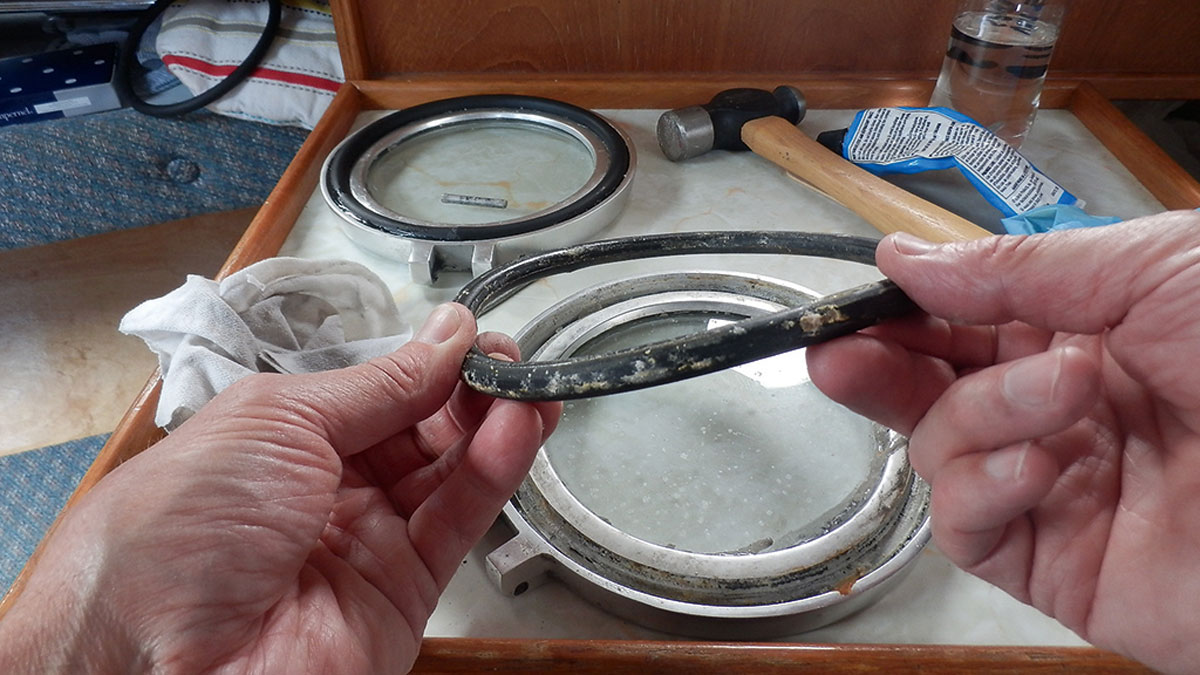
The plastic base of the toggle had cracked and could not be repaired
After finding the correct size on Beckson’s website, I ordered a new unit and set about removing the old one.
This proved to be not as easy as it sounds because it was completely glued solid with old caulk on both the inside and outside flanges.
The first piece that had to be removed was the trim ring around the outside of the frame.
Using a combination of wood chisels and a box cutter I tried to ease the trim ring off but it would not move at all.
The caulk was holding the whole outer ring firmly against the coachroof side and I was reluctant to try to pry it out for fear of damaging the paintwork.
Removing the portlight
I searched the internet with the question ‘How to soften marine caulk?’ and the results offered me numerous methods.
The one mostly recommended was rubbing alcohol and since this is a liquid I hoped I’d be able to run it into the joint between the trim ring and the cabin side.
I soaked an old rag, then squeezed it along the seam. It ran in between the joint on the top of the flange and partly on the sides, but it would not run ‘uphill’, along the bottom flange.
After an hour of repeated applications, the flange was still showing no signs of giving way. I then tried the second suggestion, vinegar, but with more or less the same results.

Brute force was the only way to beat the years of old caulk, but it broke the trim ring
The top of the trim ring had softened a little, but the sides and bottom were still solidly attached.
The new portlight came with a trim ring, so it didn’t really matter if the old one was damaged in removal and I finally decided that I had little choice but to wrench the thing off with brute force.
I hammered a wide wood chisel hard all the way along the top of the flange and managed to lever it part way off the cabin side.
I then worked down the sides using the chisel to slice through the more reluctant caulk.
It was more difficult to hammer the chisel into the bottom flange, which would still not budge.

Components of the new Beckson ‘Newport’ portlight
My wife, Kati, had heard all the hammering and banging, including some choice expletives, and came to see how I was getting on. “Perhaps that’s the reason the last old port was still there,” she exclaimed. “The fitter probably had a heart attack before he could fit that one.”
Finally, after using a long Jemmy on the trim ring it suddenly cracked and broke.
This was the point of no return, and I started to apply some serious leverage on the flange, finally removing it in broken pieces.
I could now see that the frame had been sealed to the cabin wall with what must have been at least a couple of tubes of caulk.
The 12.8mm gap all around the port frame and the cabin side was completely solid with old caulk – but now I could see what I was fighting against and I definitely knew how I’d handle that!
Heavy work
I fitted a plunge bit to my hand router then literally routed all the caulk out from inside the joint, all the way around the rim.
With this done, and after removing the screws holding the inside frame to the cabin wall I whacked the frame with a heavy hammer from the outside, and the whole assembly suddenly gave up the struggle and fell into the cabin.

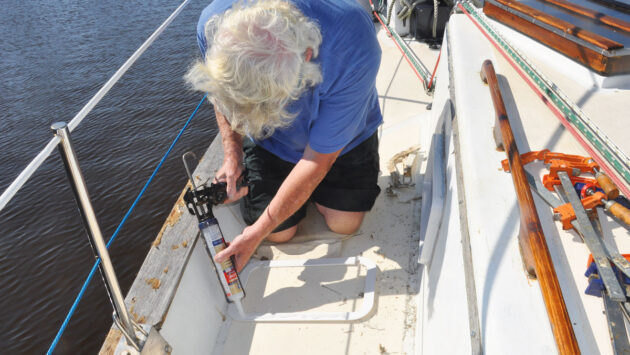
The portlight frame clamped in place while the sealant sets
I then cleaned up the edges of the aperture ready for the new port.
This was the point where I’d normally have taken a tea break, or even left the job until the next day, but if I had done that it would most likely have hurtled down with rain in the night and I had a hole in the side of the cabin wall that I could not easily have sealed.
Refitting the portlight
The hard part was done and, after cleaning up all the piles of caulk and bits of plastic, I offered the body of the new port into the hole and marked the position of the 10 screw holes in the inside flange, then pre-drilled them to the screw size.
I ran a caulk bead from my gun around the inner flange and screwed the port in place.
These held the assembly rigid as I filled the gap between the cabin wall and frame with 100% silicone caulk that Beckson recommends, and it actually did consume nearly two tubes.

New portlight installed and curtains back in place – job done
Next, I completely removed the port window by unscrewing and pulling the hinge pins out, which enabled me to use my small clamps to hold the outer trim ring against the cabin wall.
I then caulked the trim ring and placed it over the protruding frame of the portlight and clamped it tight while the caulk set.
When all the caulk had set it was just a matter of re-hinging the window and trimming the excess caulk from around the inside and outside flanges, and my brand new portlight, which now matched all the others was installed.
I still can’t decide whether I should thank whoever broke the old portlight… or send them a large bill.
Replacing crazed boat portlights
Stu Davies saves a bundle by having new acrylic windows made
How to fit new rubber port light seals
David Parker describes the process involved in replacing the old rubber seals on his boat's port lights
Bonding marine windows back in: the best gasket sealant
PBO reader Nicholas Phillips wants advice on the best gasket sealant for bonding his marine windows. Our expert Sven Petersen…
Leaky boat repair: How we plugged the gaps in the PBO Project Boat
Leaky portholes and portlights are common on cruising boats, but there are several things we can try to solve the…
Want to read more practical articles like How to replace a leaking portlight?

A subscription to Practical Boat Owner magazine costs around 40% less than the cover price.
Print and digital editions are available through Magazines Direct – where you can also find the latest deals.
PBO is packed with information to help you get the most from boat ownership – whether sail or power.
-
-
-
- Take your DIY skills to the next level with trusted advice on boat maintenance and repairs
- Impartial in-depth gear reviews
- Practical cruising tips for making the most of your time afloat
-
-
Follow us on Facebook, Instagram, TikTok and Twitter


